
Setting Up Loyalty Program Part 1 (Ways to Earn)
Setting Up Loyalty Program - Ways to Earn
Made by Vipin Pandey with Scribe
Learn how to configure a Loyalty Program for your customers using the Nector. This guide covers creating an earning rule, assigning point values, and adjusting advanced settings to ensure your loyalty program operates smoothly.
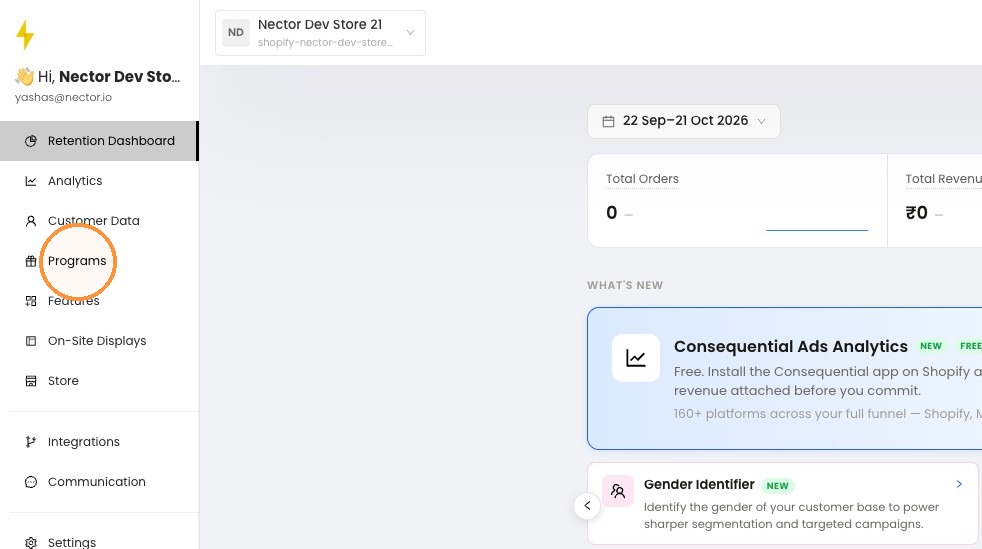
1. Log in at merchant.nector.io and click Programs in the left sidebar.
2. Earning Rules are grouped into four tabs:
- Loyalty: sign-ups, orders, birthdays, anniversaries, social follows
- Referral: rewards for the customer and the friend they refer
- Reviews: rewards for reviewing a purchased product
- Others: custom actions, such as completing a survey
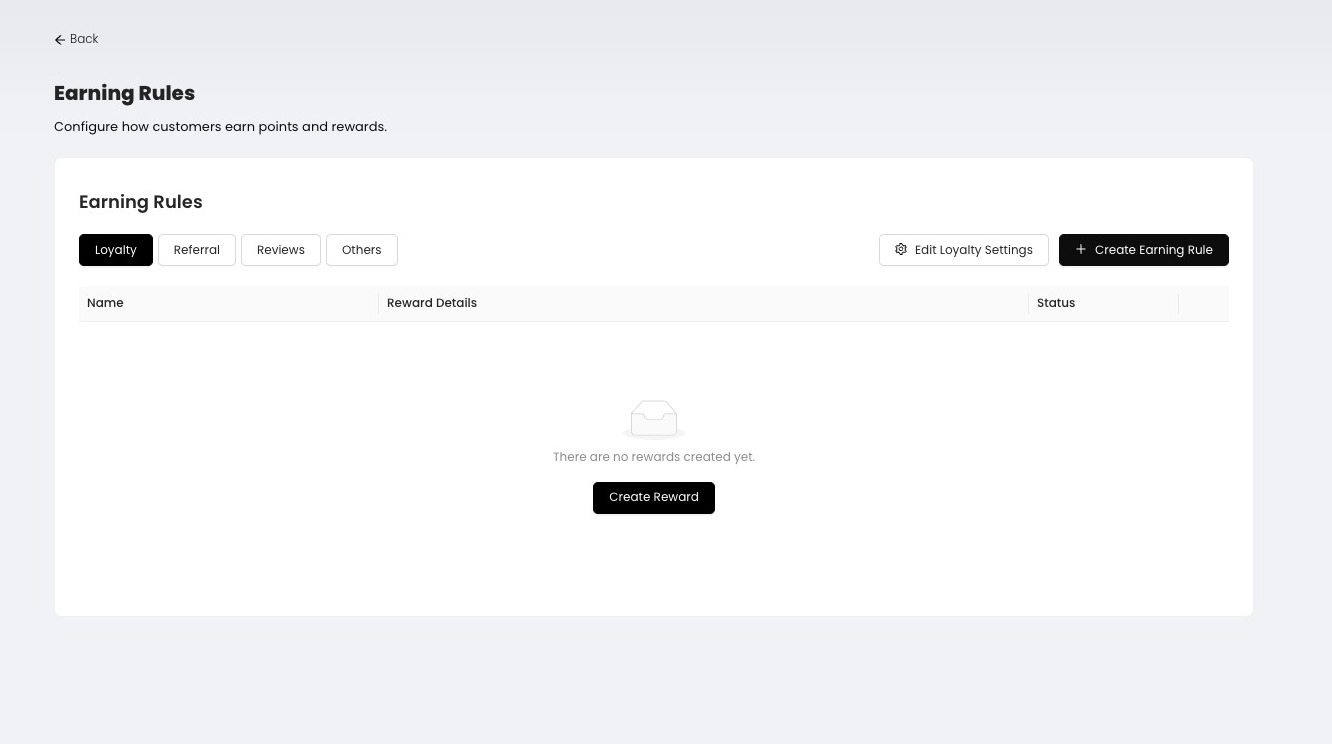
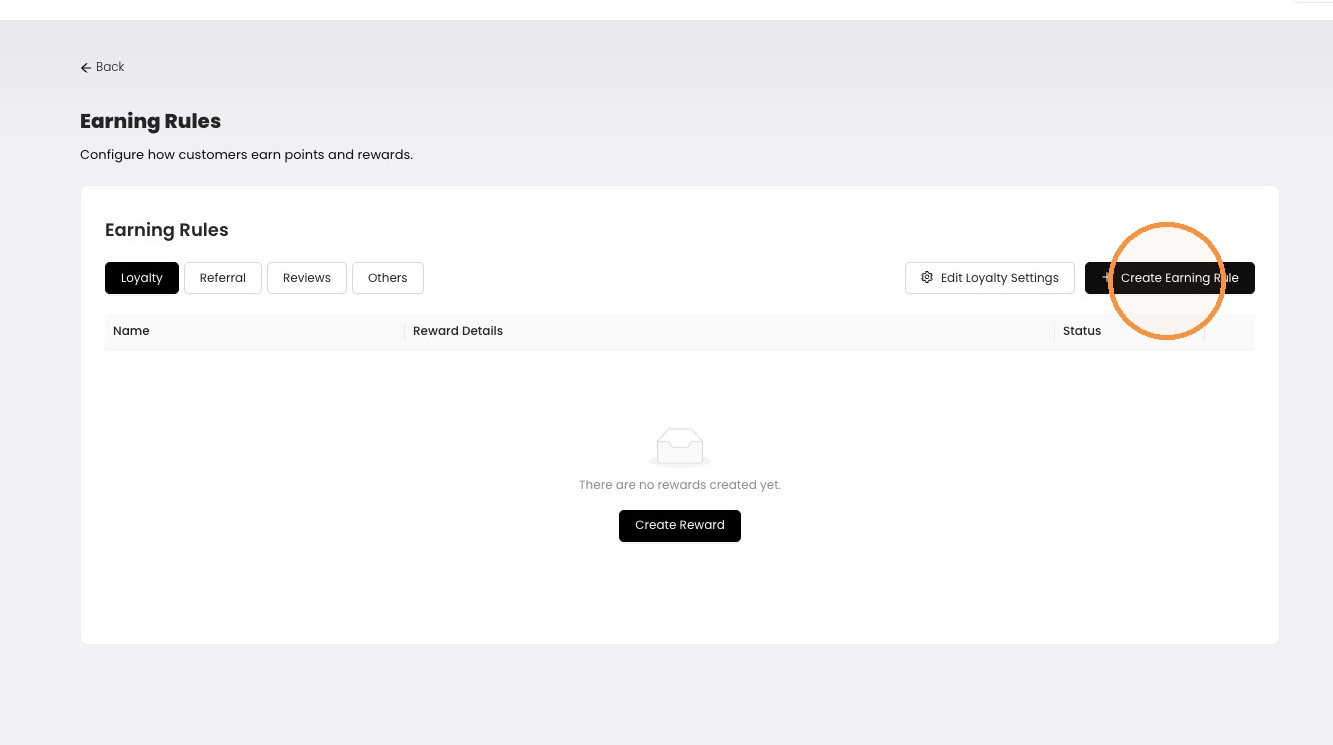
3. To create rewards click on the + Create Earning Rule button
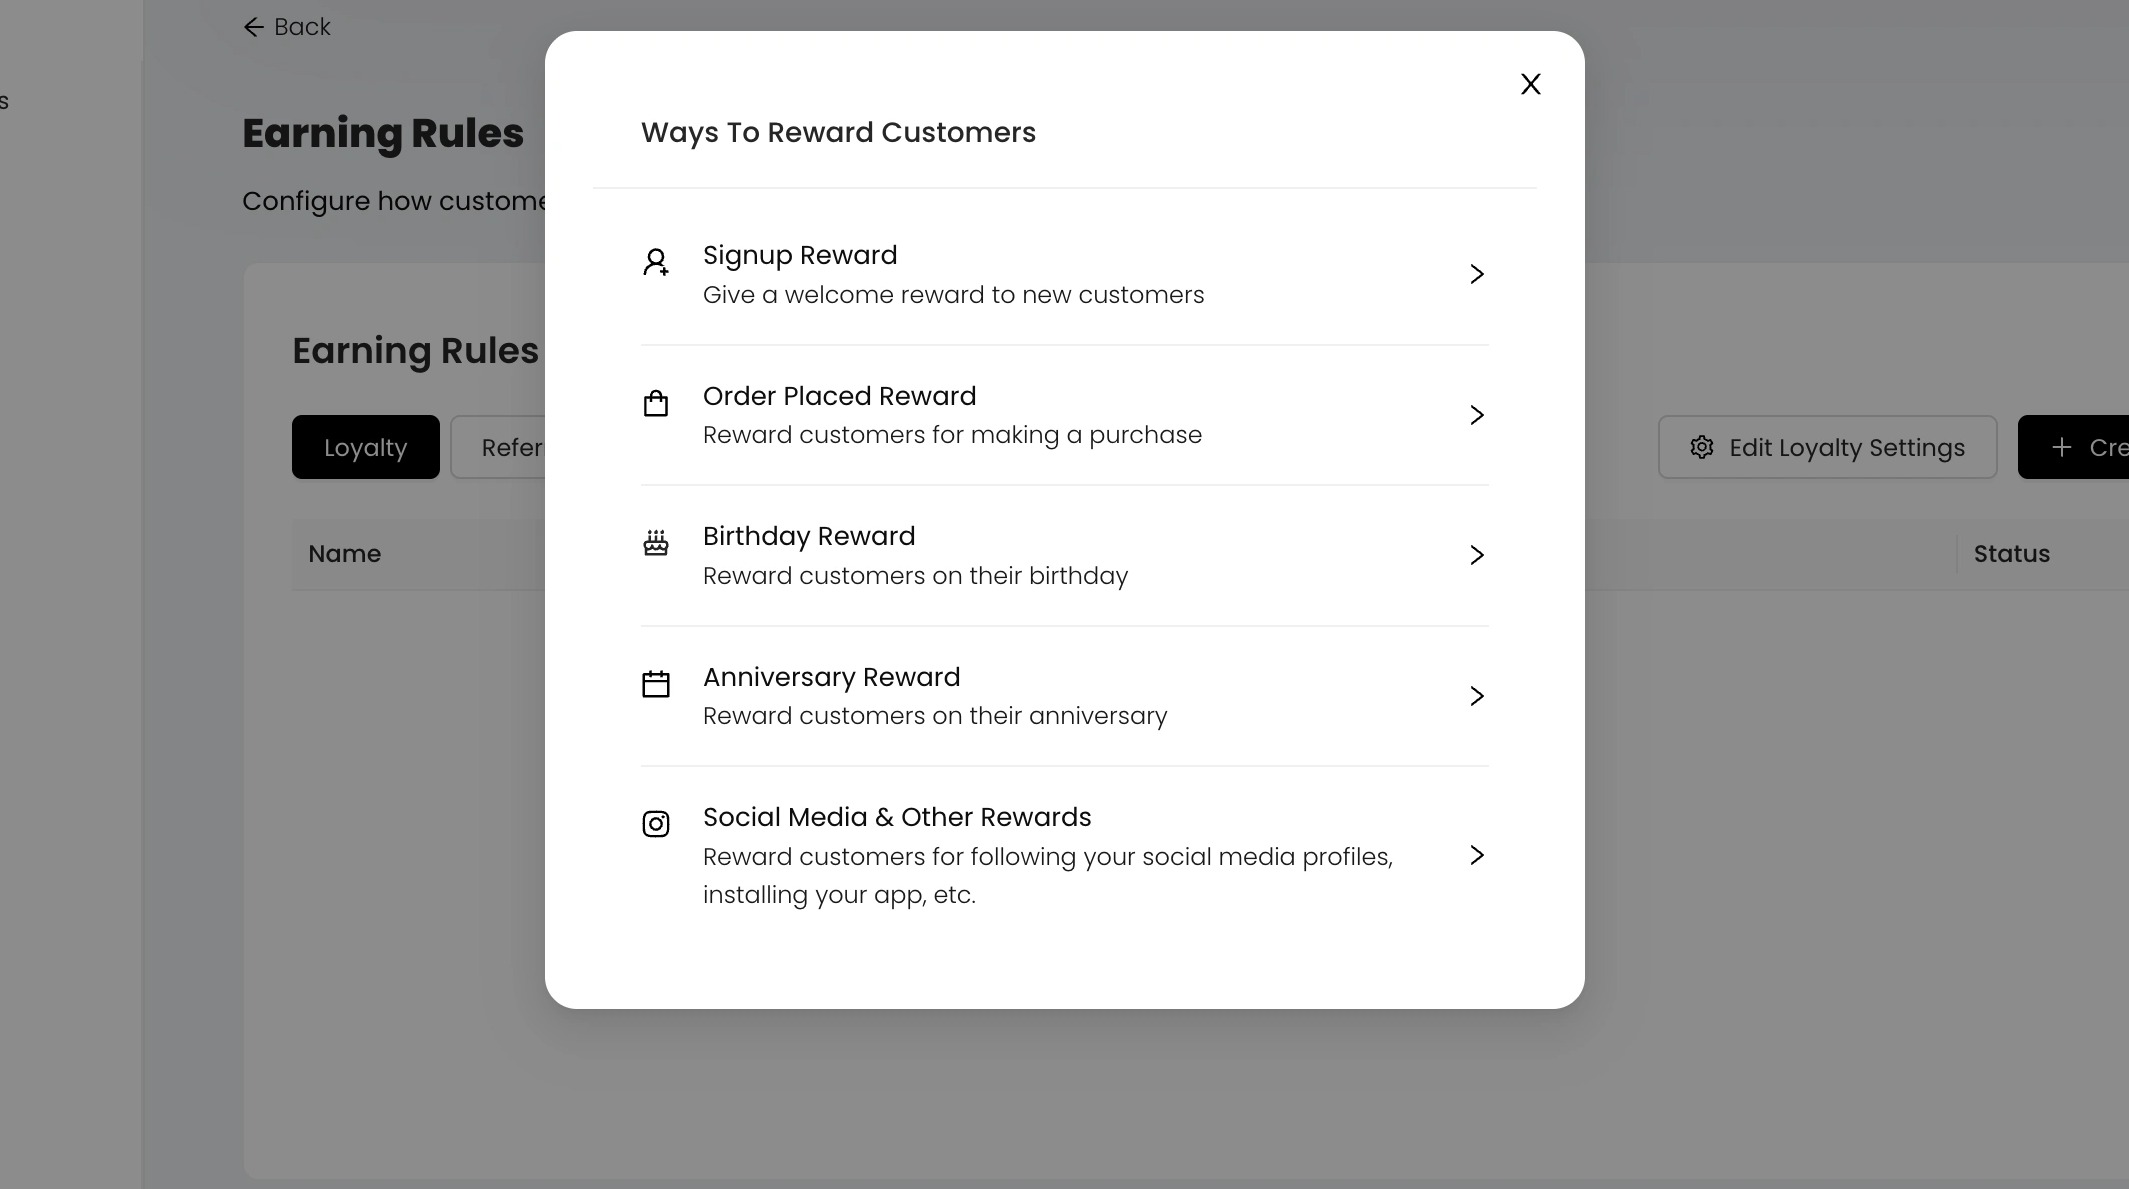
- On the Loyalty tab, choose one of five triggers: Signup, Order Placed, Birthday, Anniversary, or Social Media & Other.
- Choose the reward type
For Signup, Birthday, Anniversary and Social triggers, pick what the customer gets:
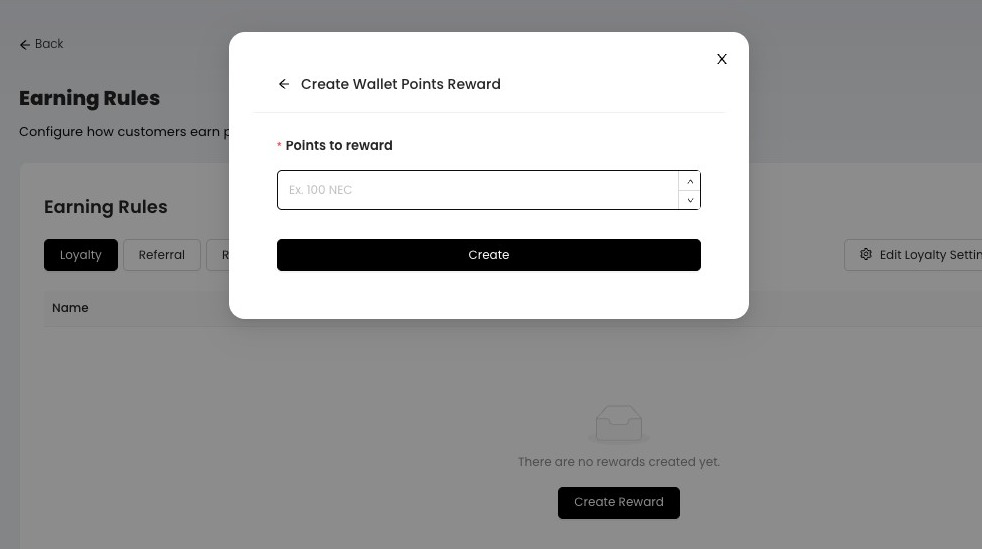
- Points: a fixed number of points, e.g. 100
- Amount discount: a flat amount off, with an optional minimum cart value
- Percentage discount: a percentage off, with an optional minimum cart value
- Free shipping: with an optional minimum cart value
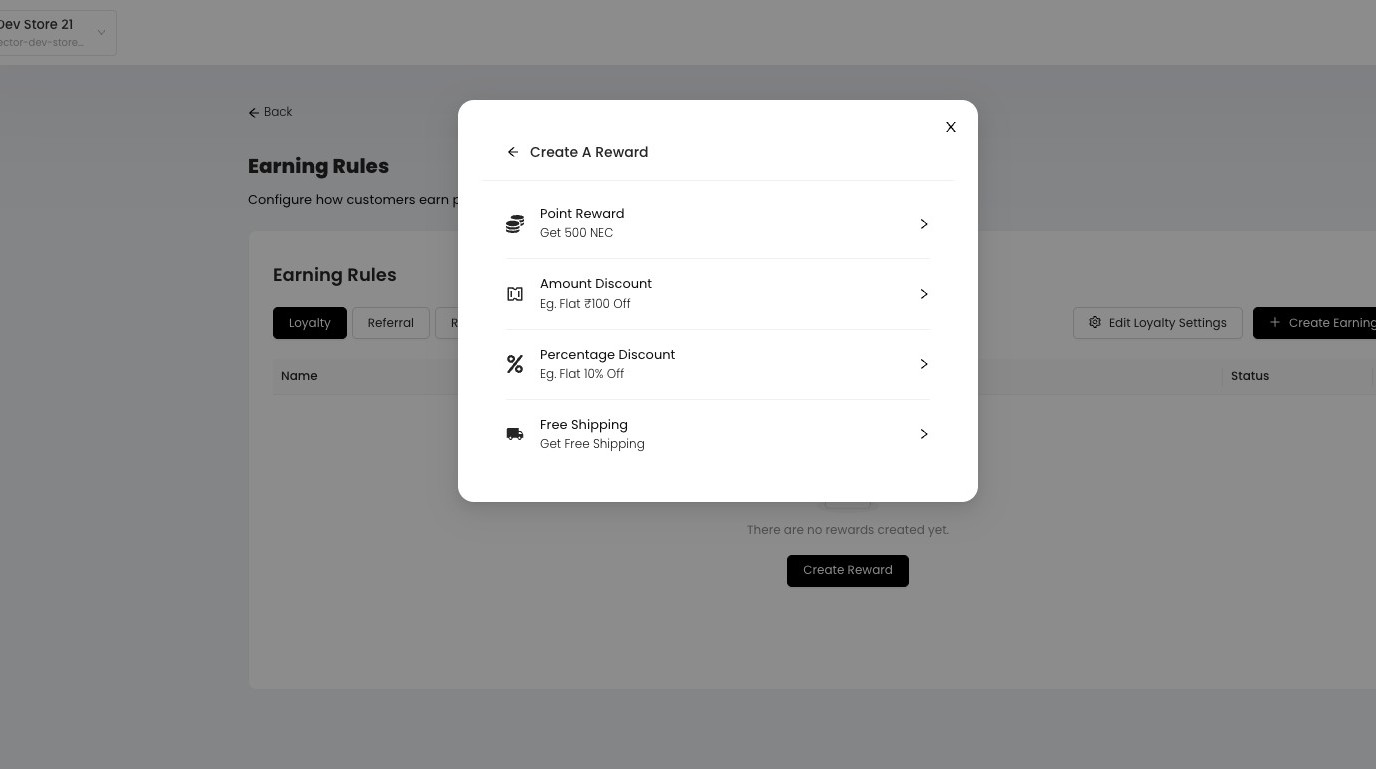
6. Enter the values and click Create.
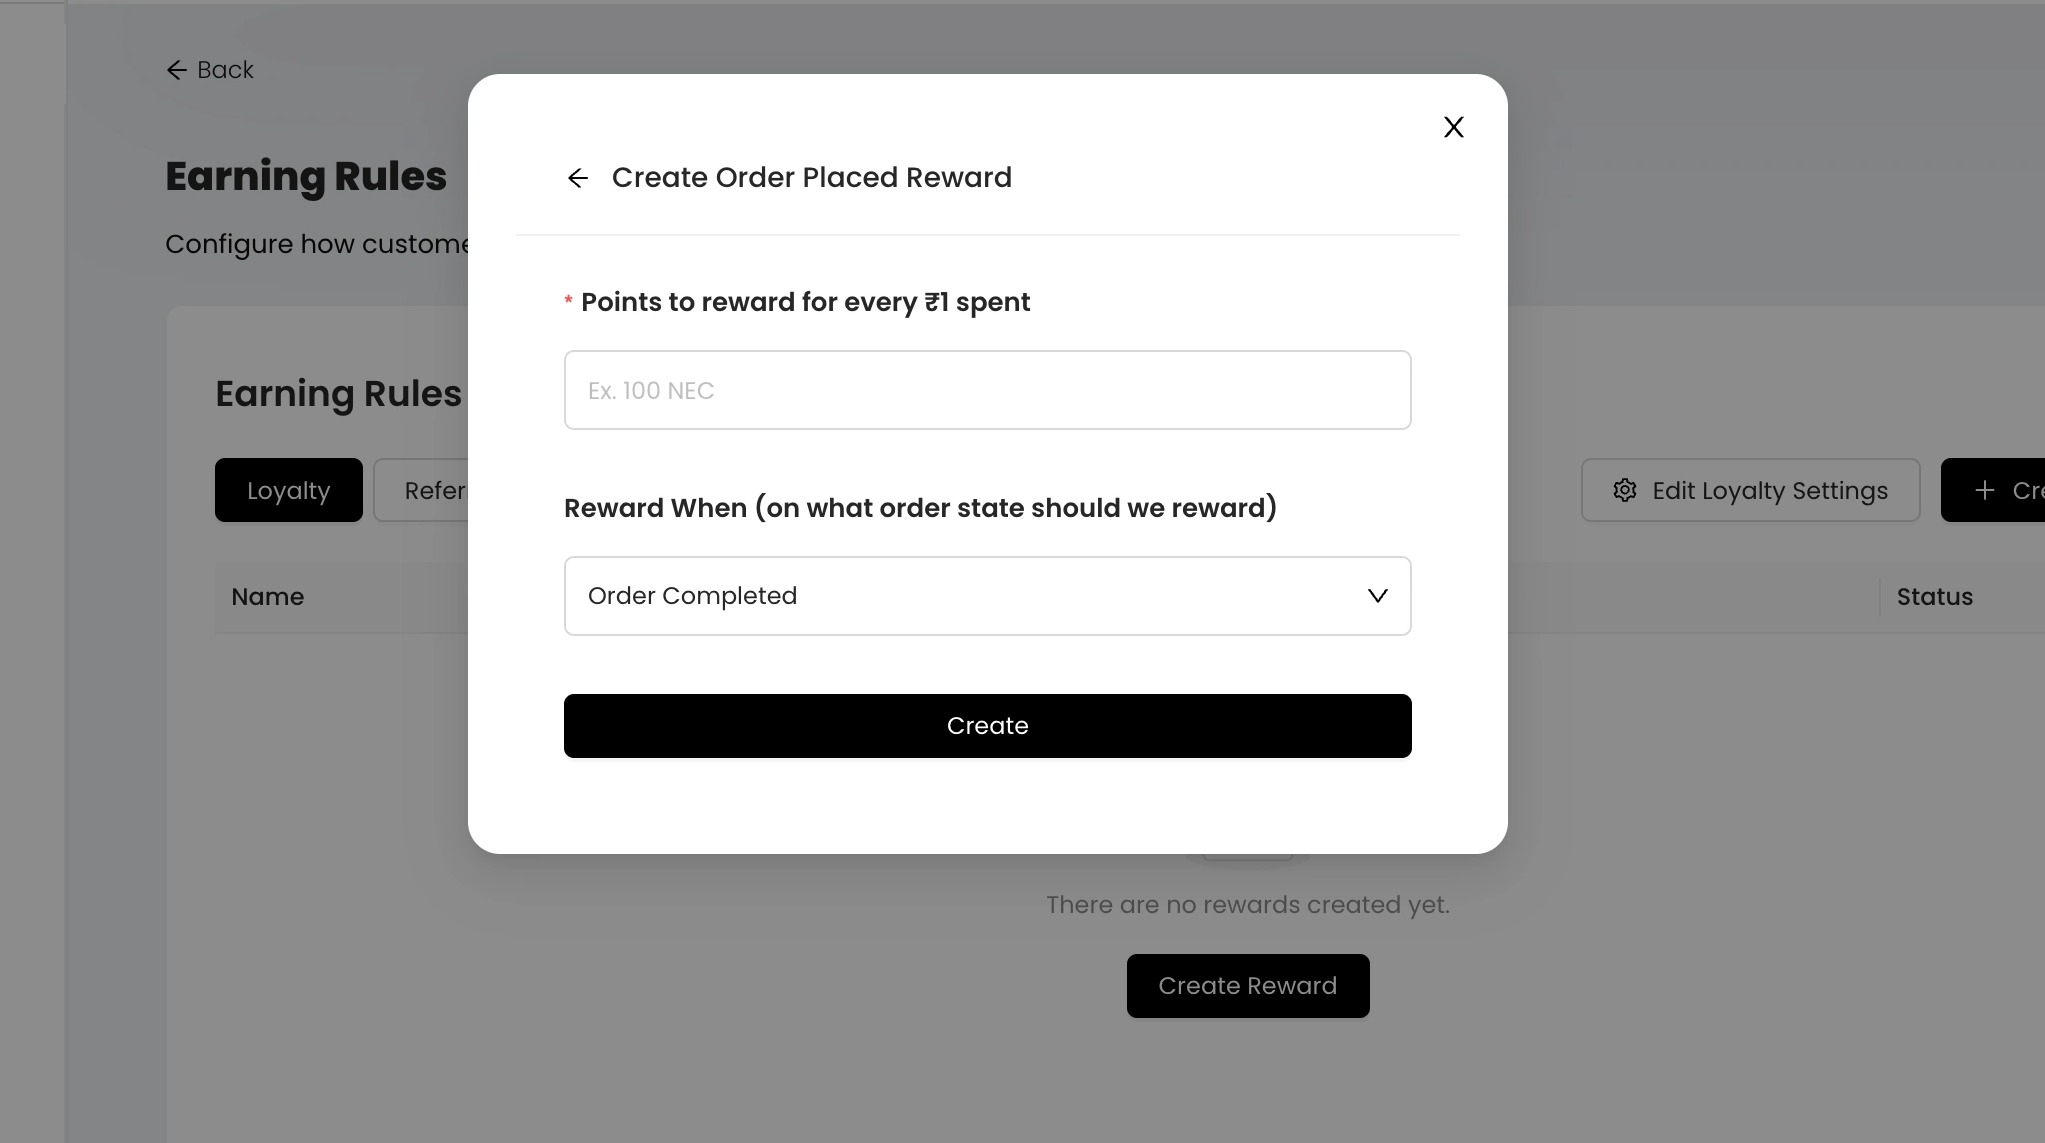
7. For Order Placed rewards, set points per ₹1
Enter the points earned per ₹1 spent. Then choose when they’re credited: order placed, order paid, order completed, or paid and completed.
8. Birthday and Anniversary rewards
Both work the same way. Birthday rewards are given on the customer’s birthday, and Anniversary rewards on their anniversary.
- Click + Create Earning Rule and choose Birthday Reward or Anniversary Reward.
- Choose the reward type: Points, Amount Discount, Percentage Discount, or Free Shipping.
- Enter the values, such as the points or the discount and an optional minimum cart amount.
- Click Create.
The reward is given automatically on the date. Customers only receive it if their birthday or anniversary date is saved in Nector, so make sure you collect these dates from customers.
9. Social Media & Other rewards
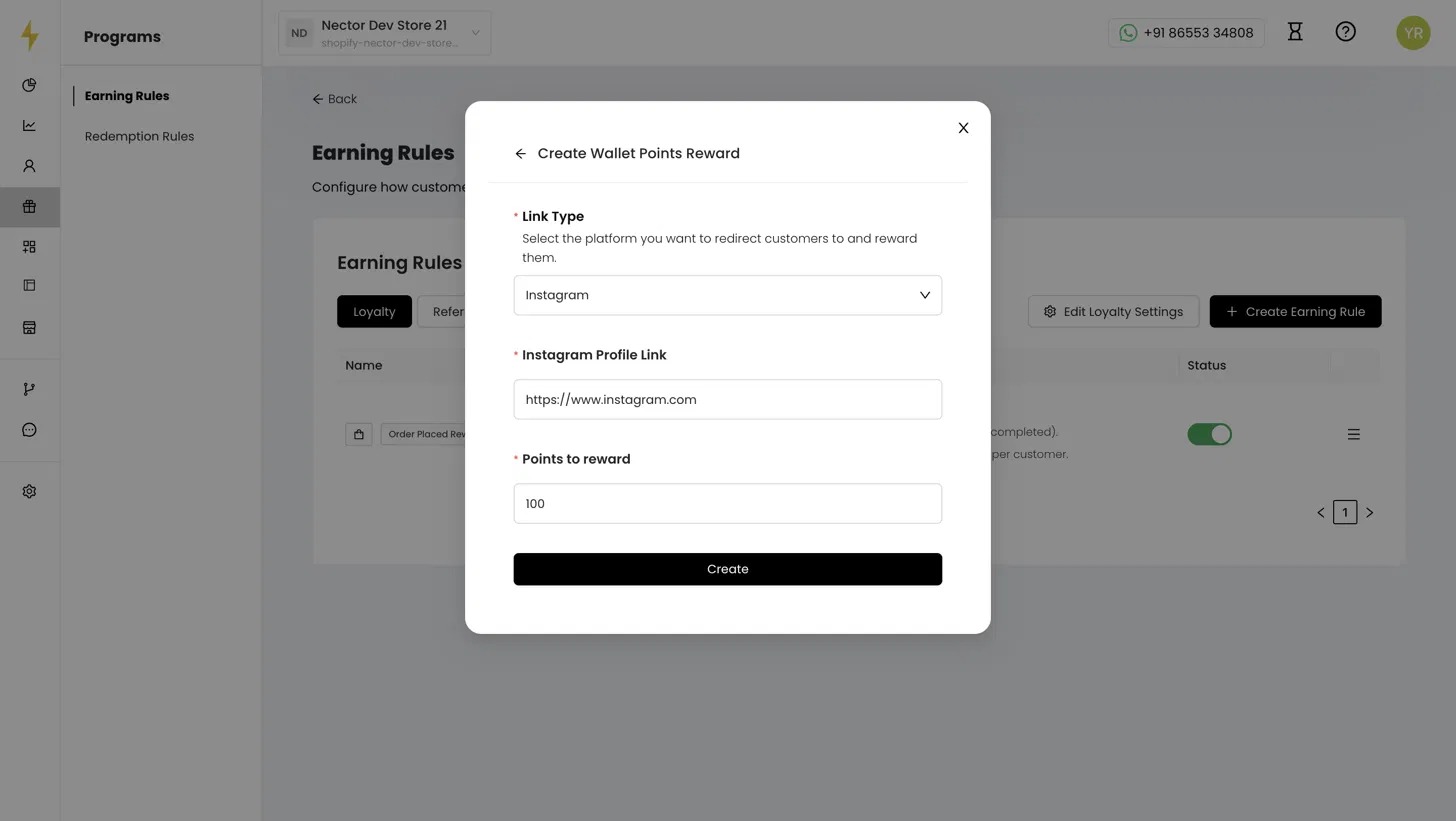
Reward customers for following your social media profiles or visiting another page you choose.
- Click + Create Earning Rule and choose Social Media & Other Rewards.
- In Link Type, choose the platform you want to send customers to, for example Instagram.
- In the profile link field, paste the full link to your profile, for example
https://www.instagram.com/yourbrand. The field name changes with the platform you pick, such as Instagram Profile Link. - In Points to reward, enter how many points customers earn, for example 100.
- Click Create.
The reward appears in your rewards widget. When a customer clicks it, they go to your profile and receive the points.
Tip: To reward several platforms, such as Instagram and YouTube, create a separate rule for each.
10. New rules appear in the Earning Rules list. Use the Status toggle to switch a rule on or off. The ☰ menu lets you edit the rule or see its wallet transactions.
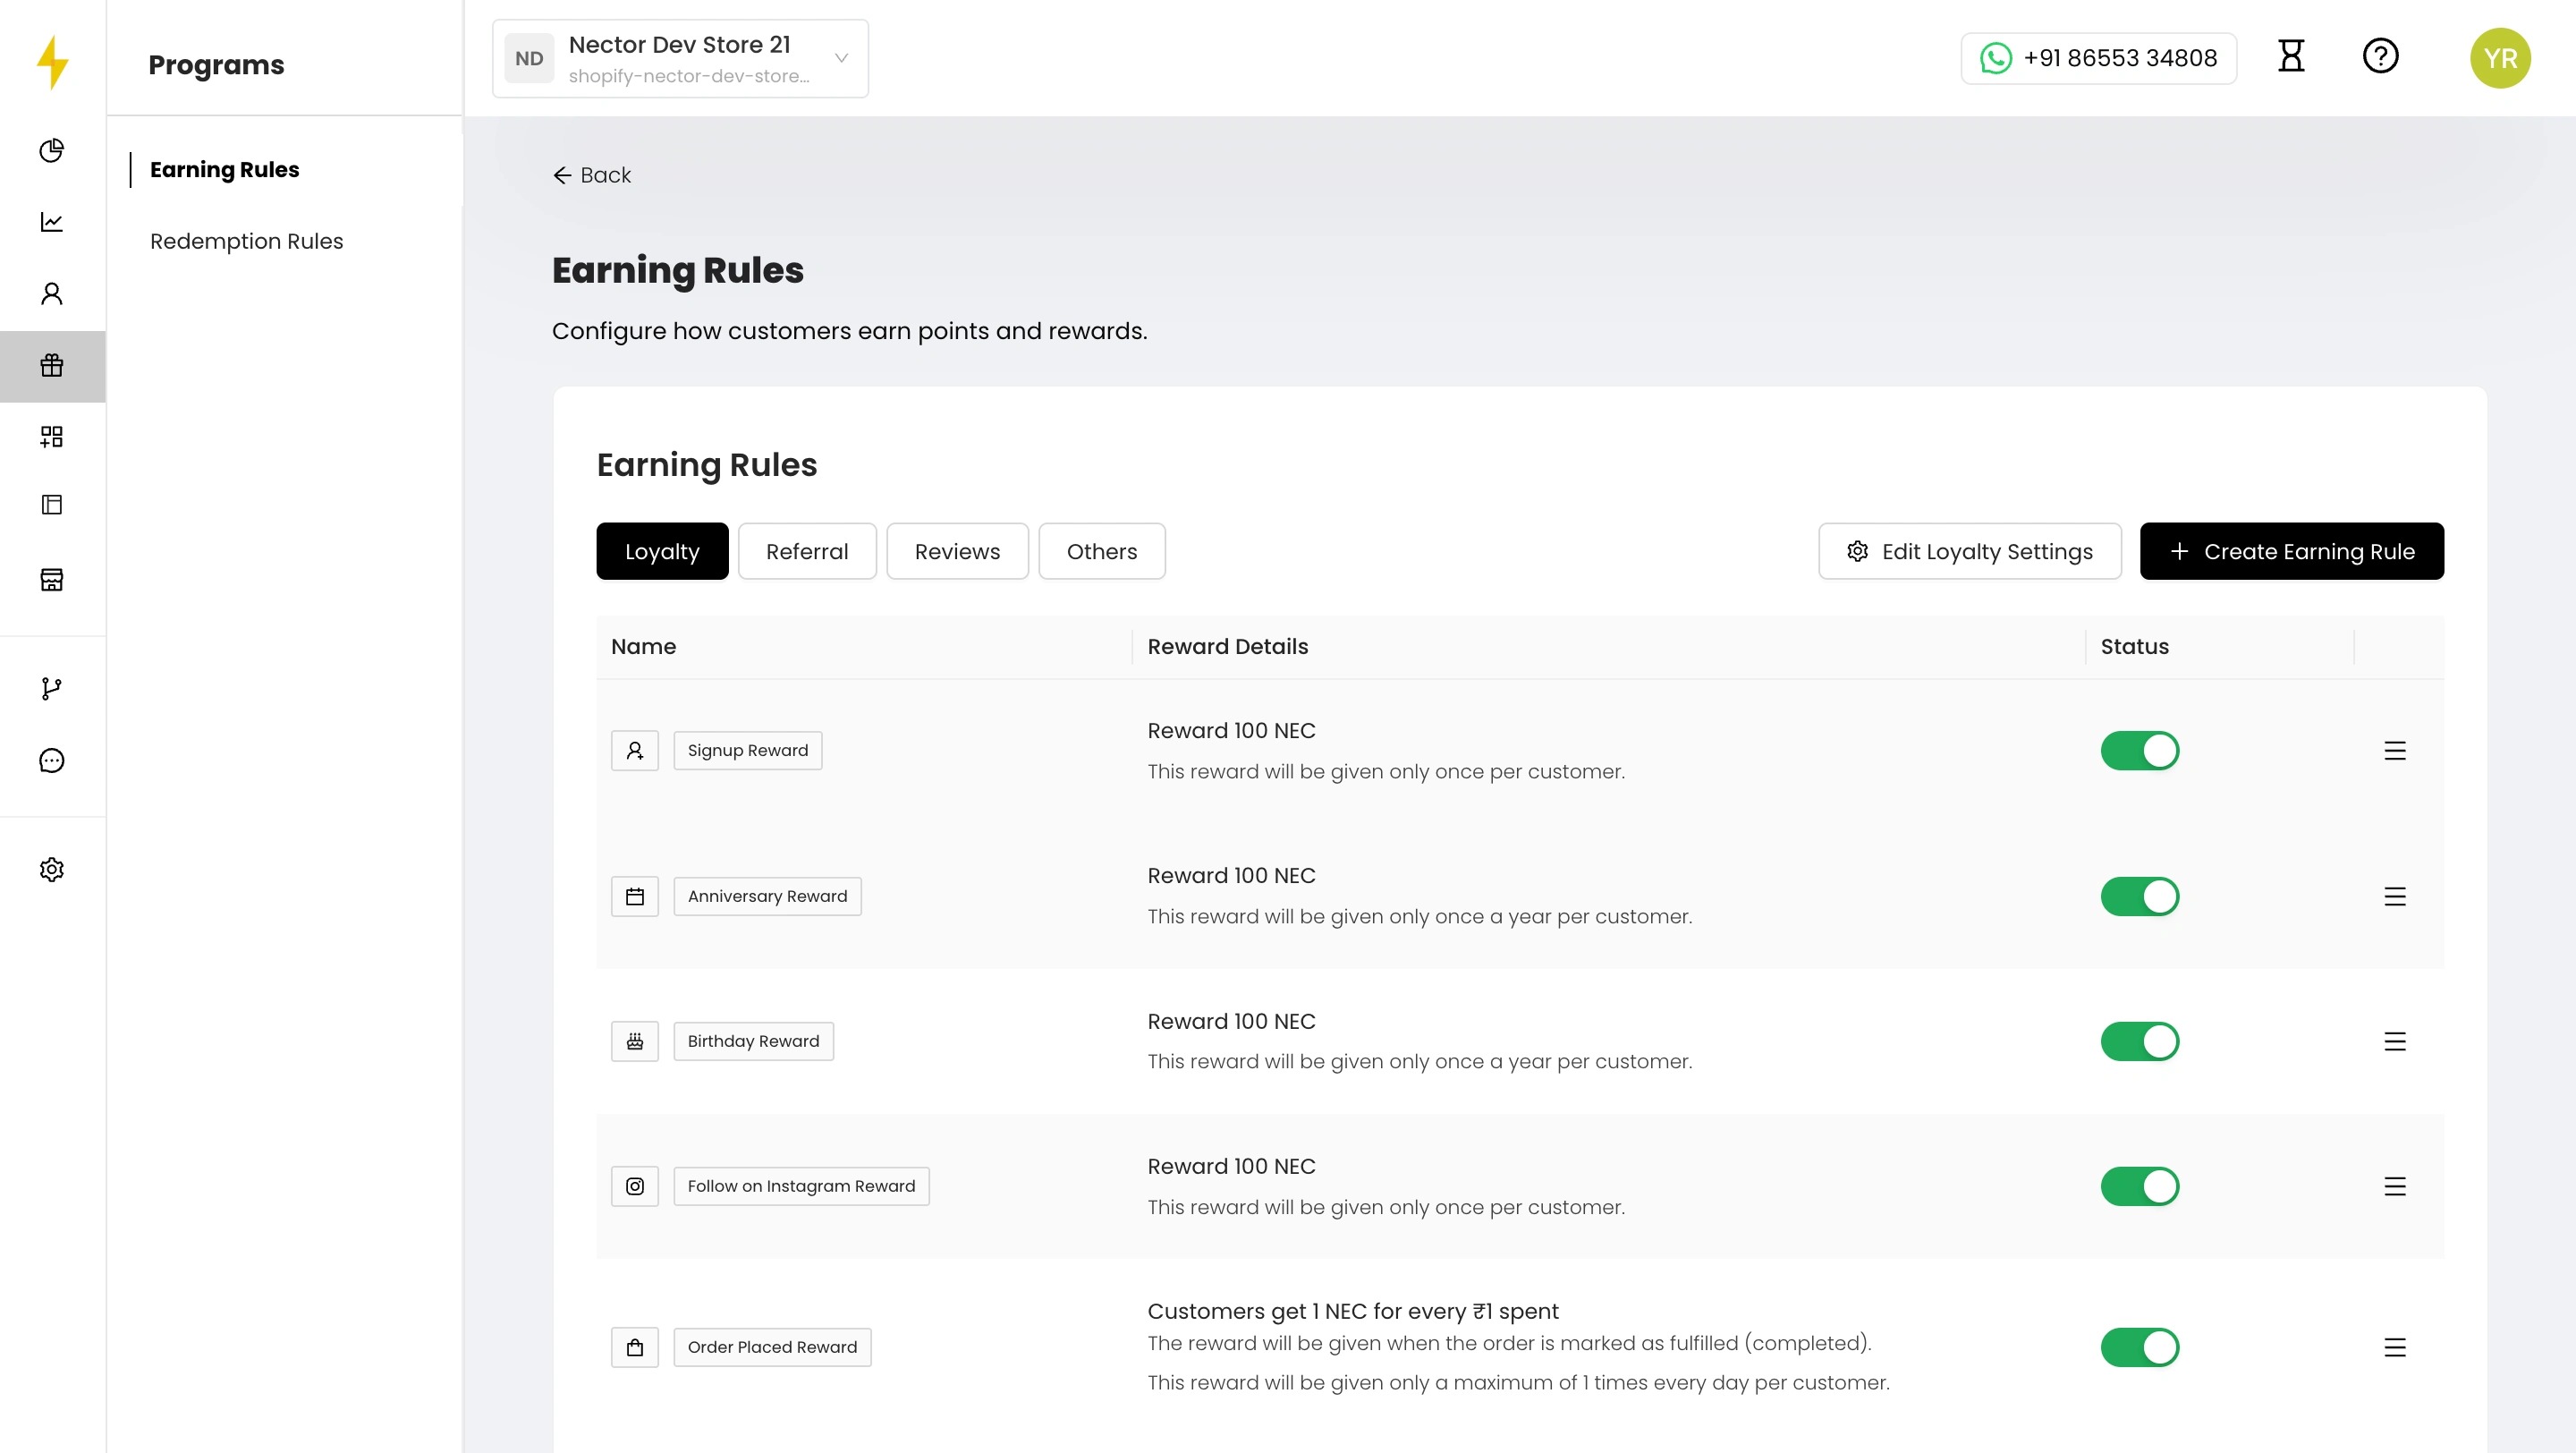
- Click a rule to open it. Under Reward Settings you can:
- edit the reward
- choose whether it shows in “Ways to Earn”
- set its icon, position, title, description and link
Description variables such as {coin_name} are available. Click Save when done
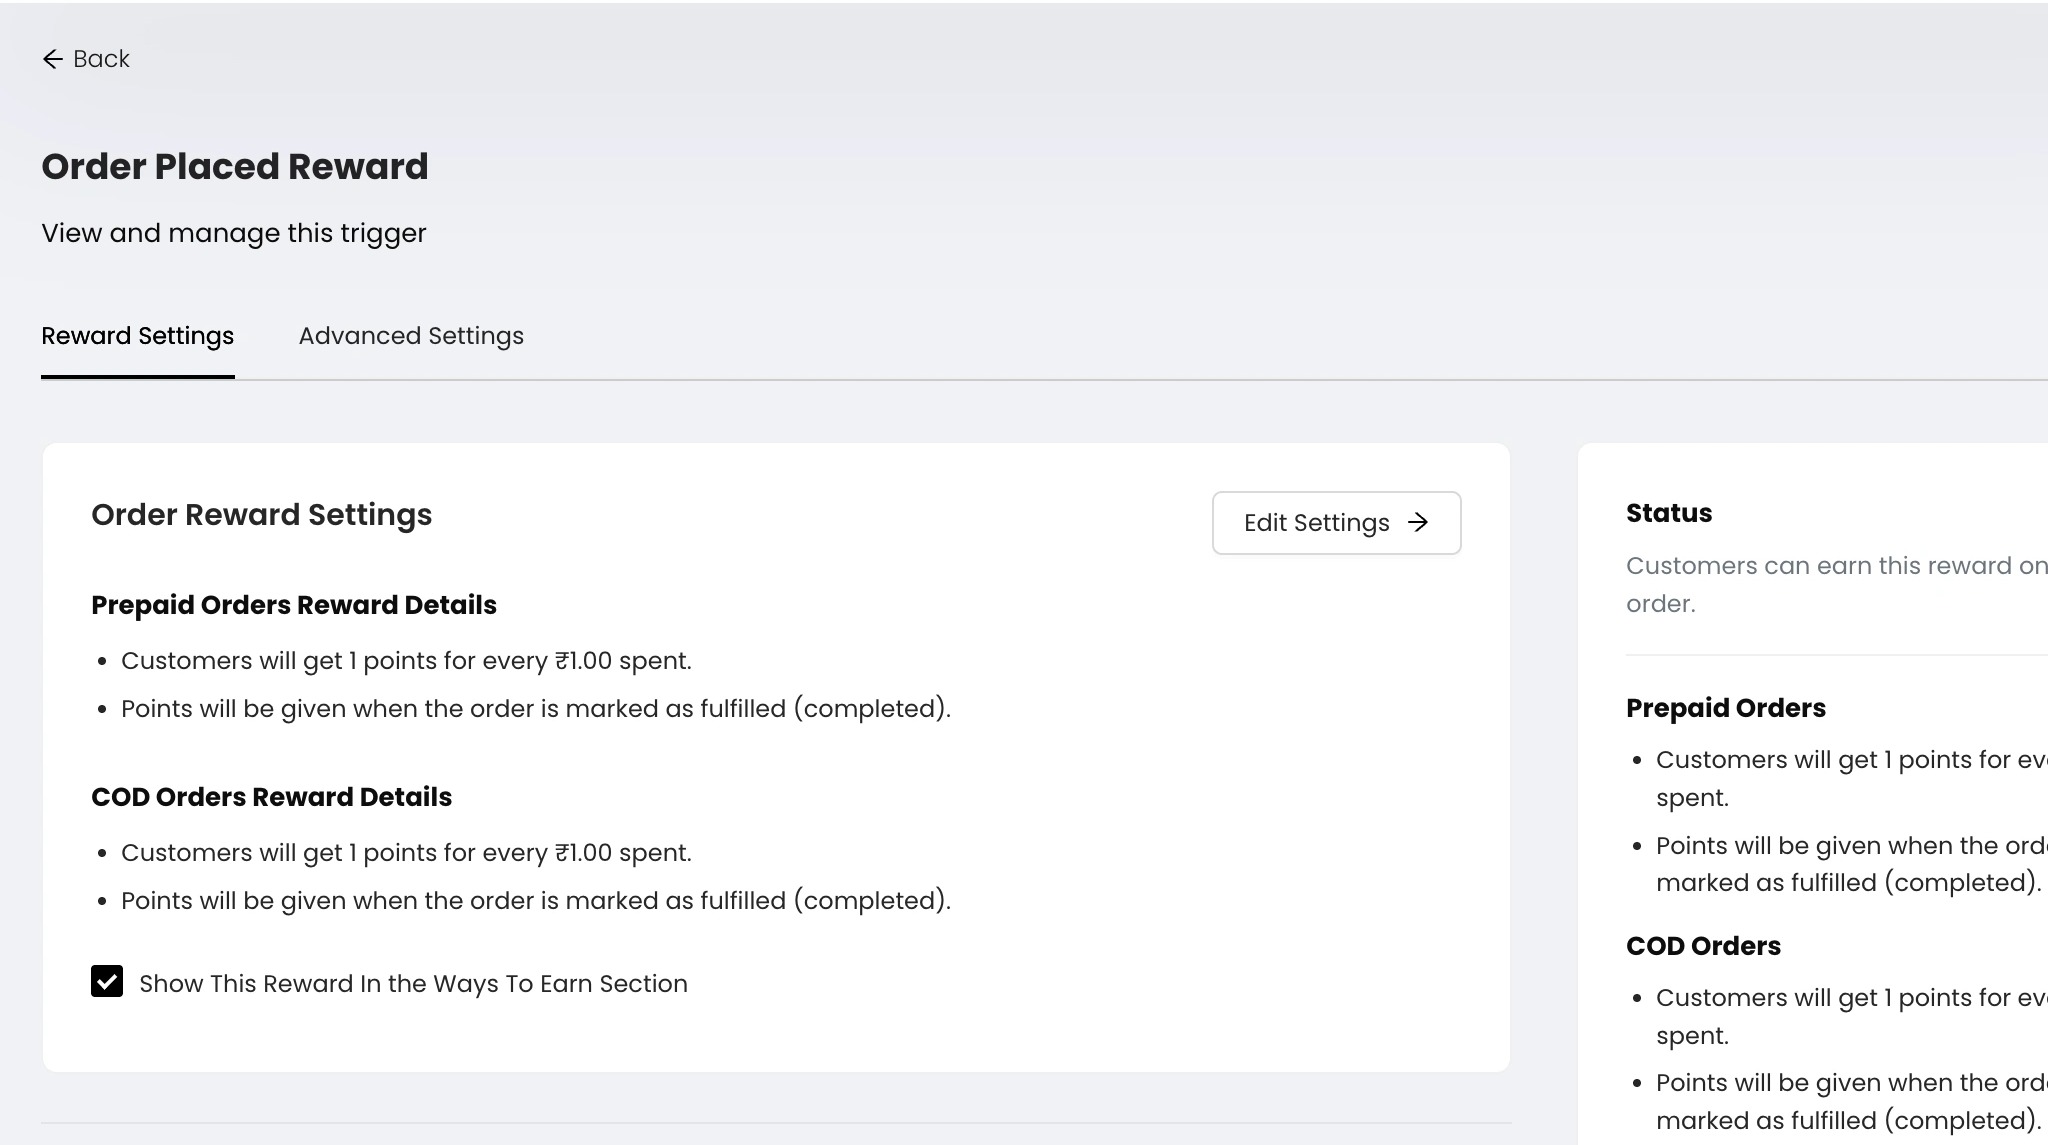
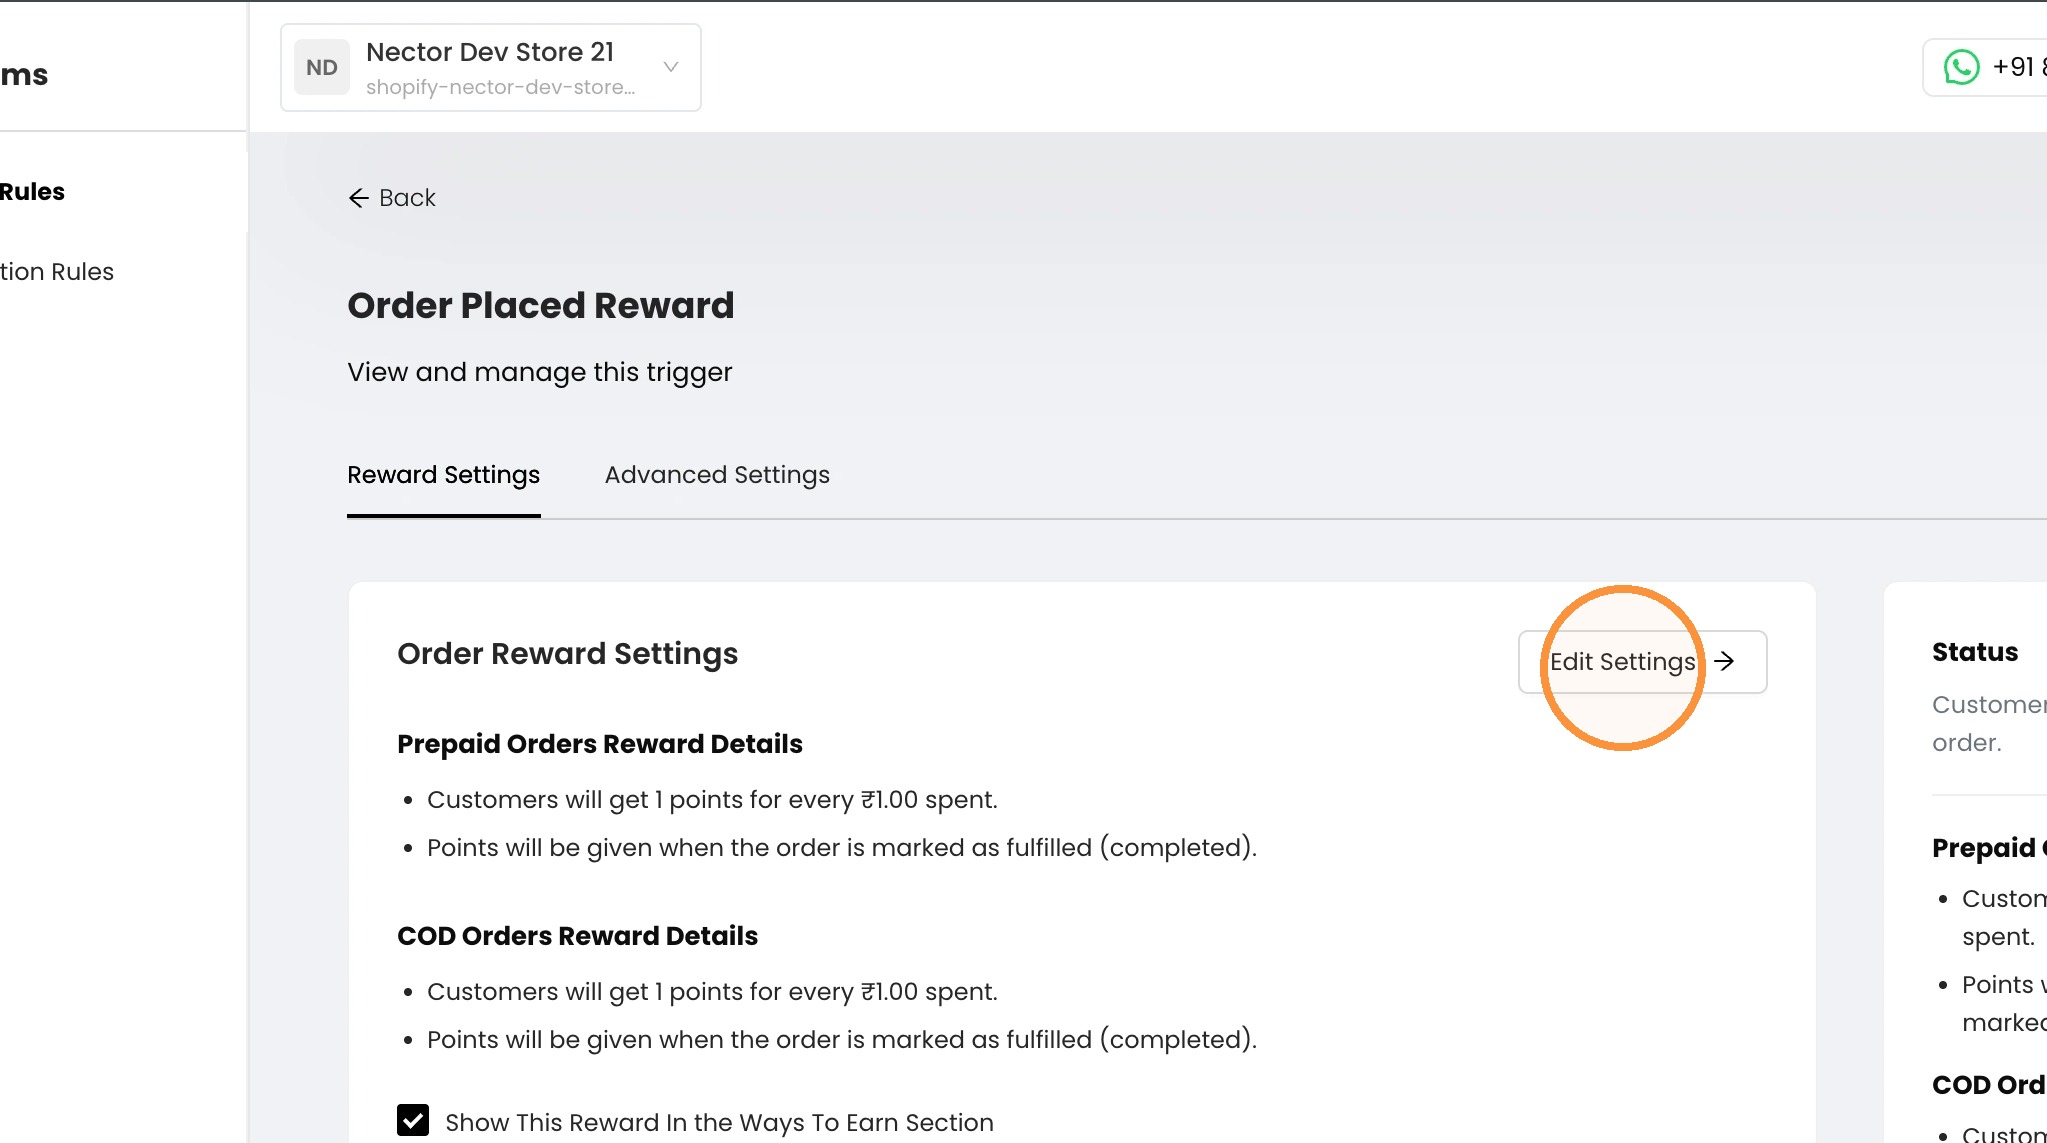
- On the Order Placed Reward page, click Edit Settings → in the Order Reward Settings box. This opens the Order Reward Settings tab of the Loyalty Program page.
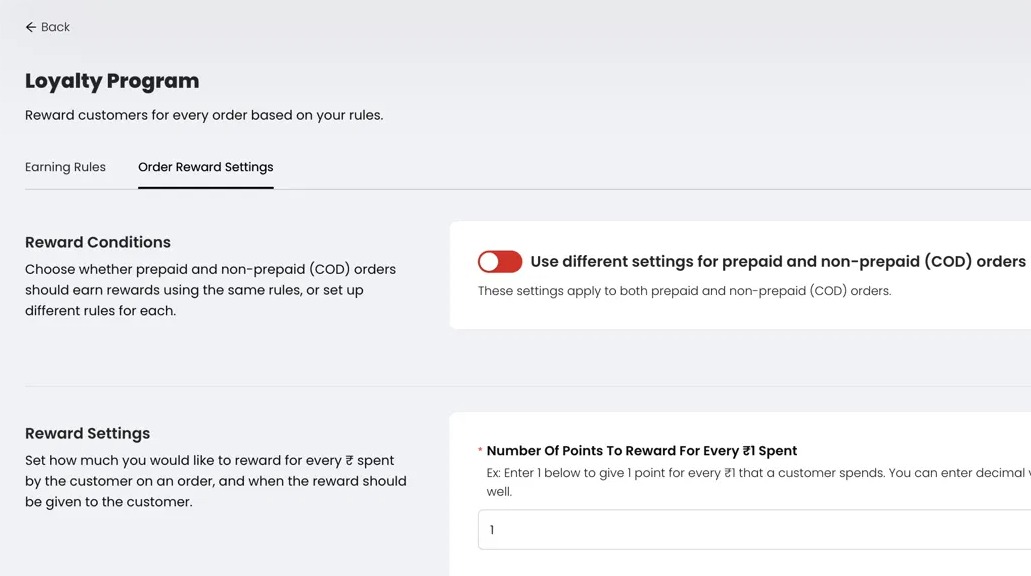
13. Under Reward Conditions, use the toggle Use different settings for prepaid and non-prepaid (COD) orders.
- Off (default): one set of rules applies to both prepaid and COD orders.
- On: you set up rewards separately for prepaid and COD orders. For example, you could give more points on prepaid orders to encourage online payment.
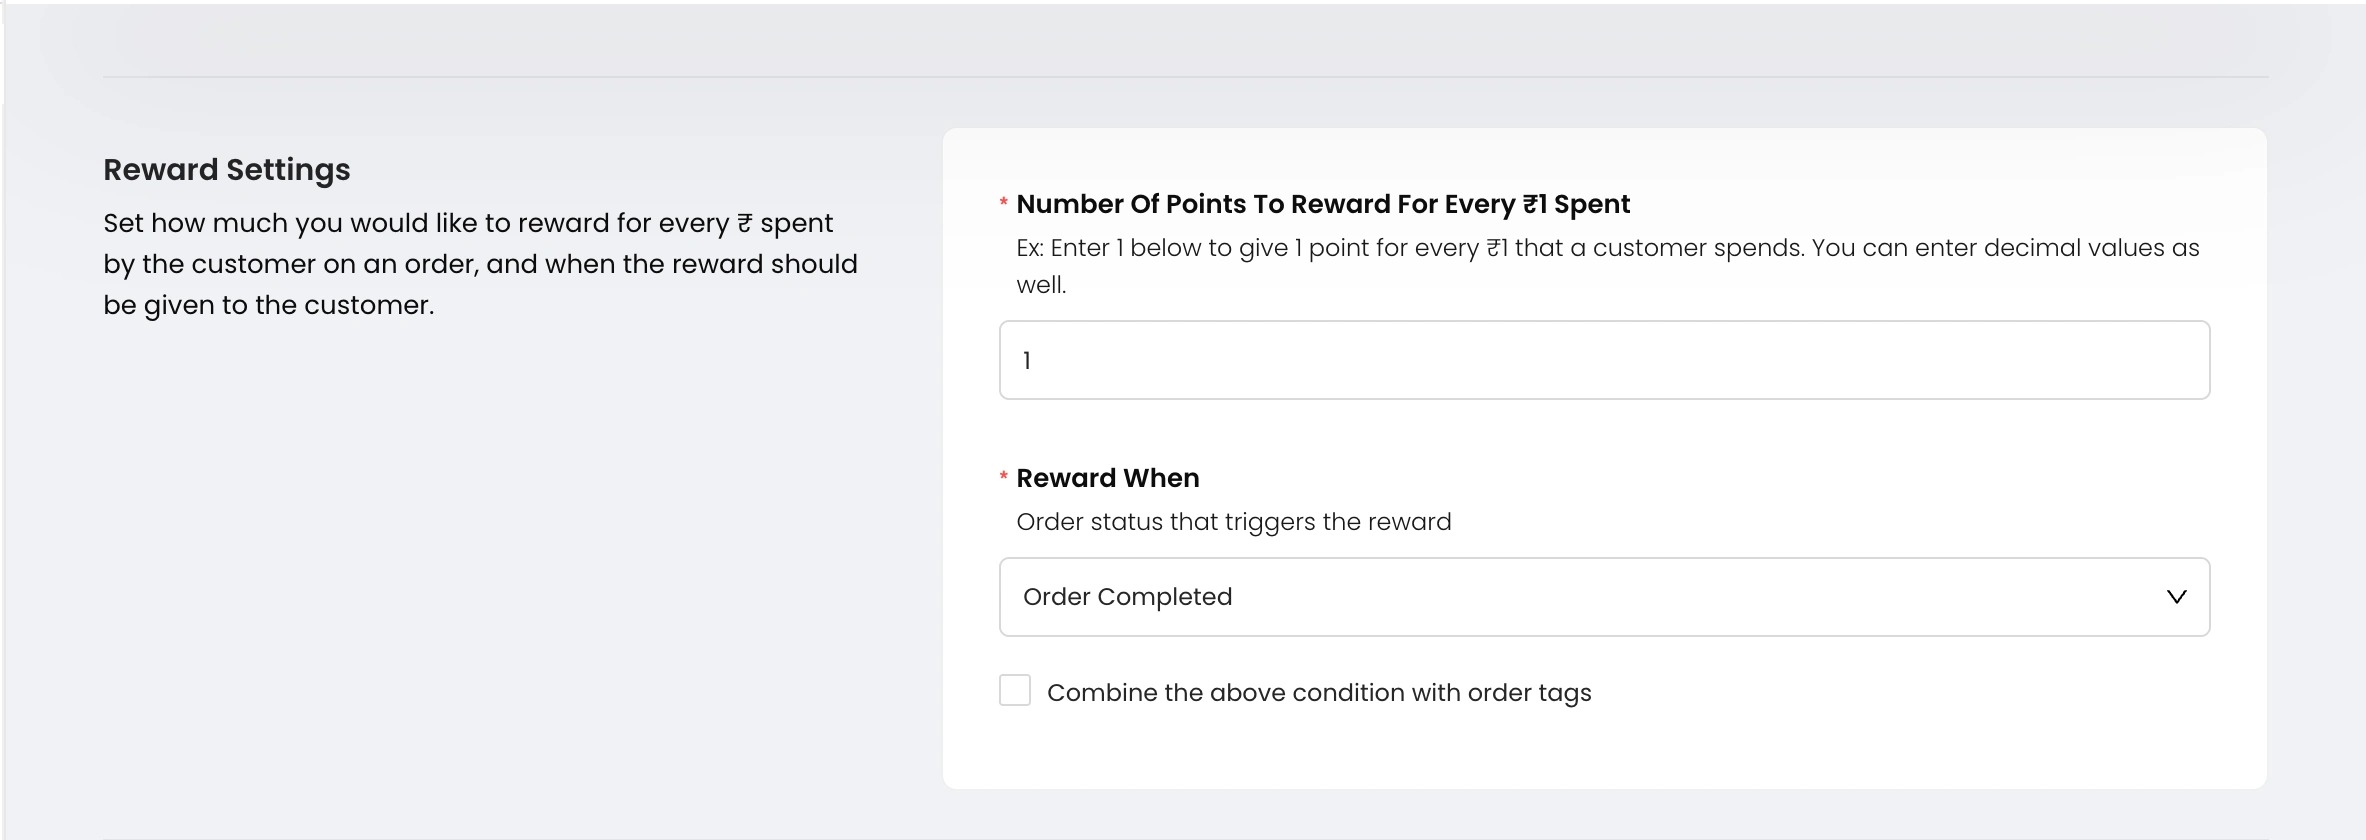
14. Set points and when they’re given
Under Reward Settings:
- In Number Of Points To Reward For Every ₹1 Spent, enter the points per ₹1. Decimals are allowed, so 0.1 gives 1 point per ₹10.
- In Reward When, choose the order status that triggers the reward: placed, paid, completed, or paid and completed.
- (Optional) Tick Combine the above condition with order tags to also require specific order tags before points are given.
15. Reward only specific products (optional)
Under Product-Specific Rewards, search for products in Reward only these products. Only those products in an order will earn points.
Tip: If a product doesn’t appear, it hasn’t synced yet. Place a test order with it to trigger the sync.

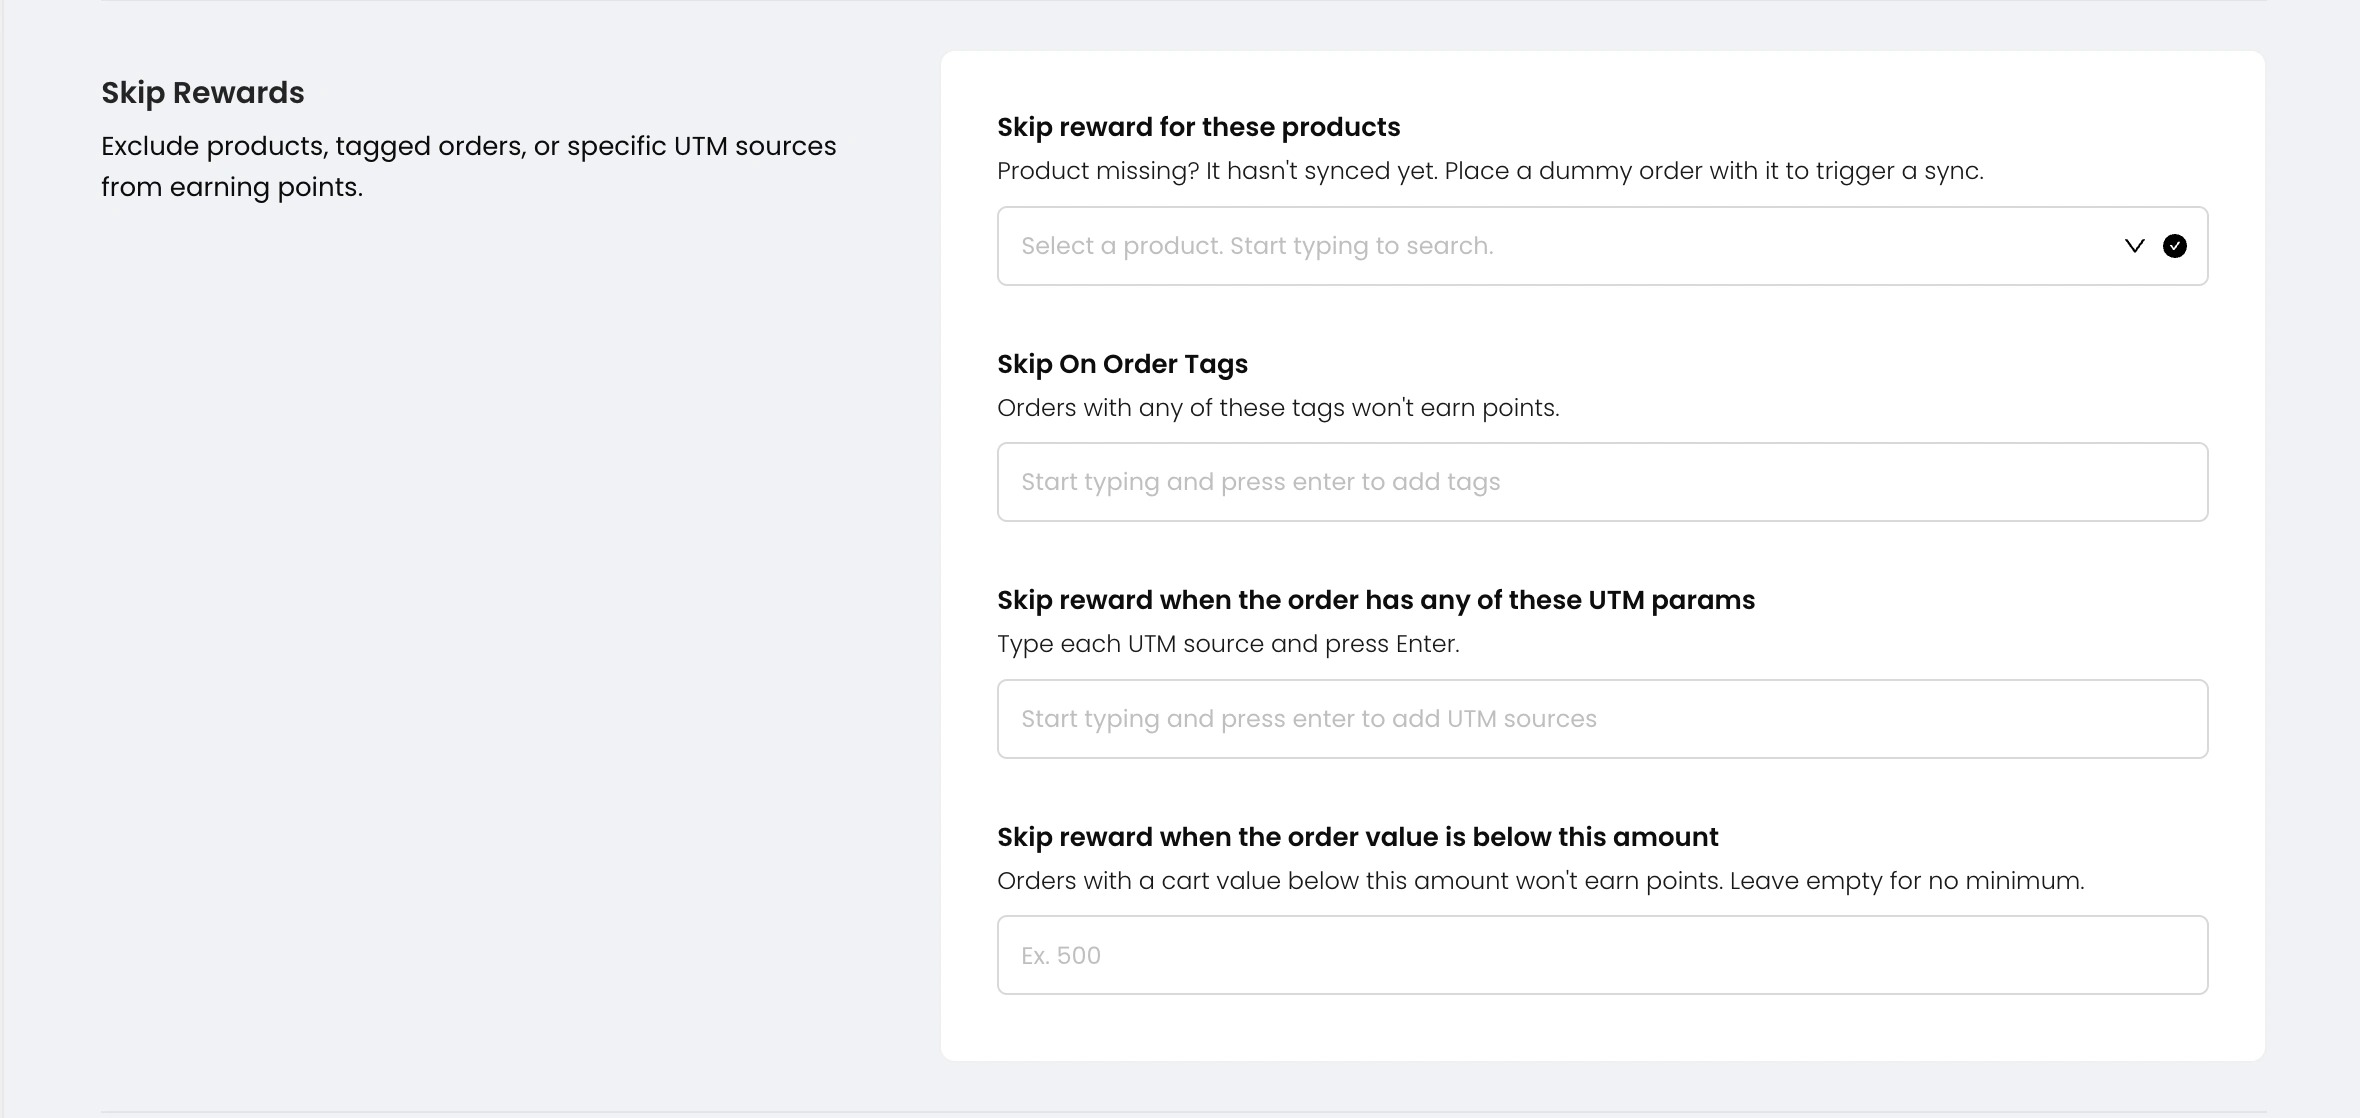
16. Exclude orders from earning points (optional)
Under Skip Rewards, fill in any of these. Matching orders or products won’t earn points.
- Skip reward for these products: for example, gift cards or items already on sale.
- Skip On Order Tags: type a tag and press Enter. Orders with any of these tags are skipped.
- Skip reward when the order has any of these UTM params: type each UTM source and press Enter. Use this to skip orders from specific campaigns or marketplaces.
- Skip reward when the order value is below this amount: for example, 500 means orders under ₹500 earn nothing. Leave it empty for no minimum.
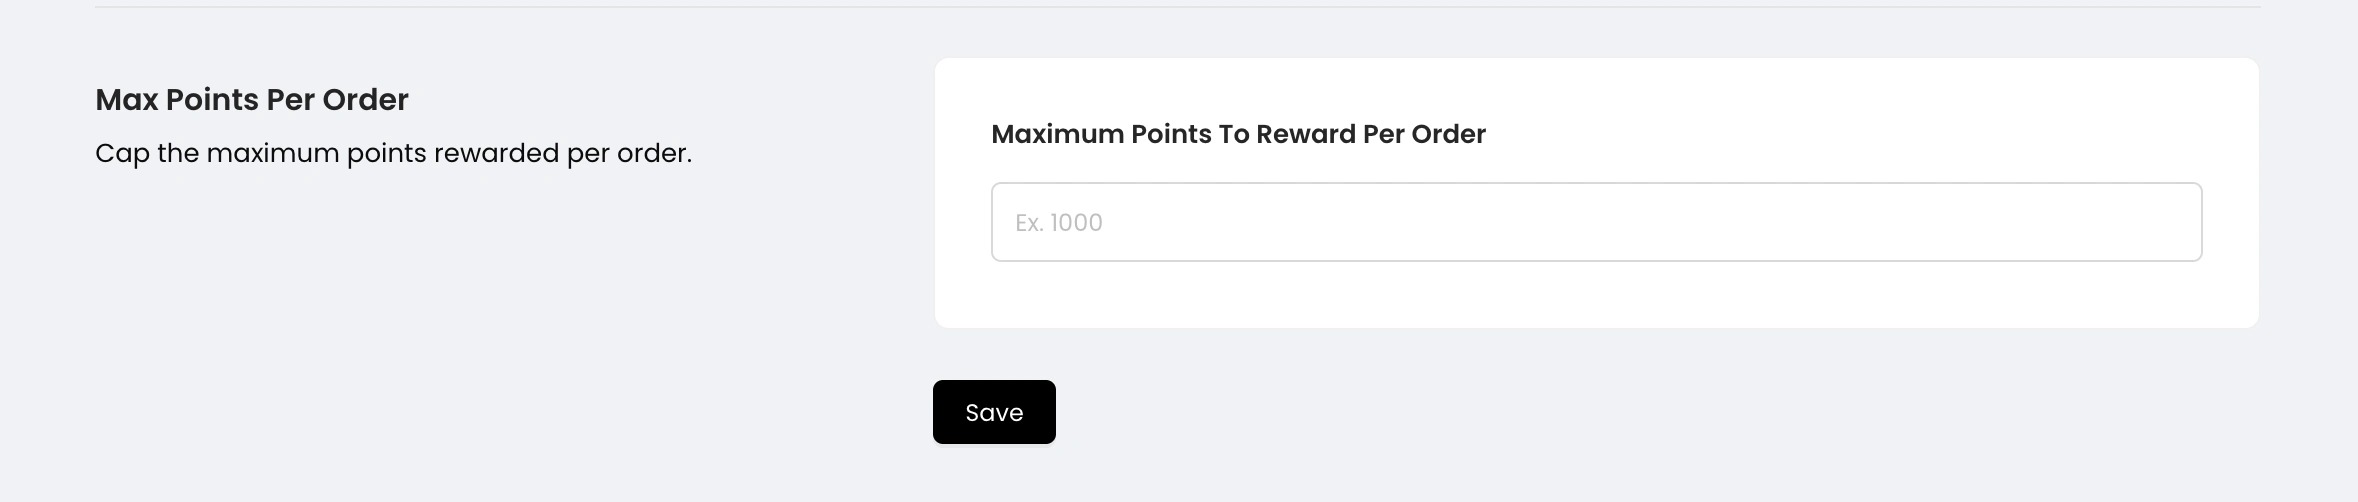
17. Cap points per order and save
- (Optional) In Maximum Points To Reward Per Order, enter a limit, such as 1000. This stops very large orders from earning very large rewards.
- Click Save.
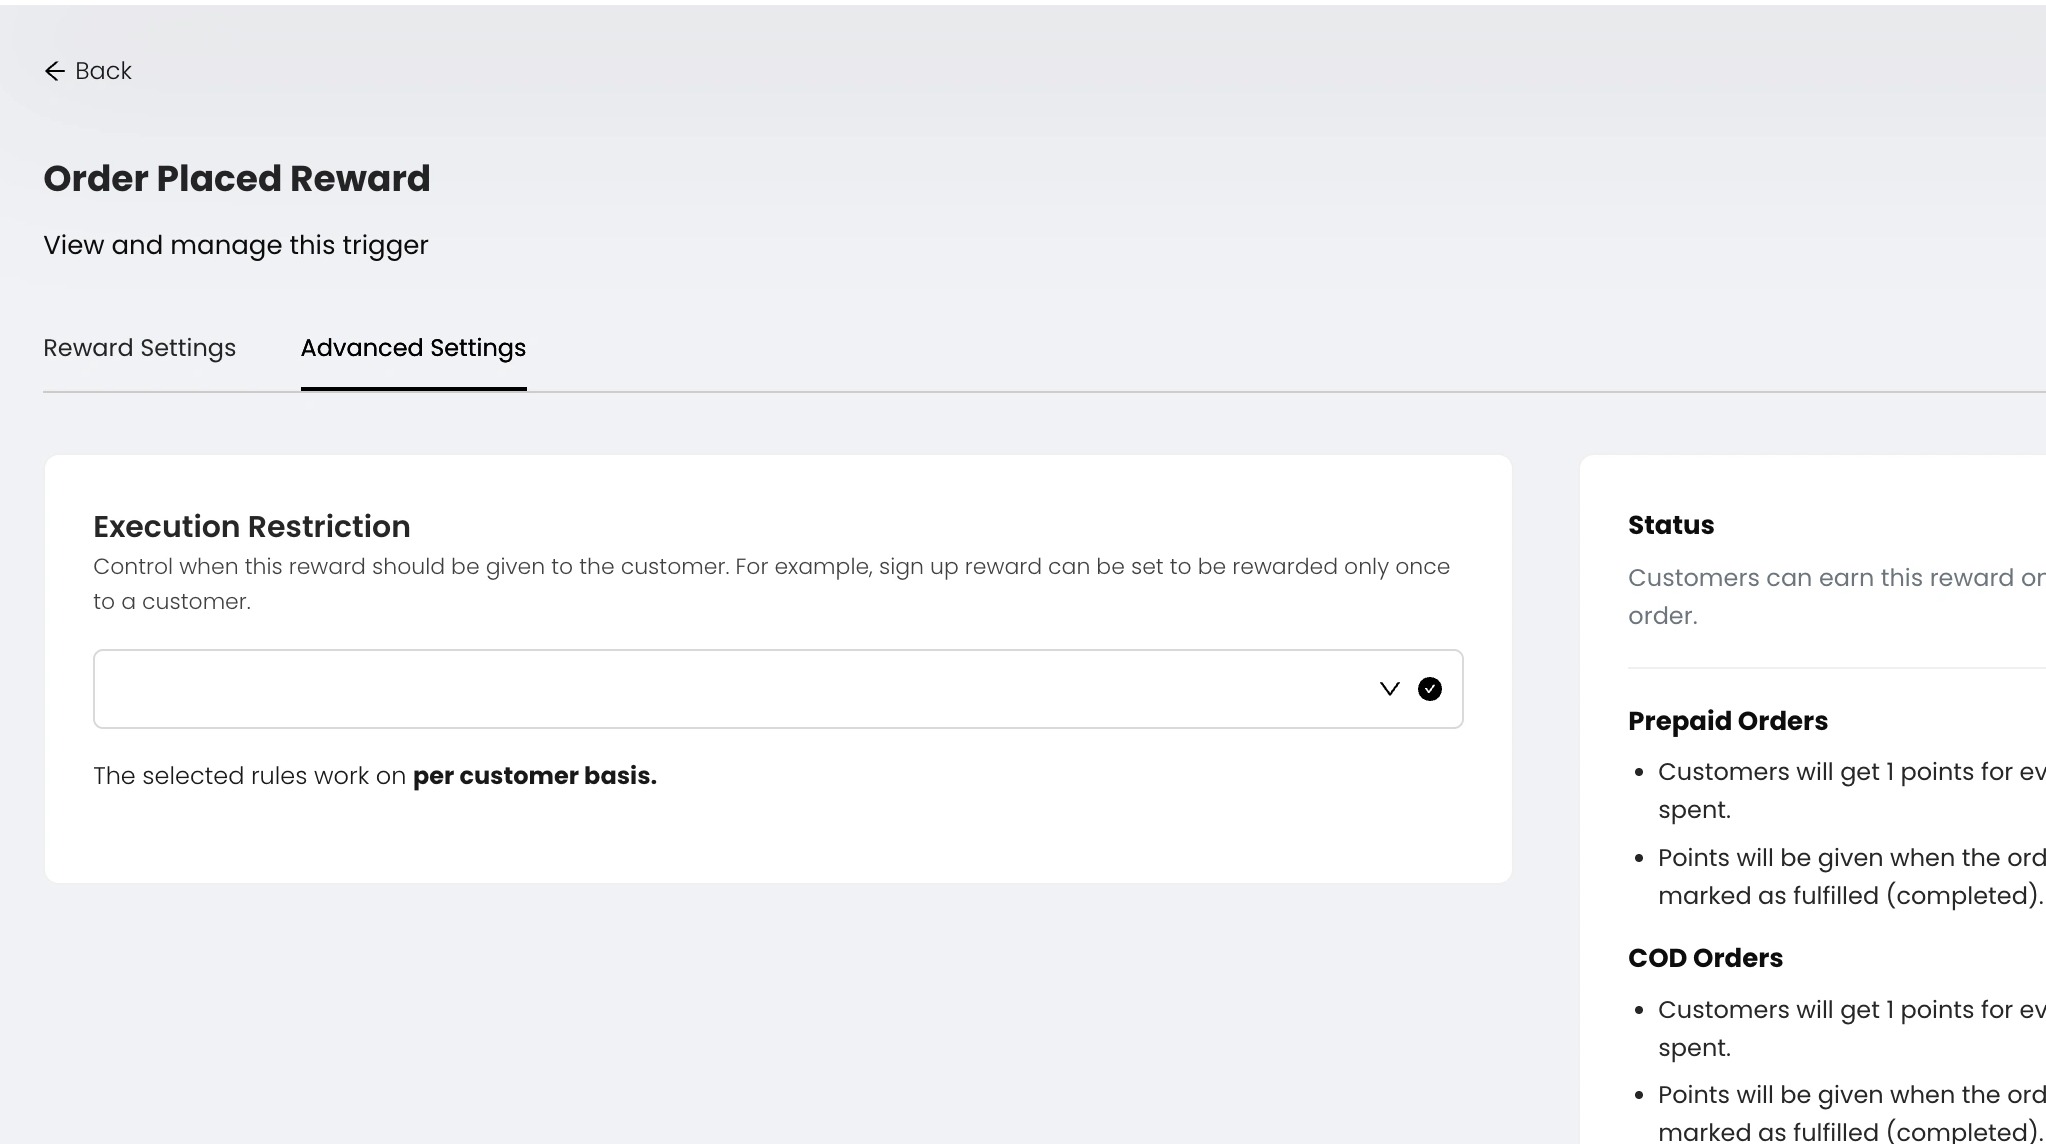
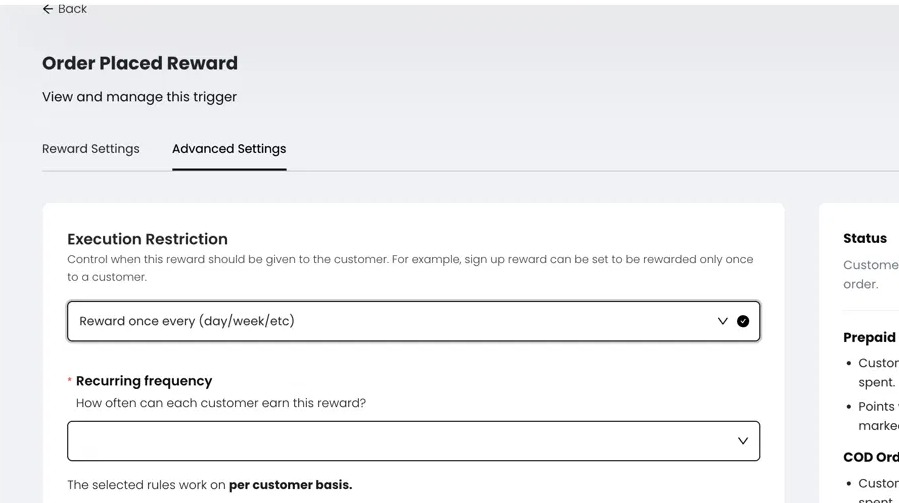
18. Open the rule and click the Advanced Settings tab. Click the Execution Restriction dropdown, which controls how often and when customers get this reward. All limits apply per customer, not across your whole store.
19. Reward once every period
- Select Reward once every (day/week/etc).
- Under Recurring frequency, choose the period, such as a day or a week.
- Click Save.
A customer can now earn the reward only once in that period. For example, with a daily limit, a customer who places 3 orders in one day earns points only once that day.
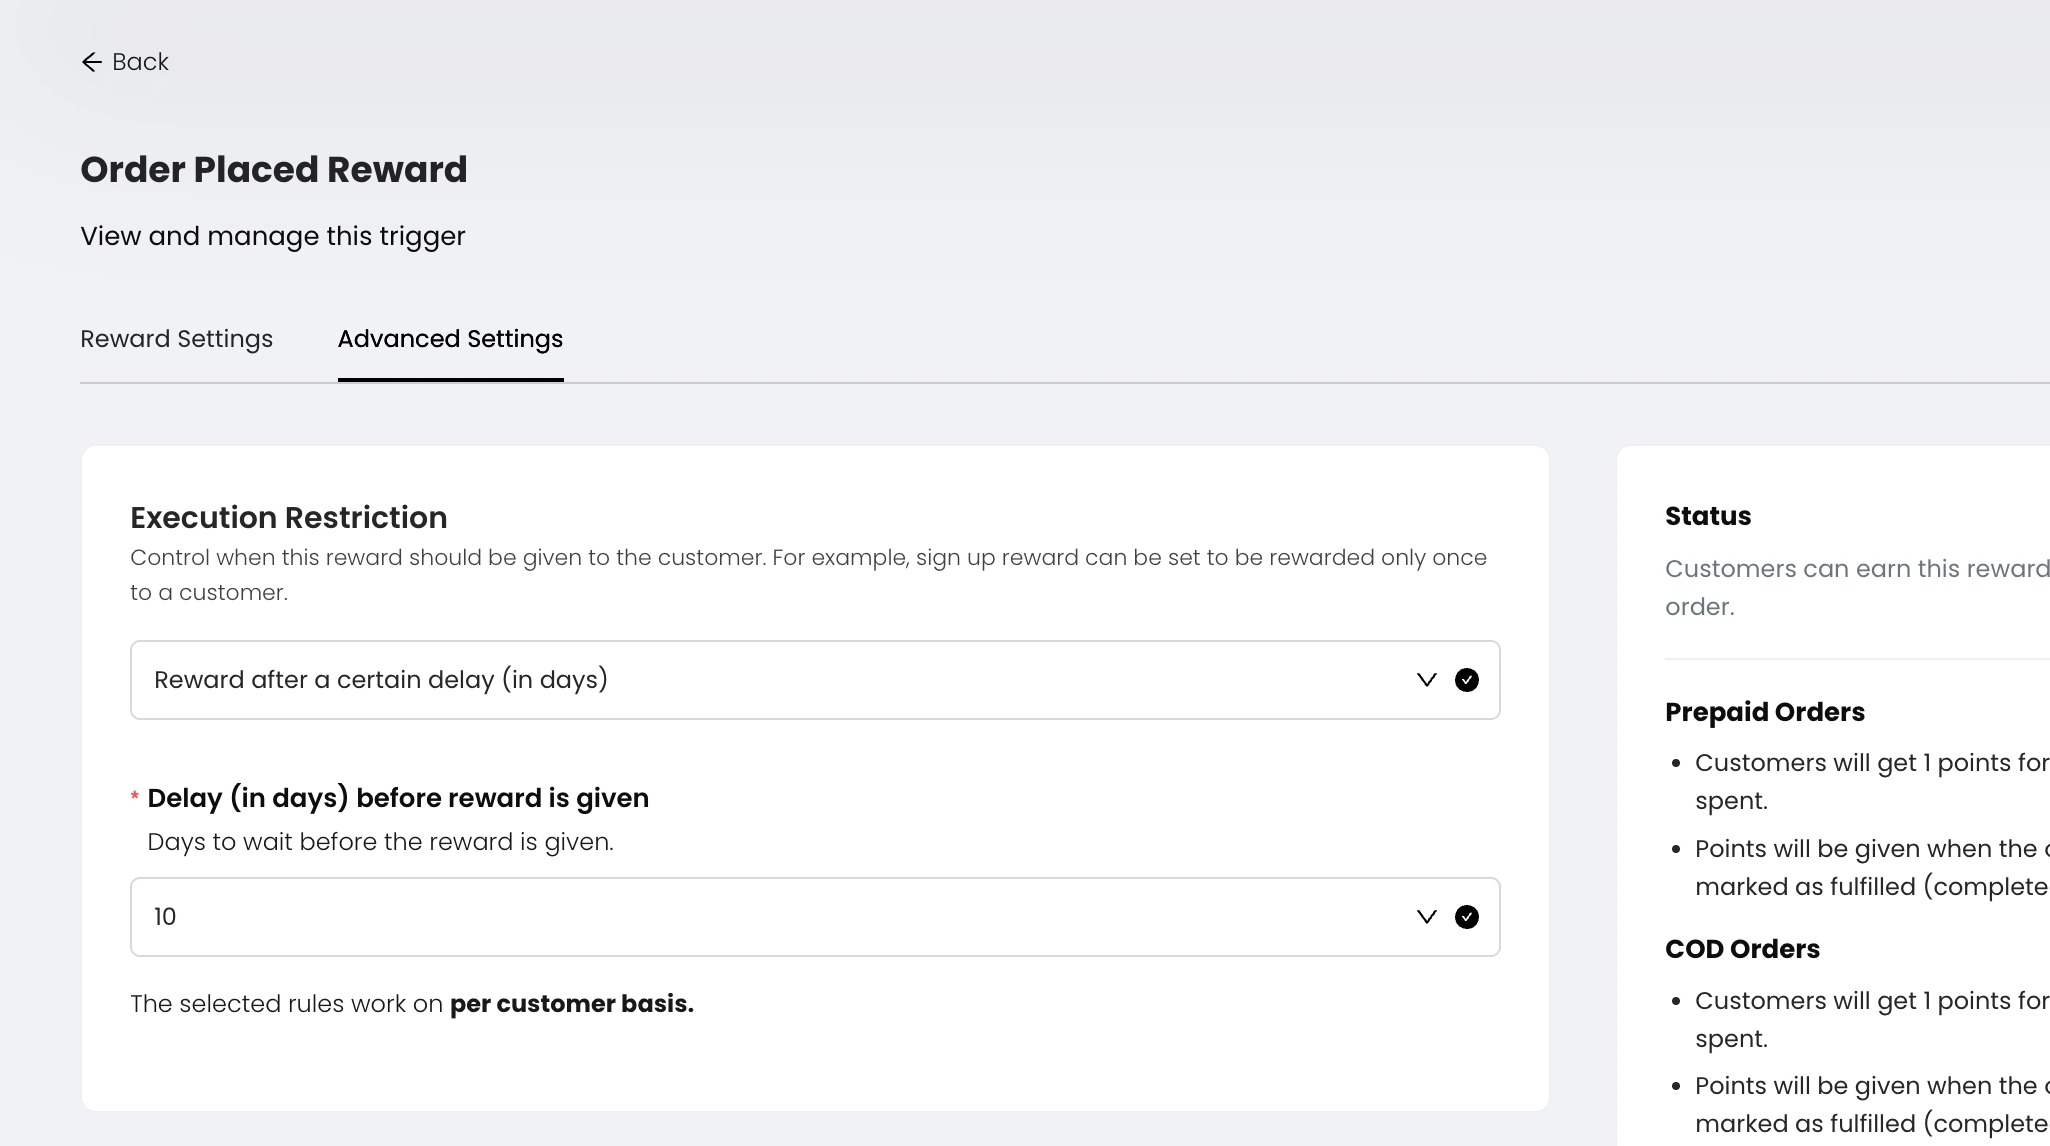
20. Delay the reward
- Select Reward after a certain delay (in days).
- Under Delay (in days) before reward is given, choose how many days to wait.
- Click Save.
Points are held until the delay ends. If Delay is set to 10 then customer will get reward 10 days after the rewards condition is met(Such as Order Placed/Order Completed/Order Paid and Delivered).
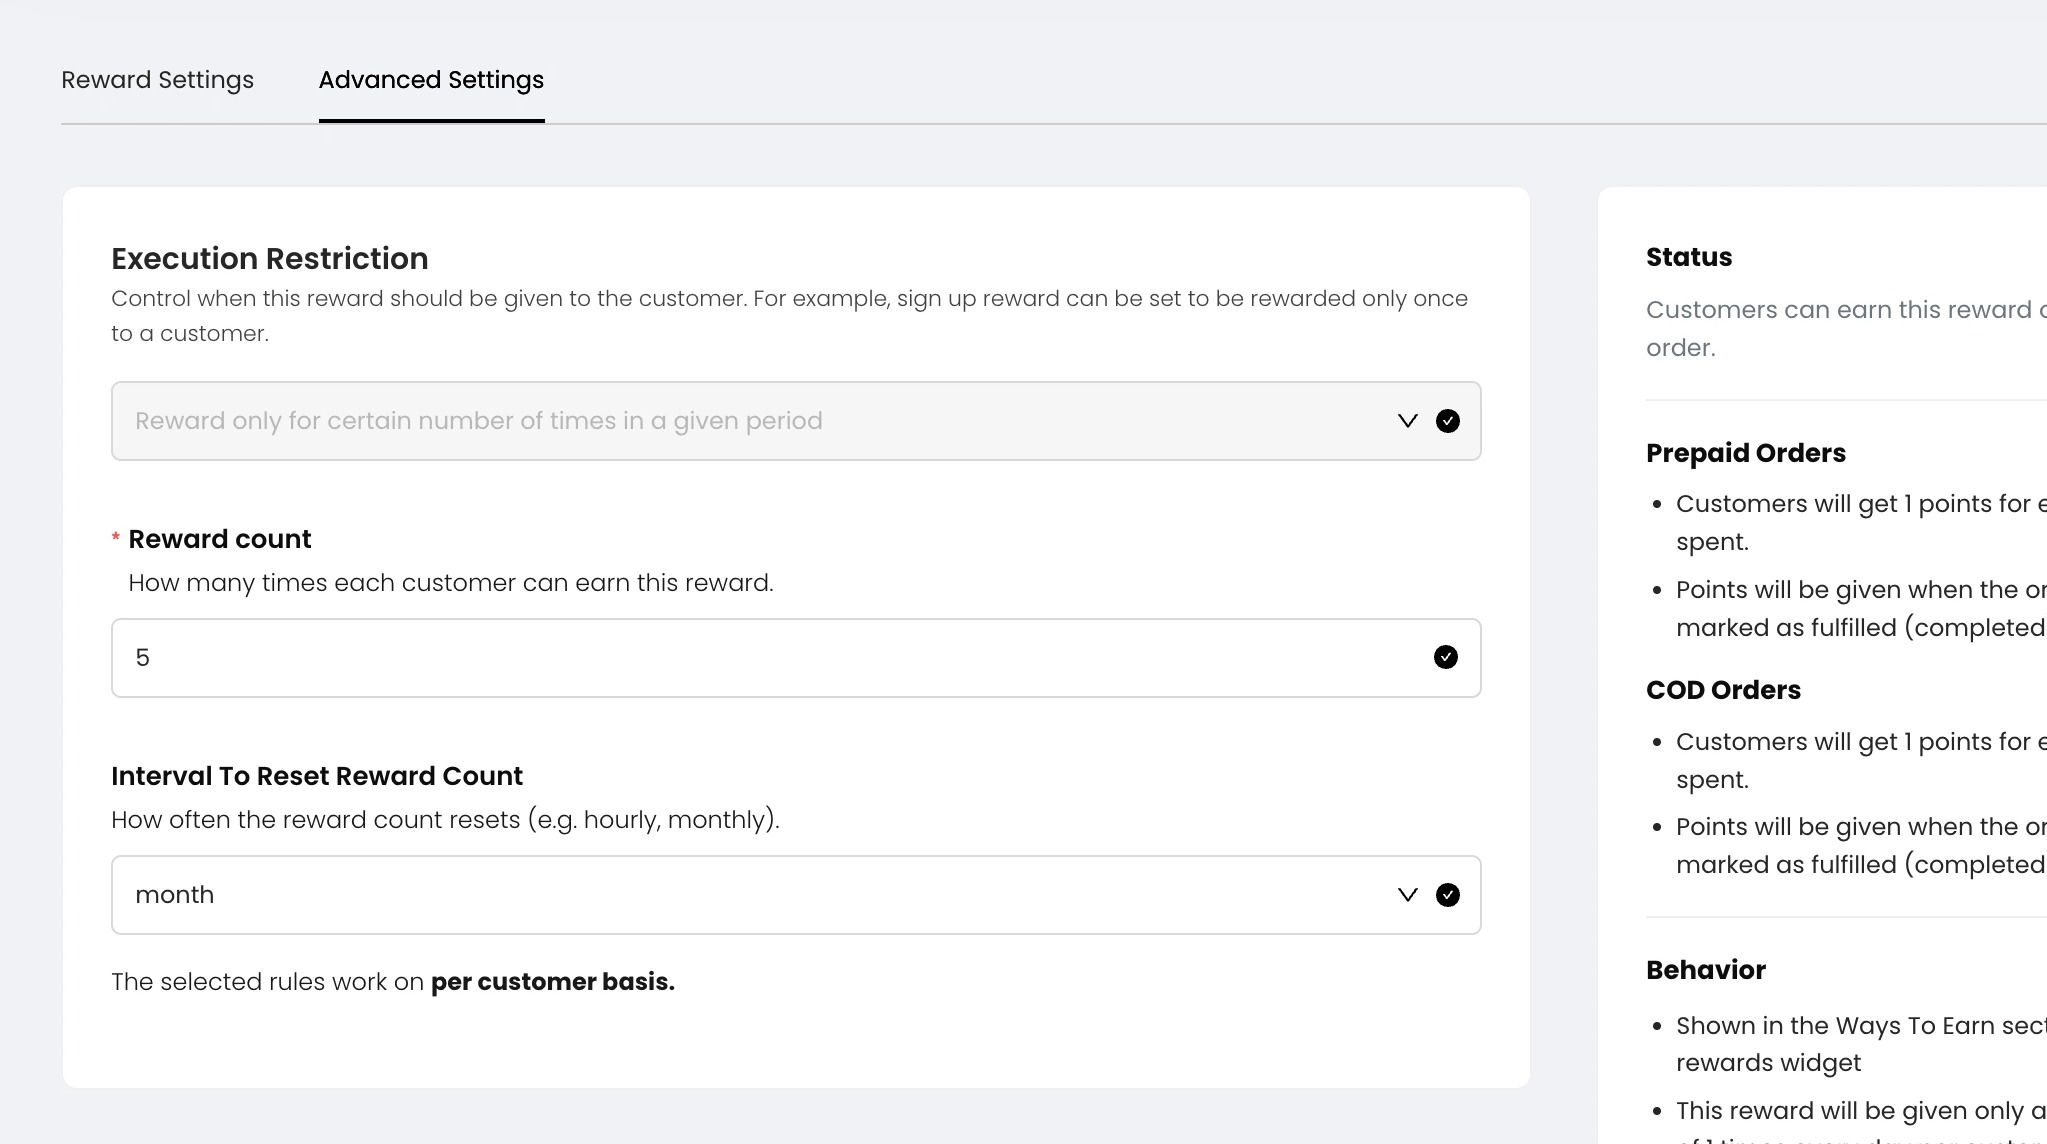
21. Cap the number of rewards
- Select Reward only for certain number of times in a given period.
- In Reward count, enter the most times a customer can earn this reward.
- In Interval To Reset Reward Count, choose how often the count goes back to zero, such as hourly or monthly.
- Click Save.
For example, a count of 5 with a monthly reset means a customer earns points on up to 5 orders a month. For one-time rewards like Signup, set the count to 1.
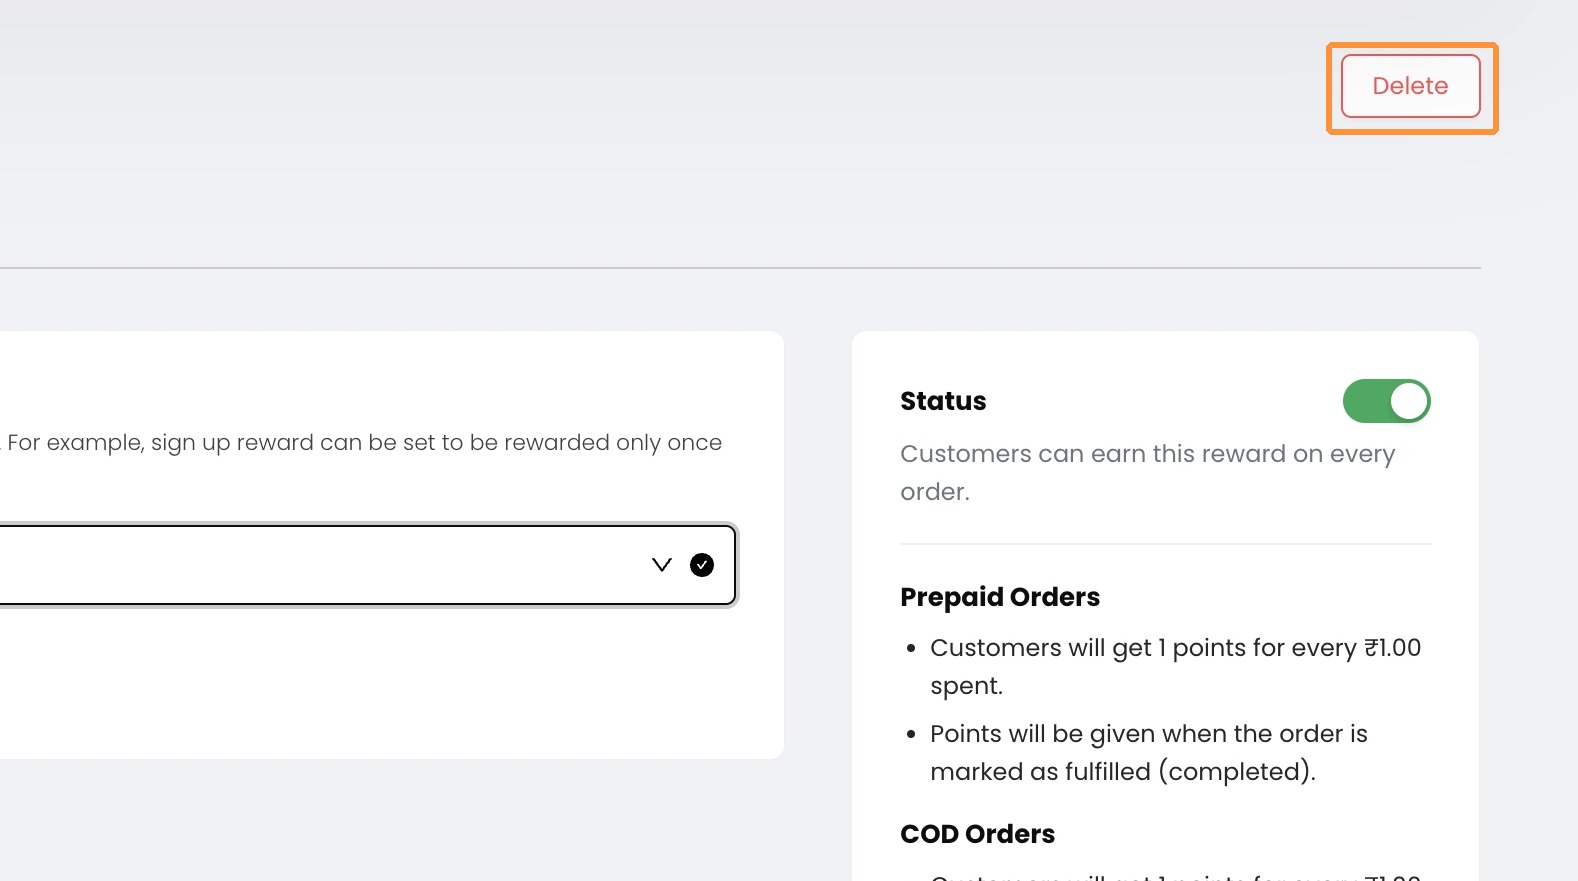
22. Click Delete at the top right of the rule’s page. This permanently stops customers earning from it.
23. Open the Referral tab
On the Earning Rules page, click the Referral tab, then click + Create Earning Rule. You’ll see two options:
- Customer’s Reward: given to the customer who refers a friend (the referrer).
- Friend’s Reward: given to the friend who was referred (the referee).
You need both for referrals to work. Each can only be created once. A ⚠ icon on the + Create Earning Rule button means one is still missing, and the button disappears once both are set up.
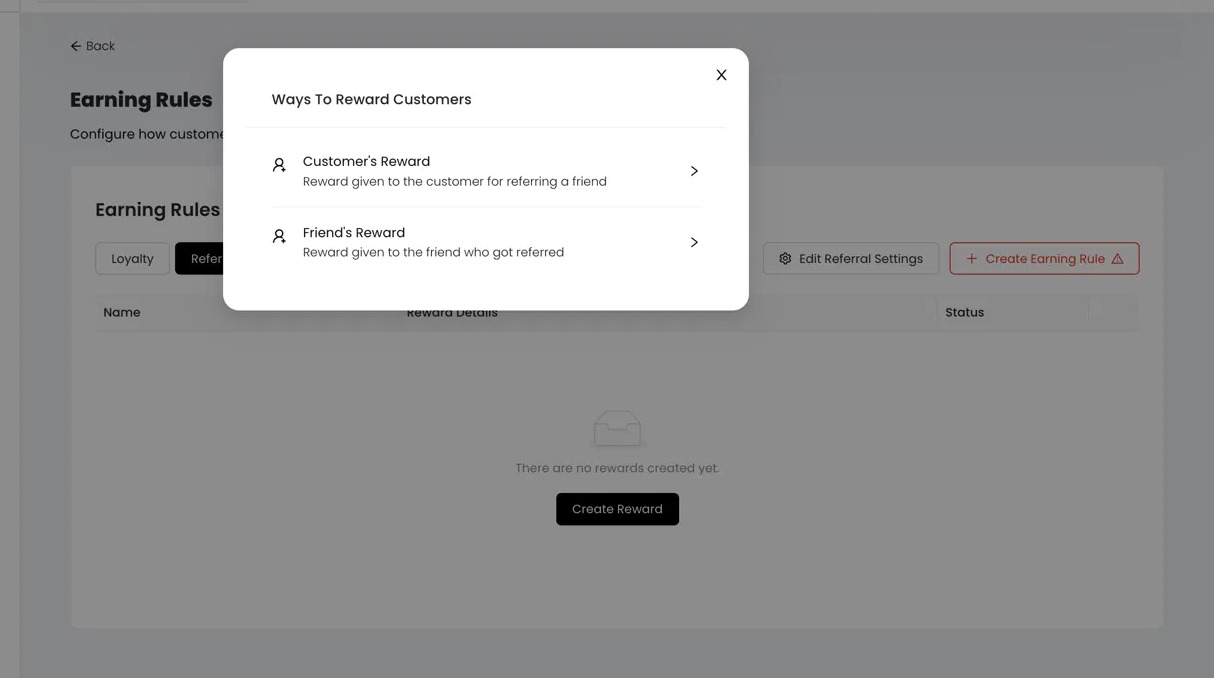
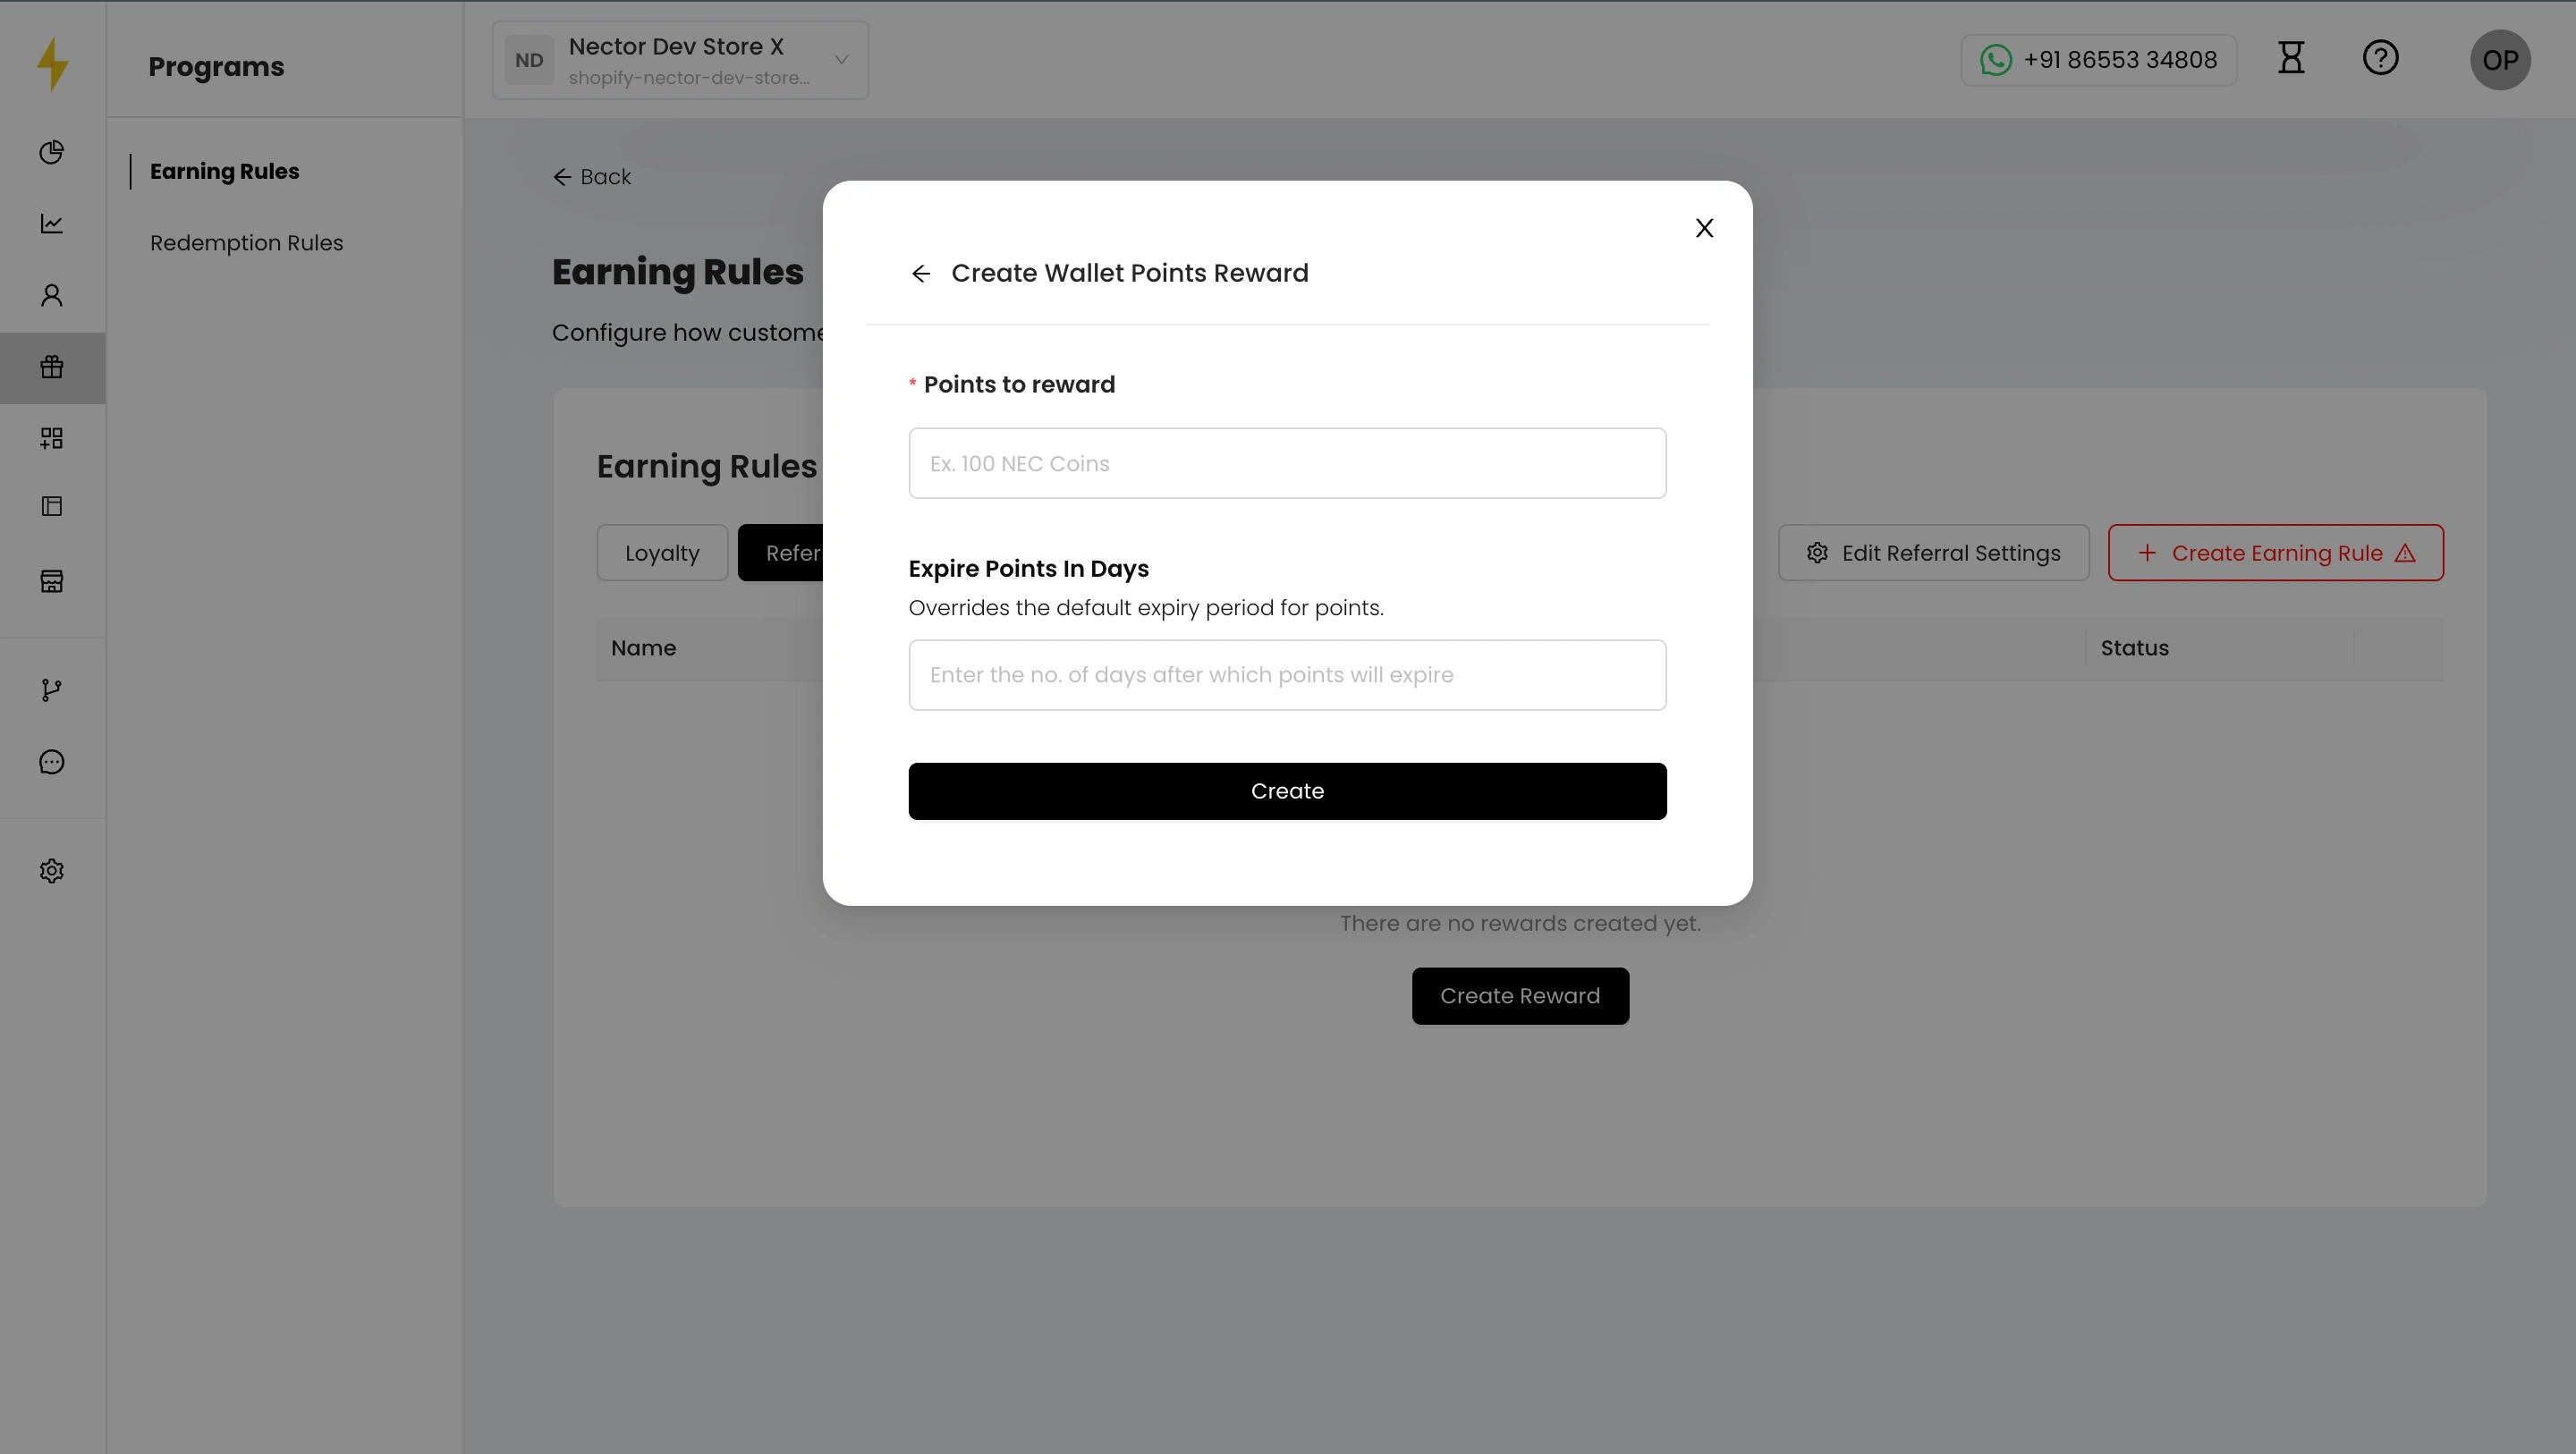
24. Create the Customer’s Reward
- Choose Customer’s Reward.
- Choose the reward type and enter its value, for example 50 points.
- Enter the number of days after which rewards will expire.
- Click Create.
The referrer gets this reward once their friend completes a purchase.
25. Create the Friend’s Reward
- Click + Create Earning Rule again and choose Friend’s Reward.
- Choose the reward type and enter its value, for example 50 points.
- Enter the number of days after which rewards will expire.
- Click Create.
The friend gets this as a discount code for their first order.
26. Check both rules in the list
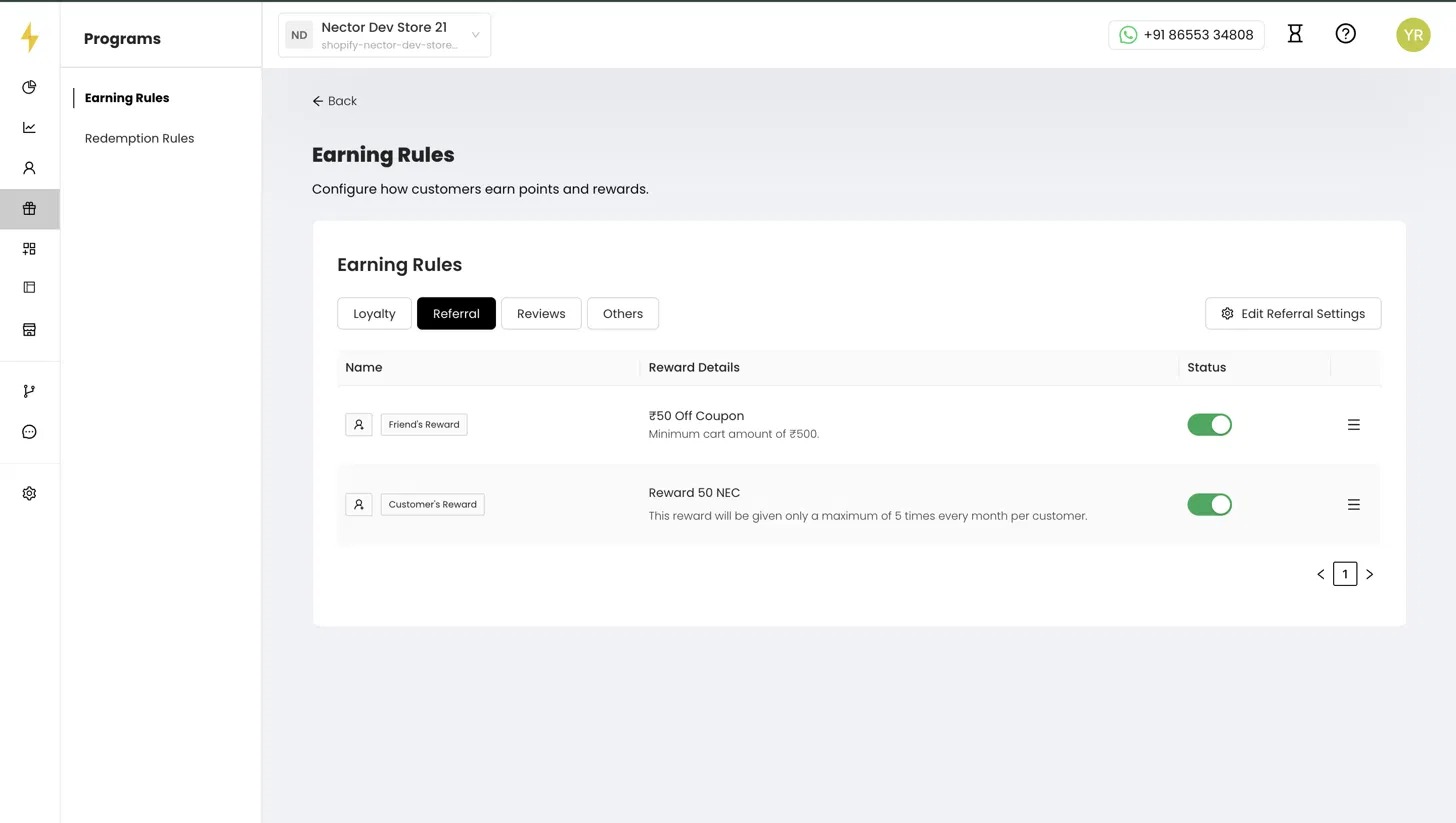
Both rewards now show on the Referral tab with their details, such as “Reward 50 NEC” and “₹50 Off Coupon, minimum cart amount of ₹500.” Use the Status toggle to turn either one on or off. Click a rule to open its settings.
Customer’s Reward (Referrer Reward) settings
27. Edit the referrer’s reward
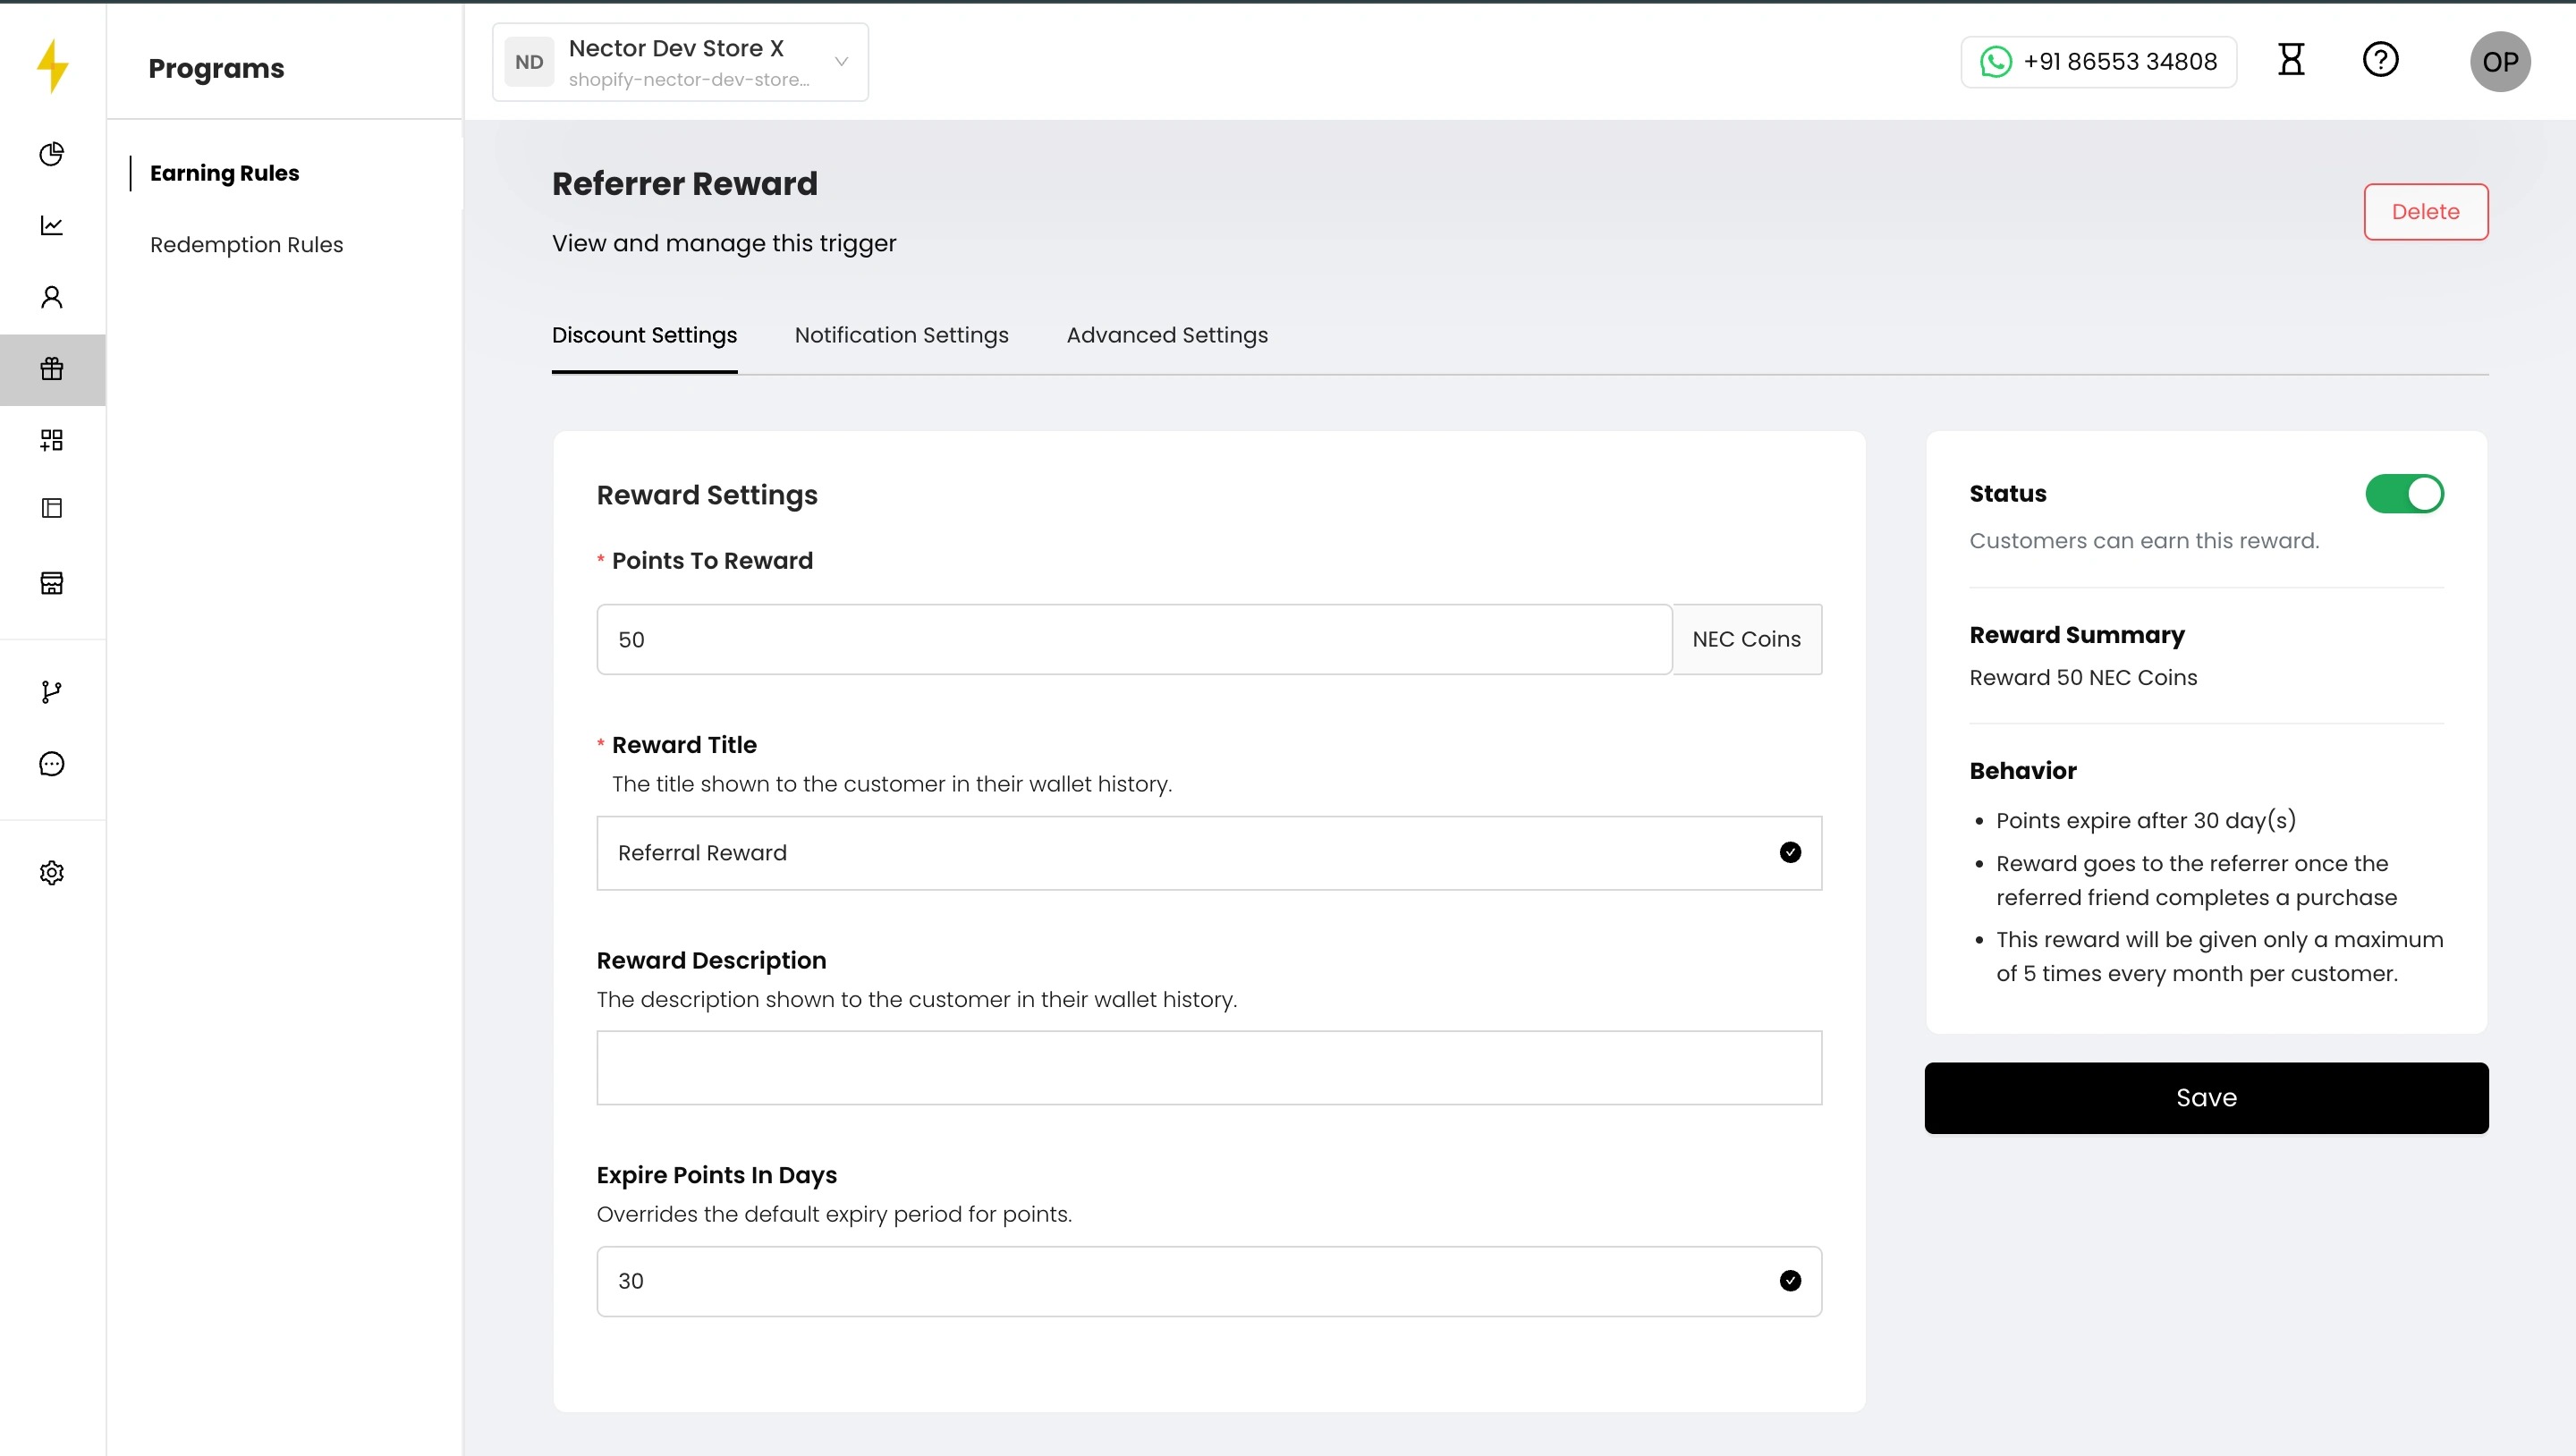
Click Customer’s Reward to open the Referrer Reward page. On the Discount Settings tab:
- Points To Reward (required): the points the referrer earns, for example 50.
- Reward Title (required): the name the customer sees in their wallet history, for example “Referral Reward.”
- Reward Description (optional): a short note shown in their wallet history.
- Click Save.
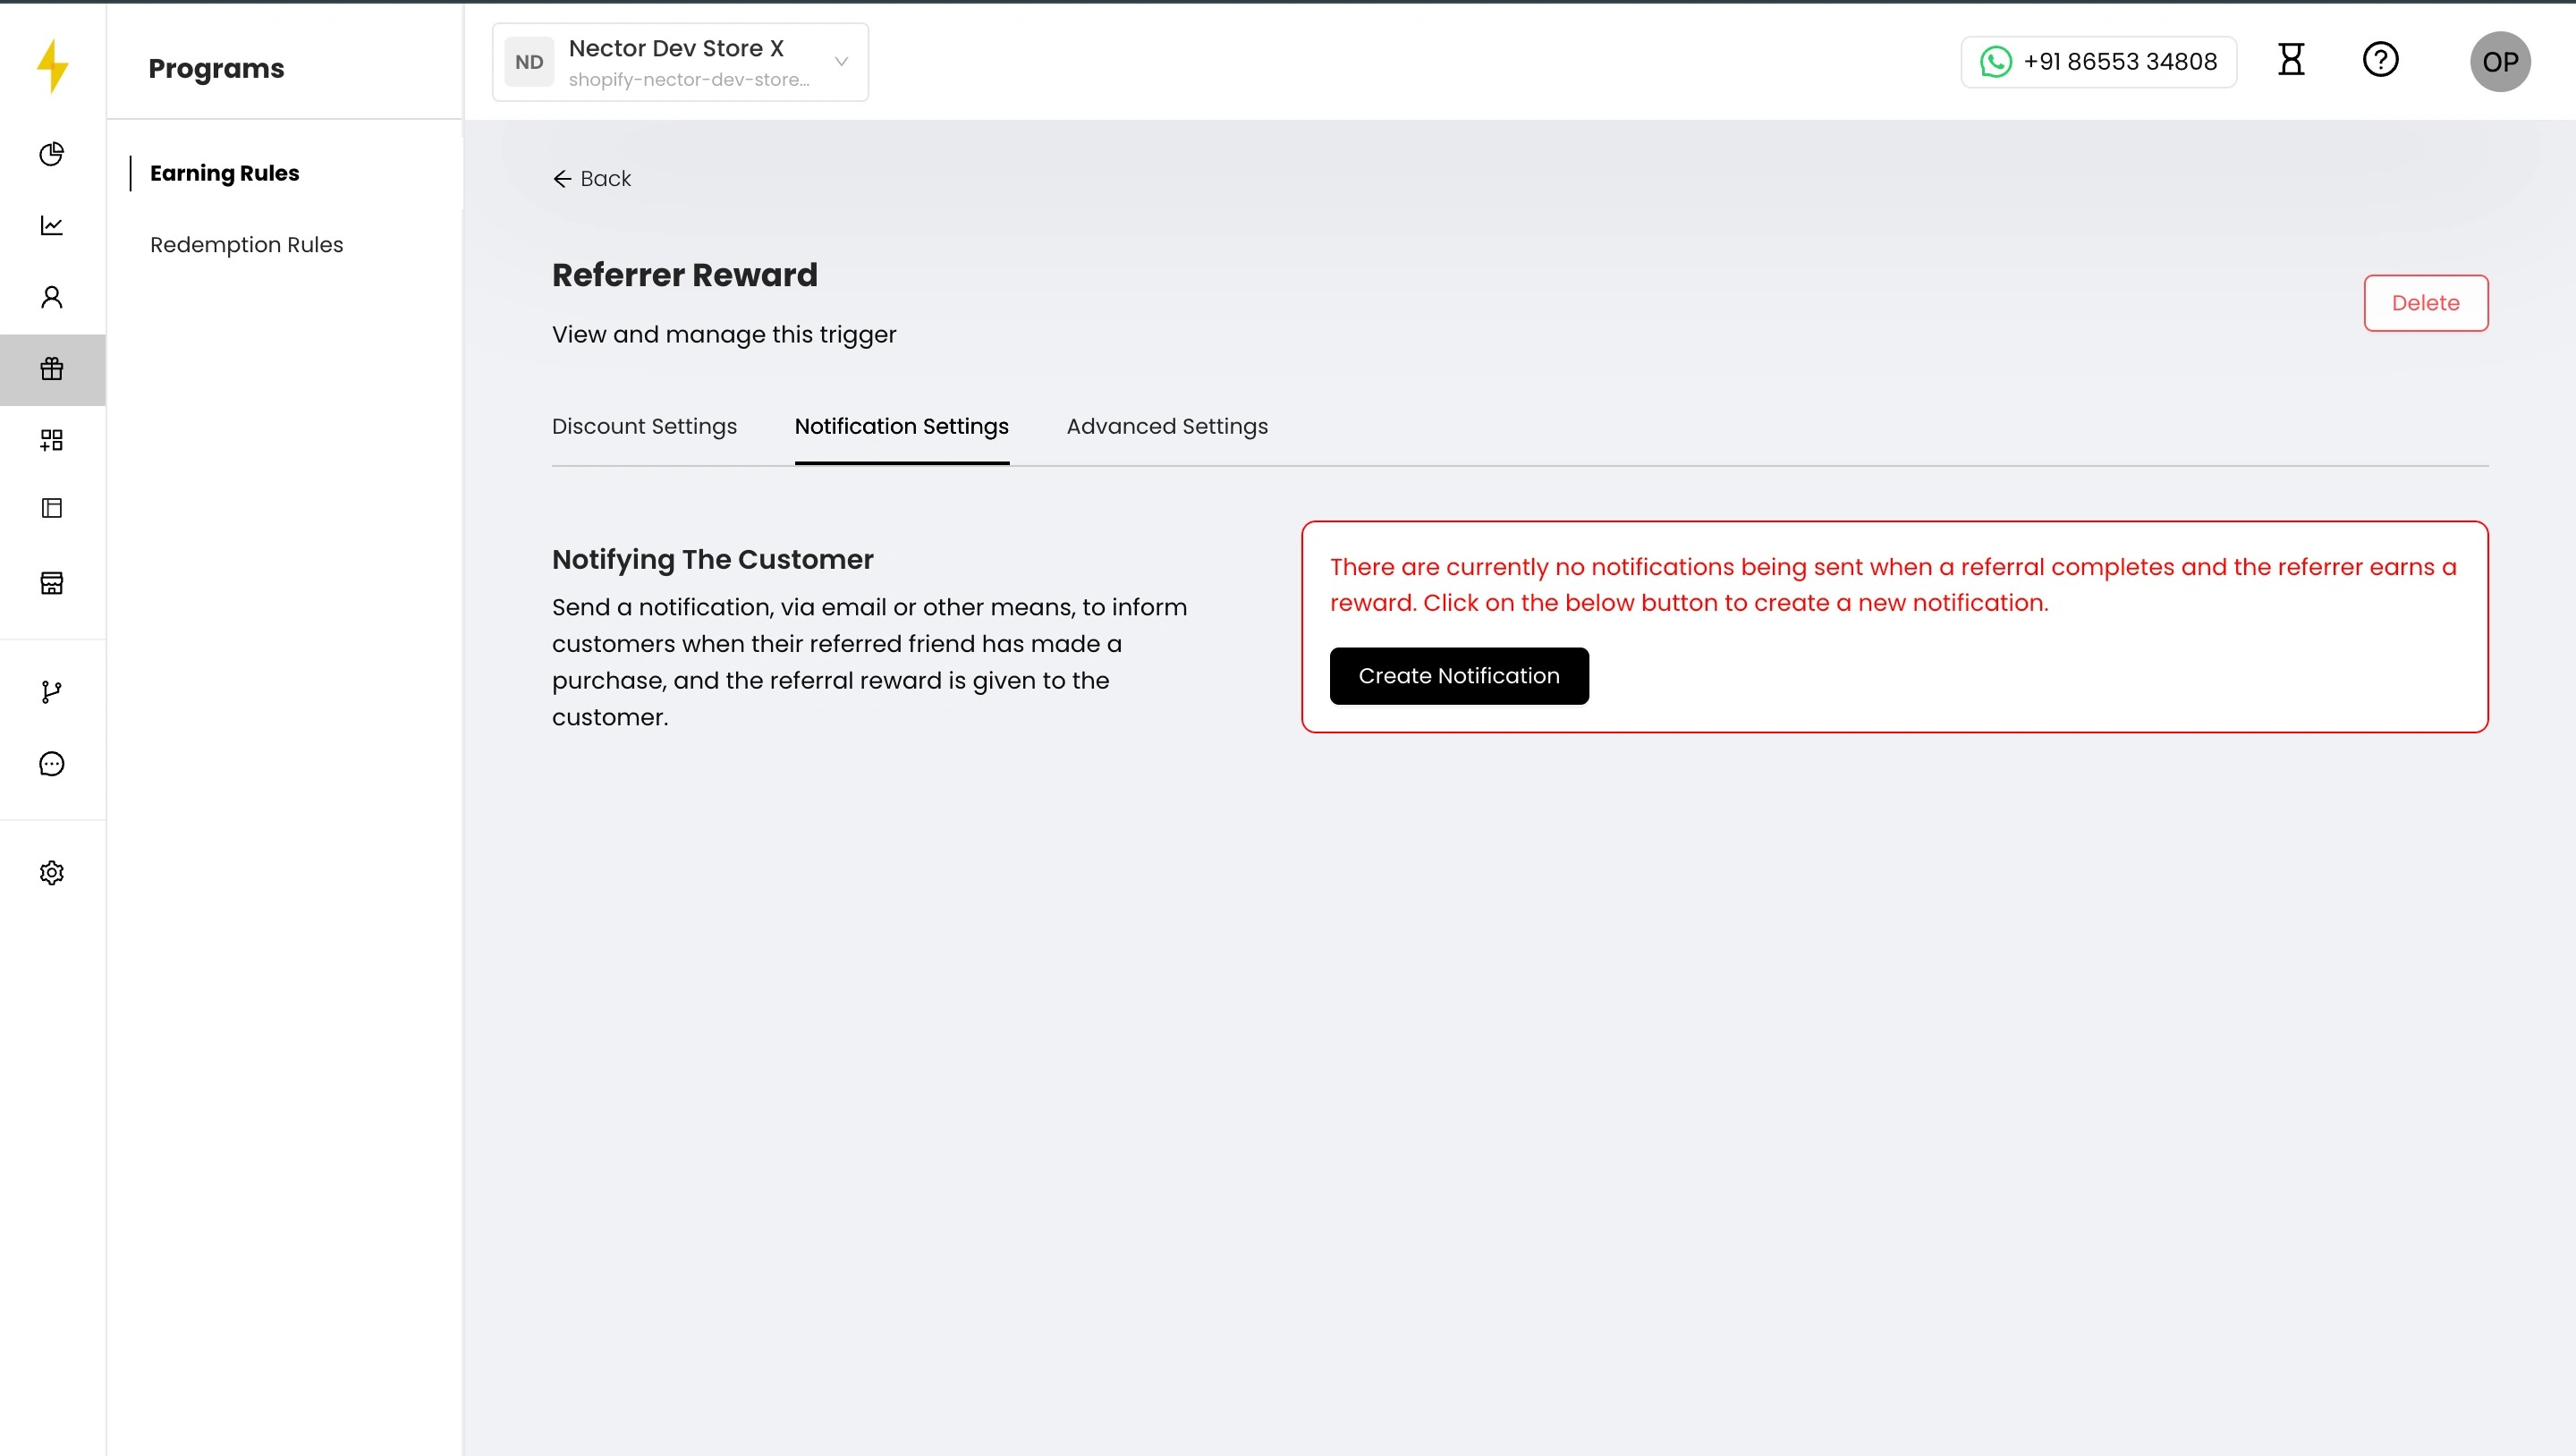
28. Open the Notification Settings tab. By default, no message is sent when a referral completes. Click Create Notification to set up an email or other message telling customers their friend made a purchase and they’ve earned their reward.
29. Limit how often referrers are rewarded (optional)
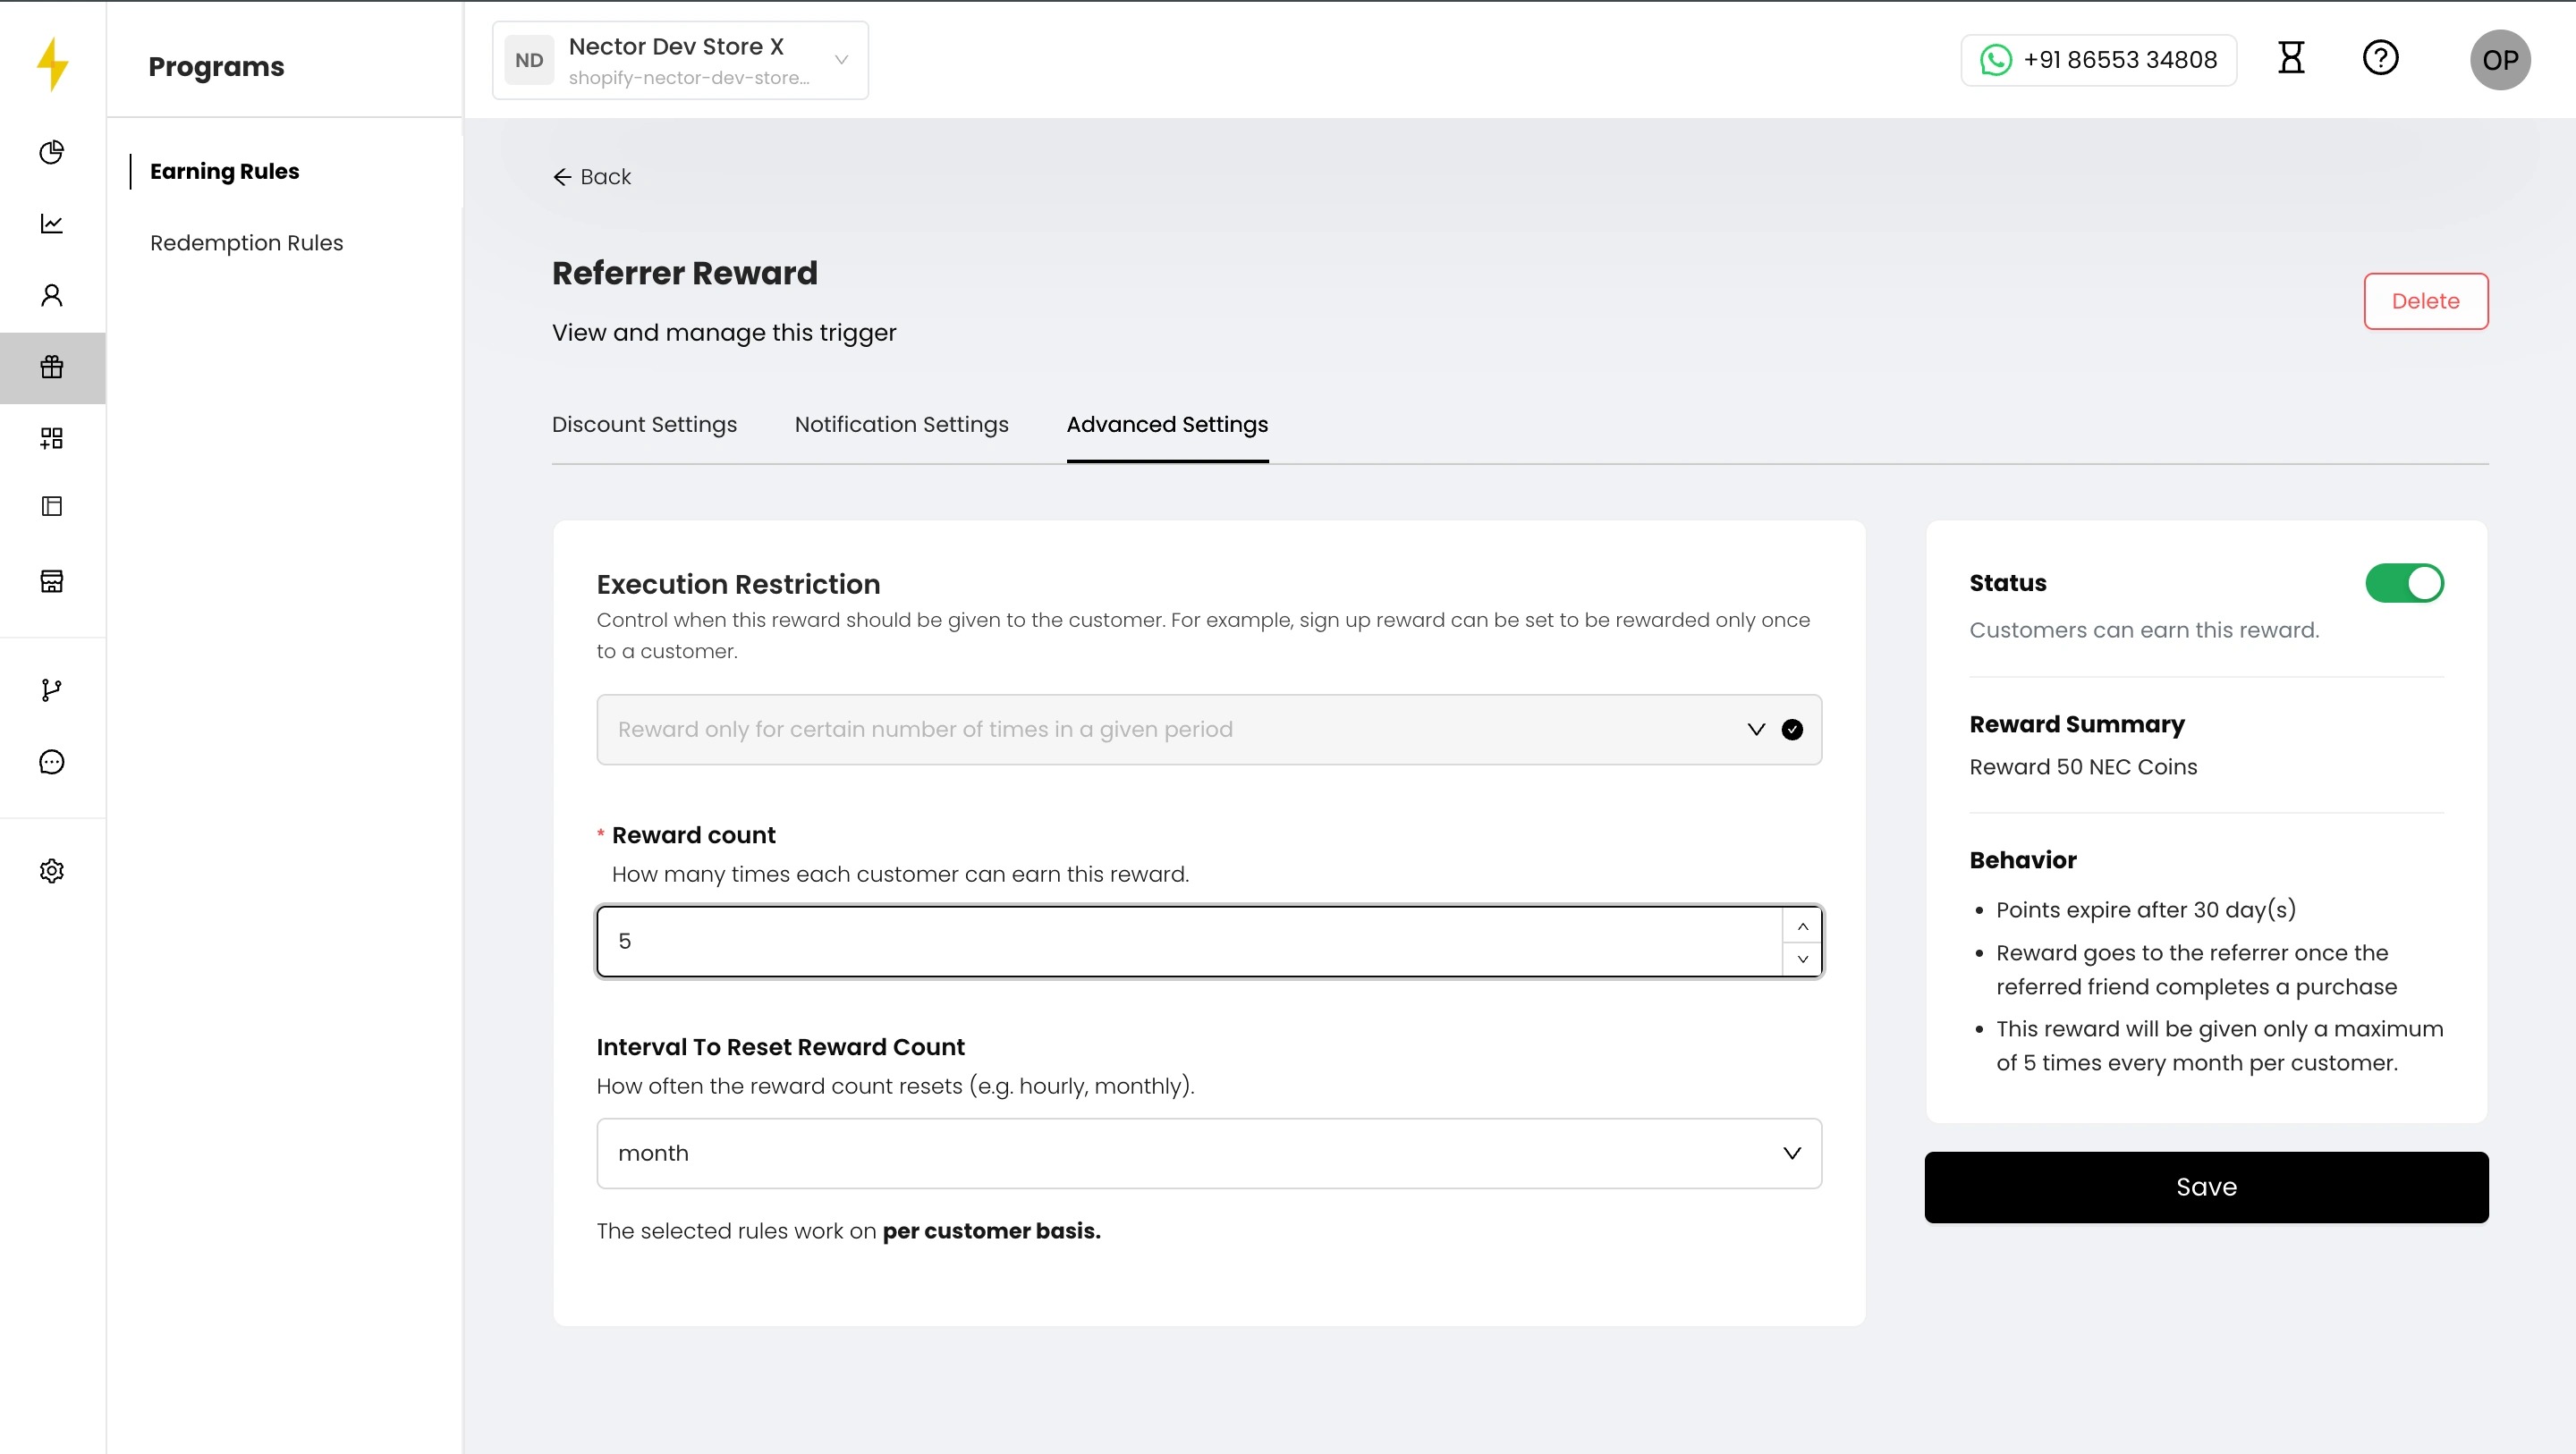
Open the Advanced Settings tab. Execution Restriction works the same way as it does for loyalty rewards. For example, choose Reward only for certain number of times in a given period, set Reward count to 5 and the interval to month. Each customer can then earn referral rewards for up to 5 friends a month. Click Save.
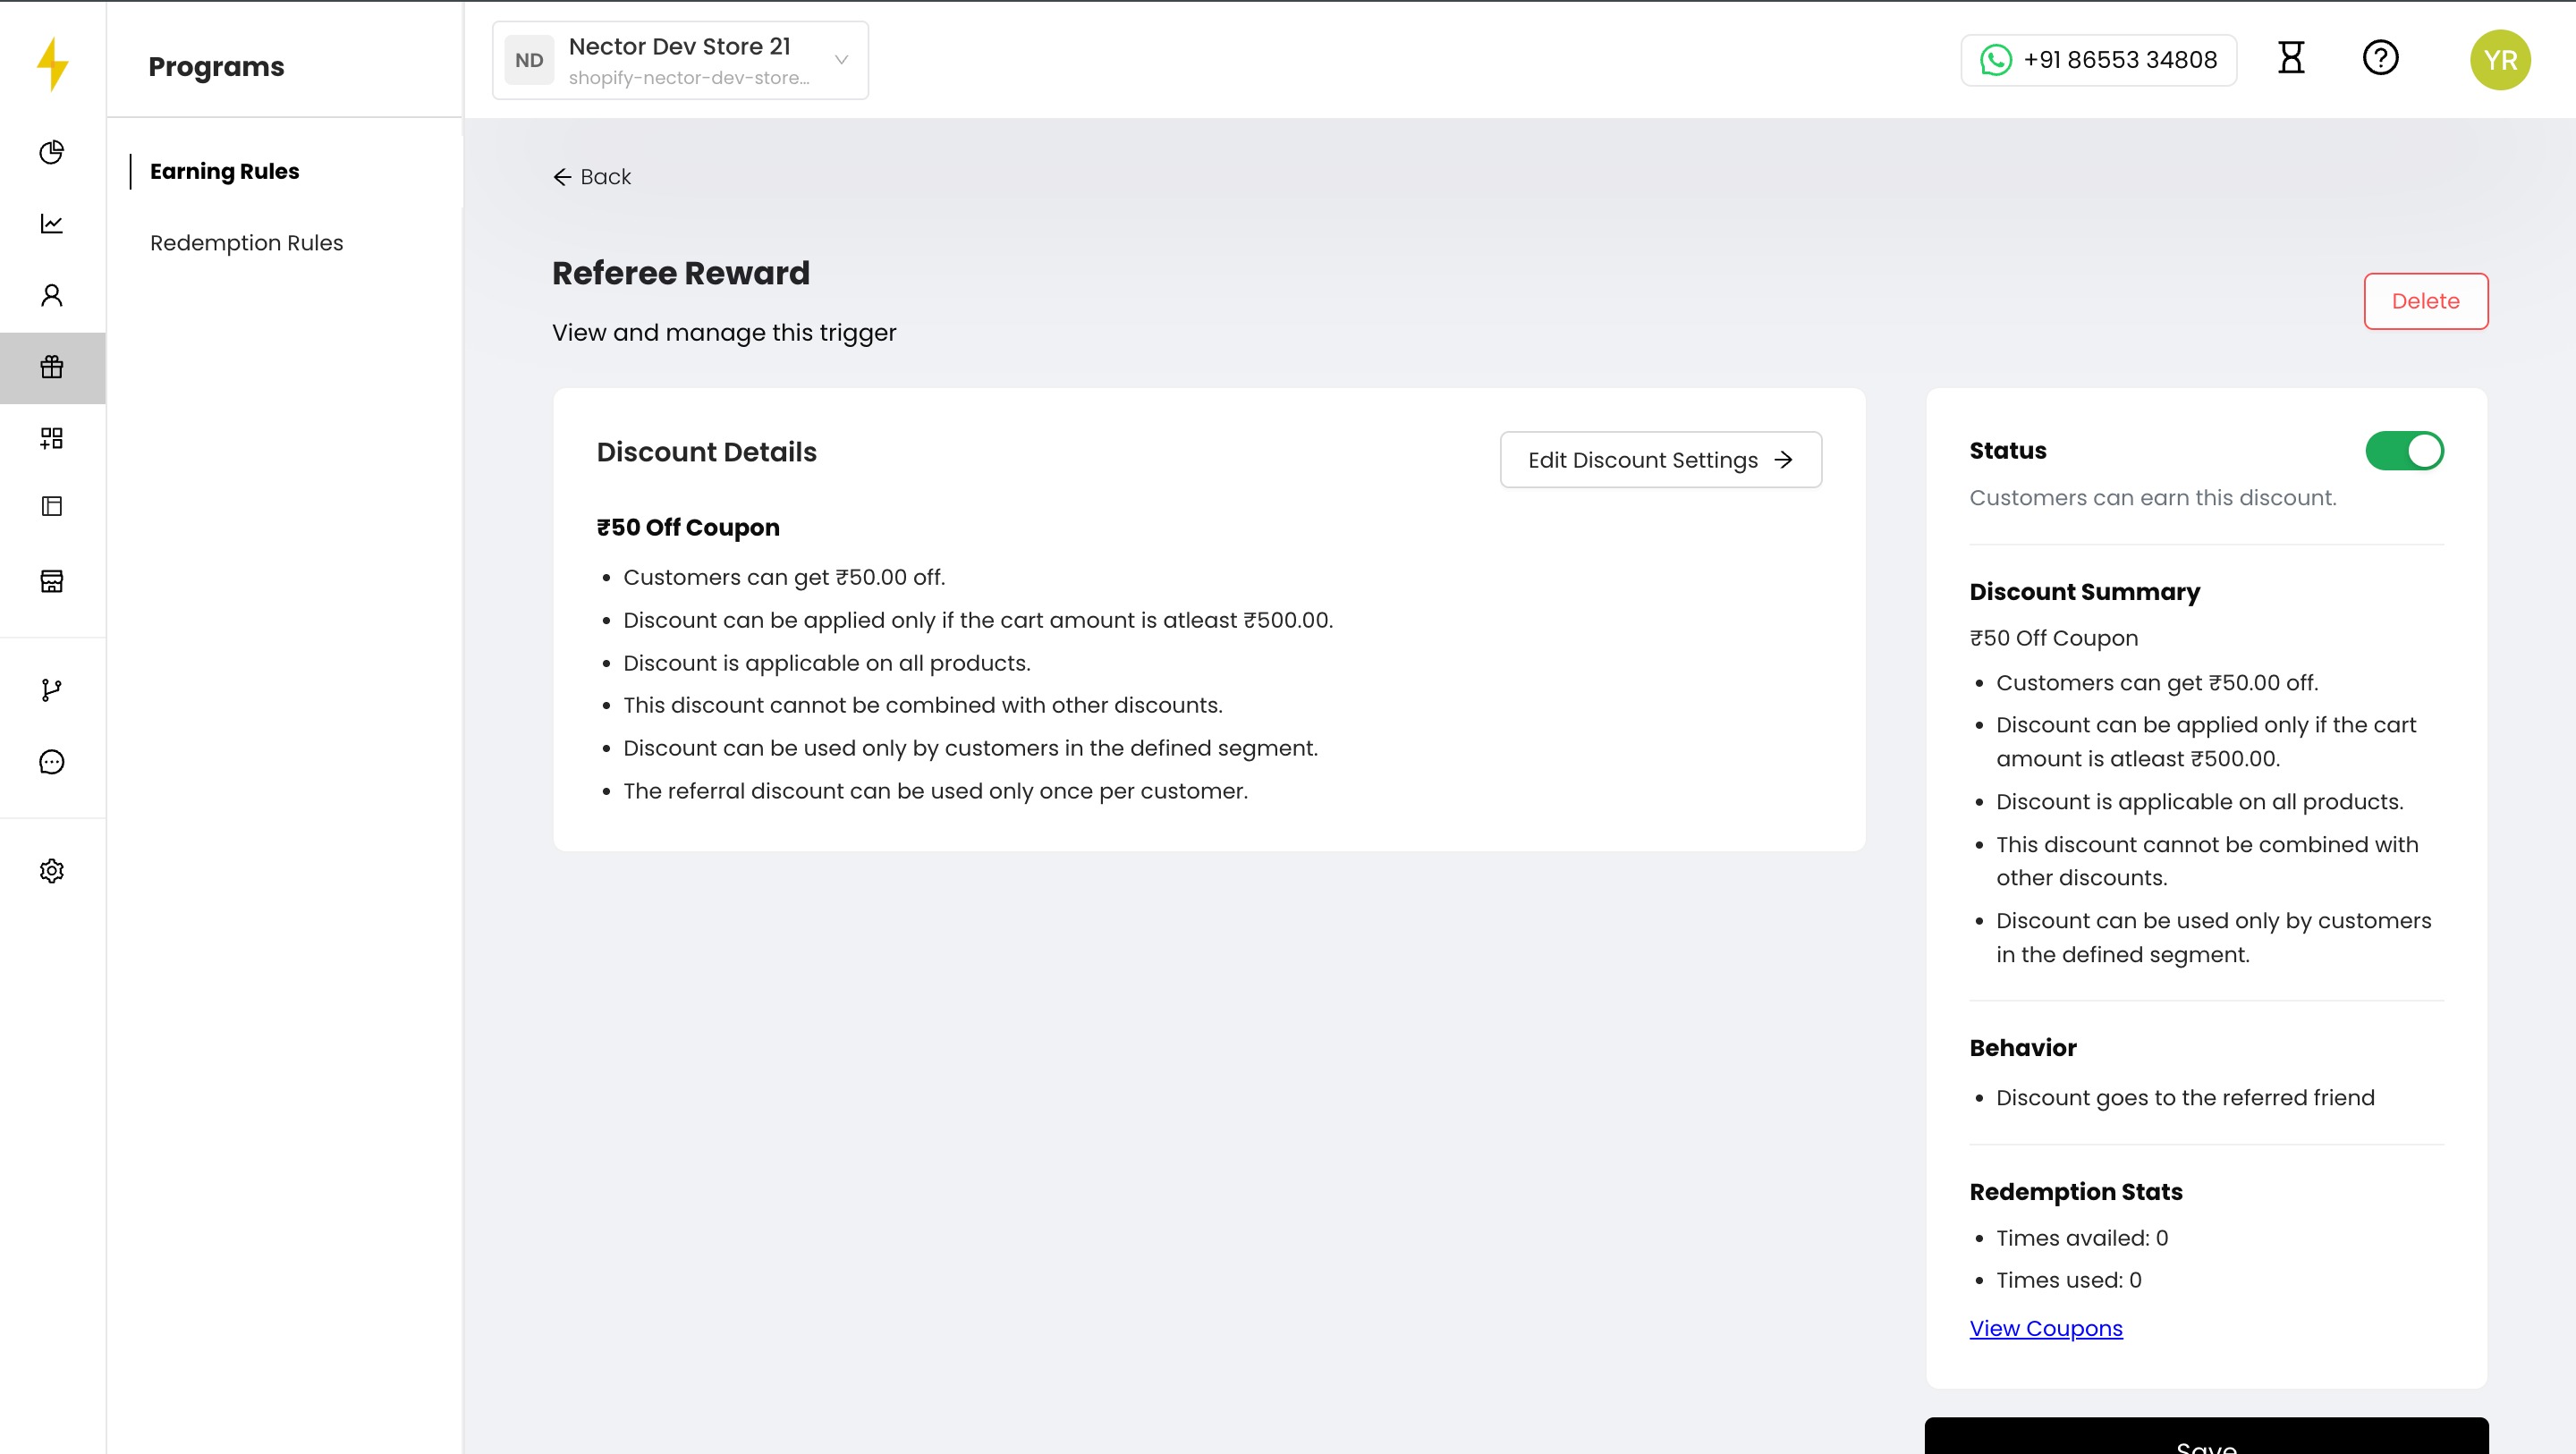
30. Click Friend’s Reward to open the Referee Reward page. It summarizes the discount, for example:
- ₹50 off with a minimum cart of ₹500
- usable once per customer
- not combinable with other discounts
The right panel shows Redemption Stats (times availed and used), and View Coupons lists the codes generated. To change the discount, click Edit Discount Settings →.
31. Set the discount amount and limits
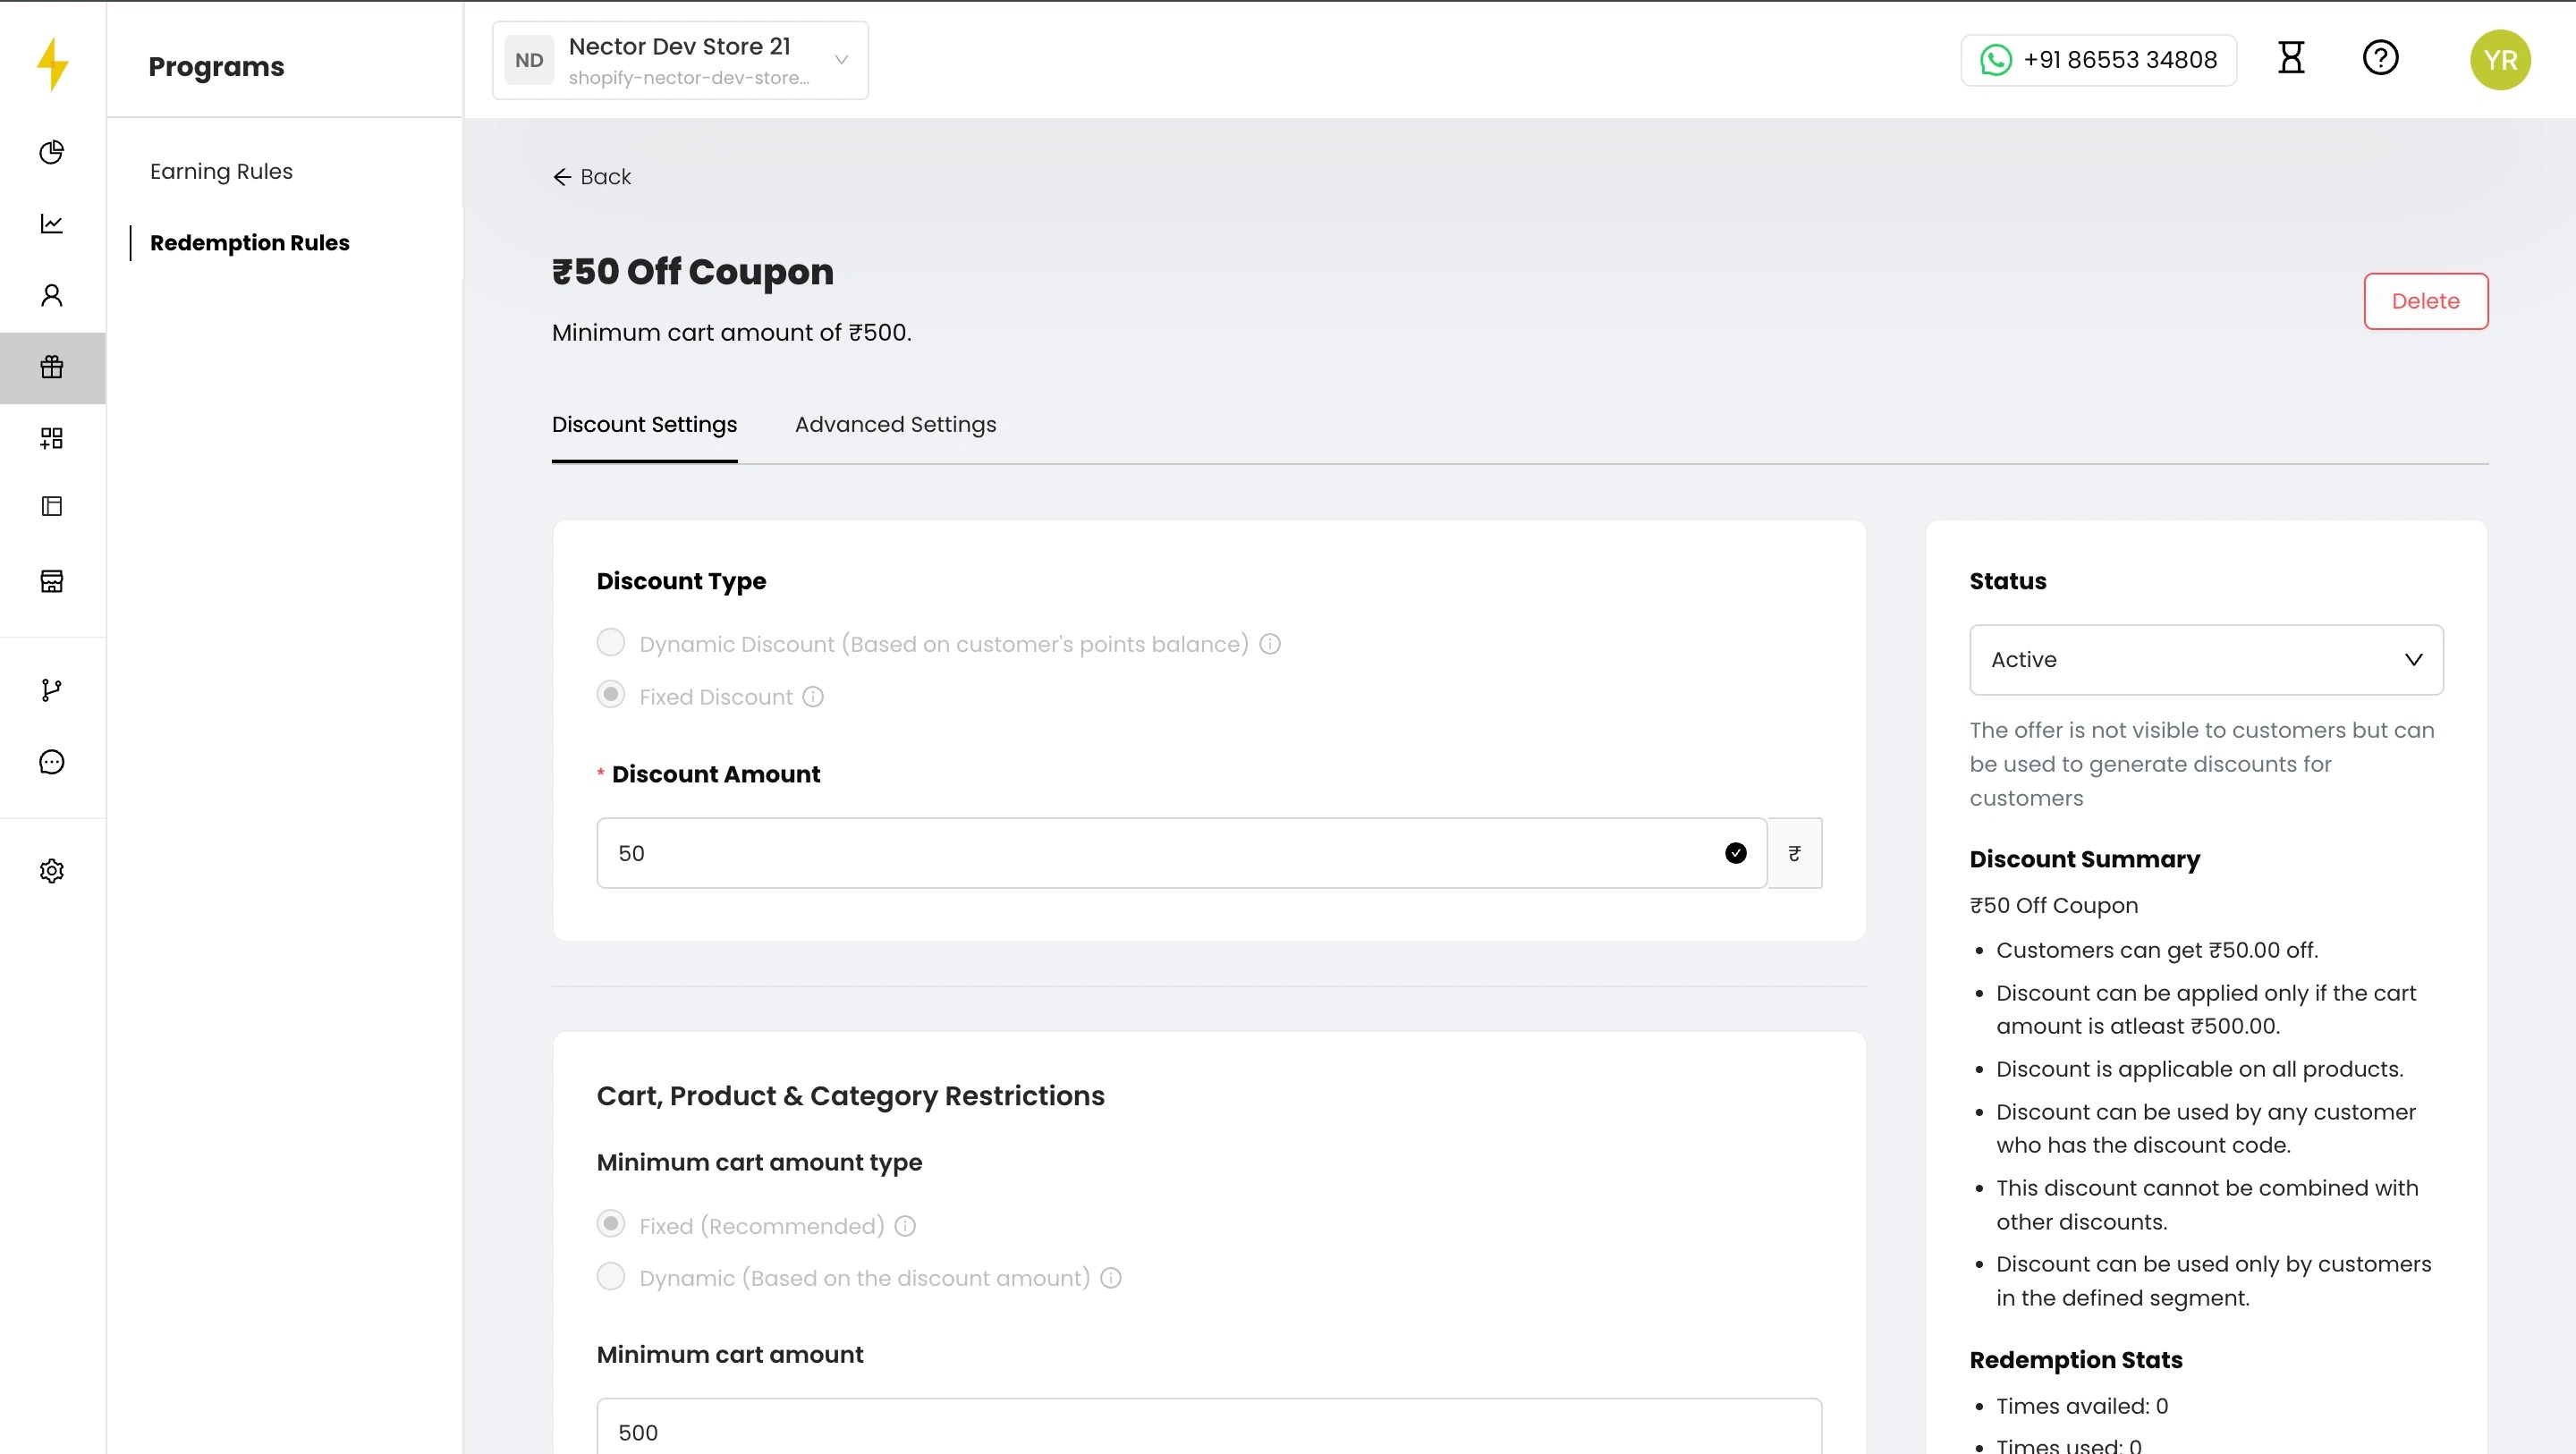
On the Discount Settings tab:
- Discount Amount (required): the discount value, for example ₹50.
- Minimum cart amount: the lowest cart value the code works on, for example ₹500.
- Allow the discount only on specific products or categories (optional): choose Product or Category, then select up to 100 items.
- Keep Status set to Active. The offer isn’t shown to customers directly; it’s only used to generate referral discount codes.
- Click Save.
32. Allow combining with other discounts (optional)
On the Advanced Settings tab, under Discount Combinations, tick any that apply:
- Allow combination with other order discounts
- Allow combination with other product discounts
- Allow combination with other shipping discounts
Leave them all unticked to stop the referral code from stacking with other offers.
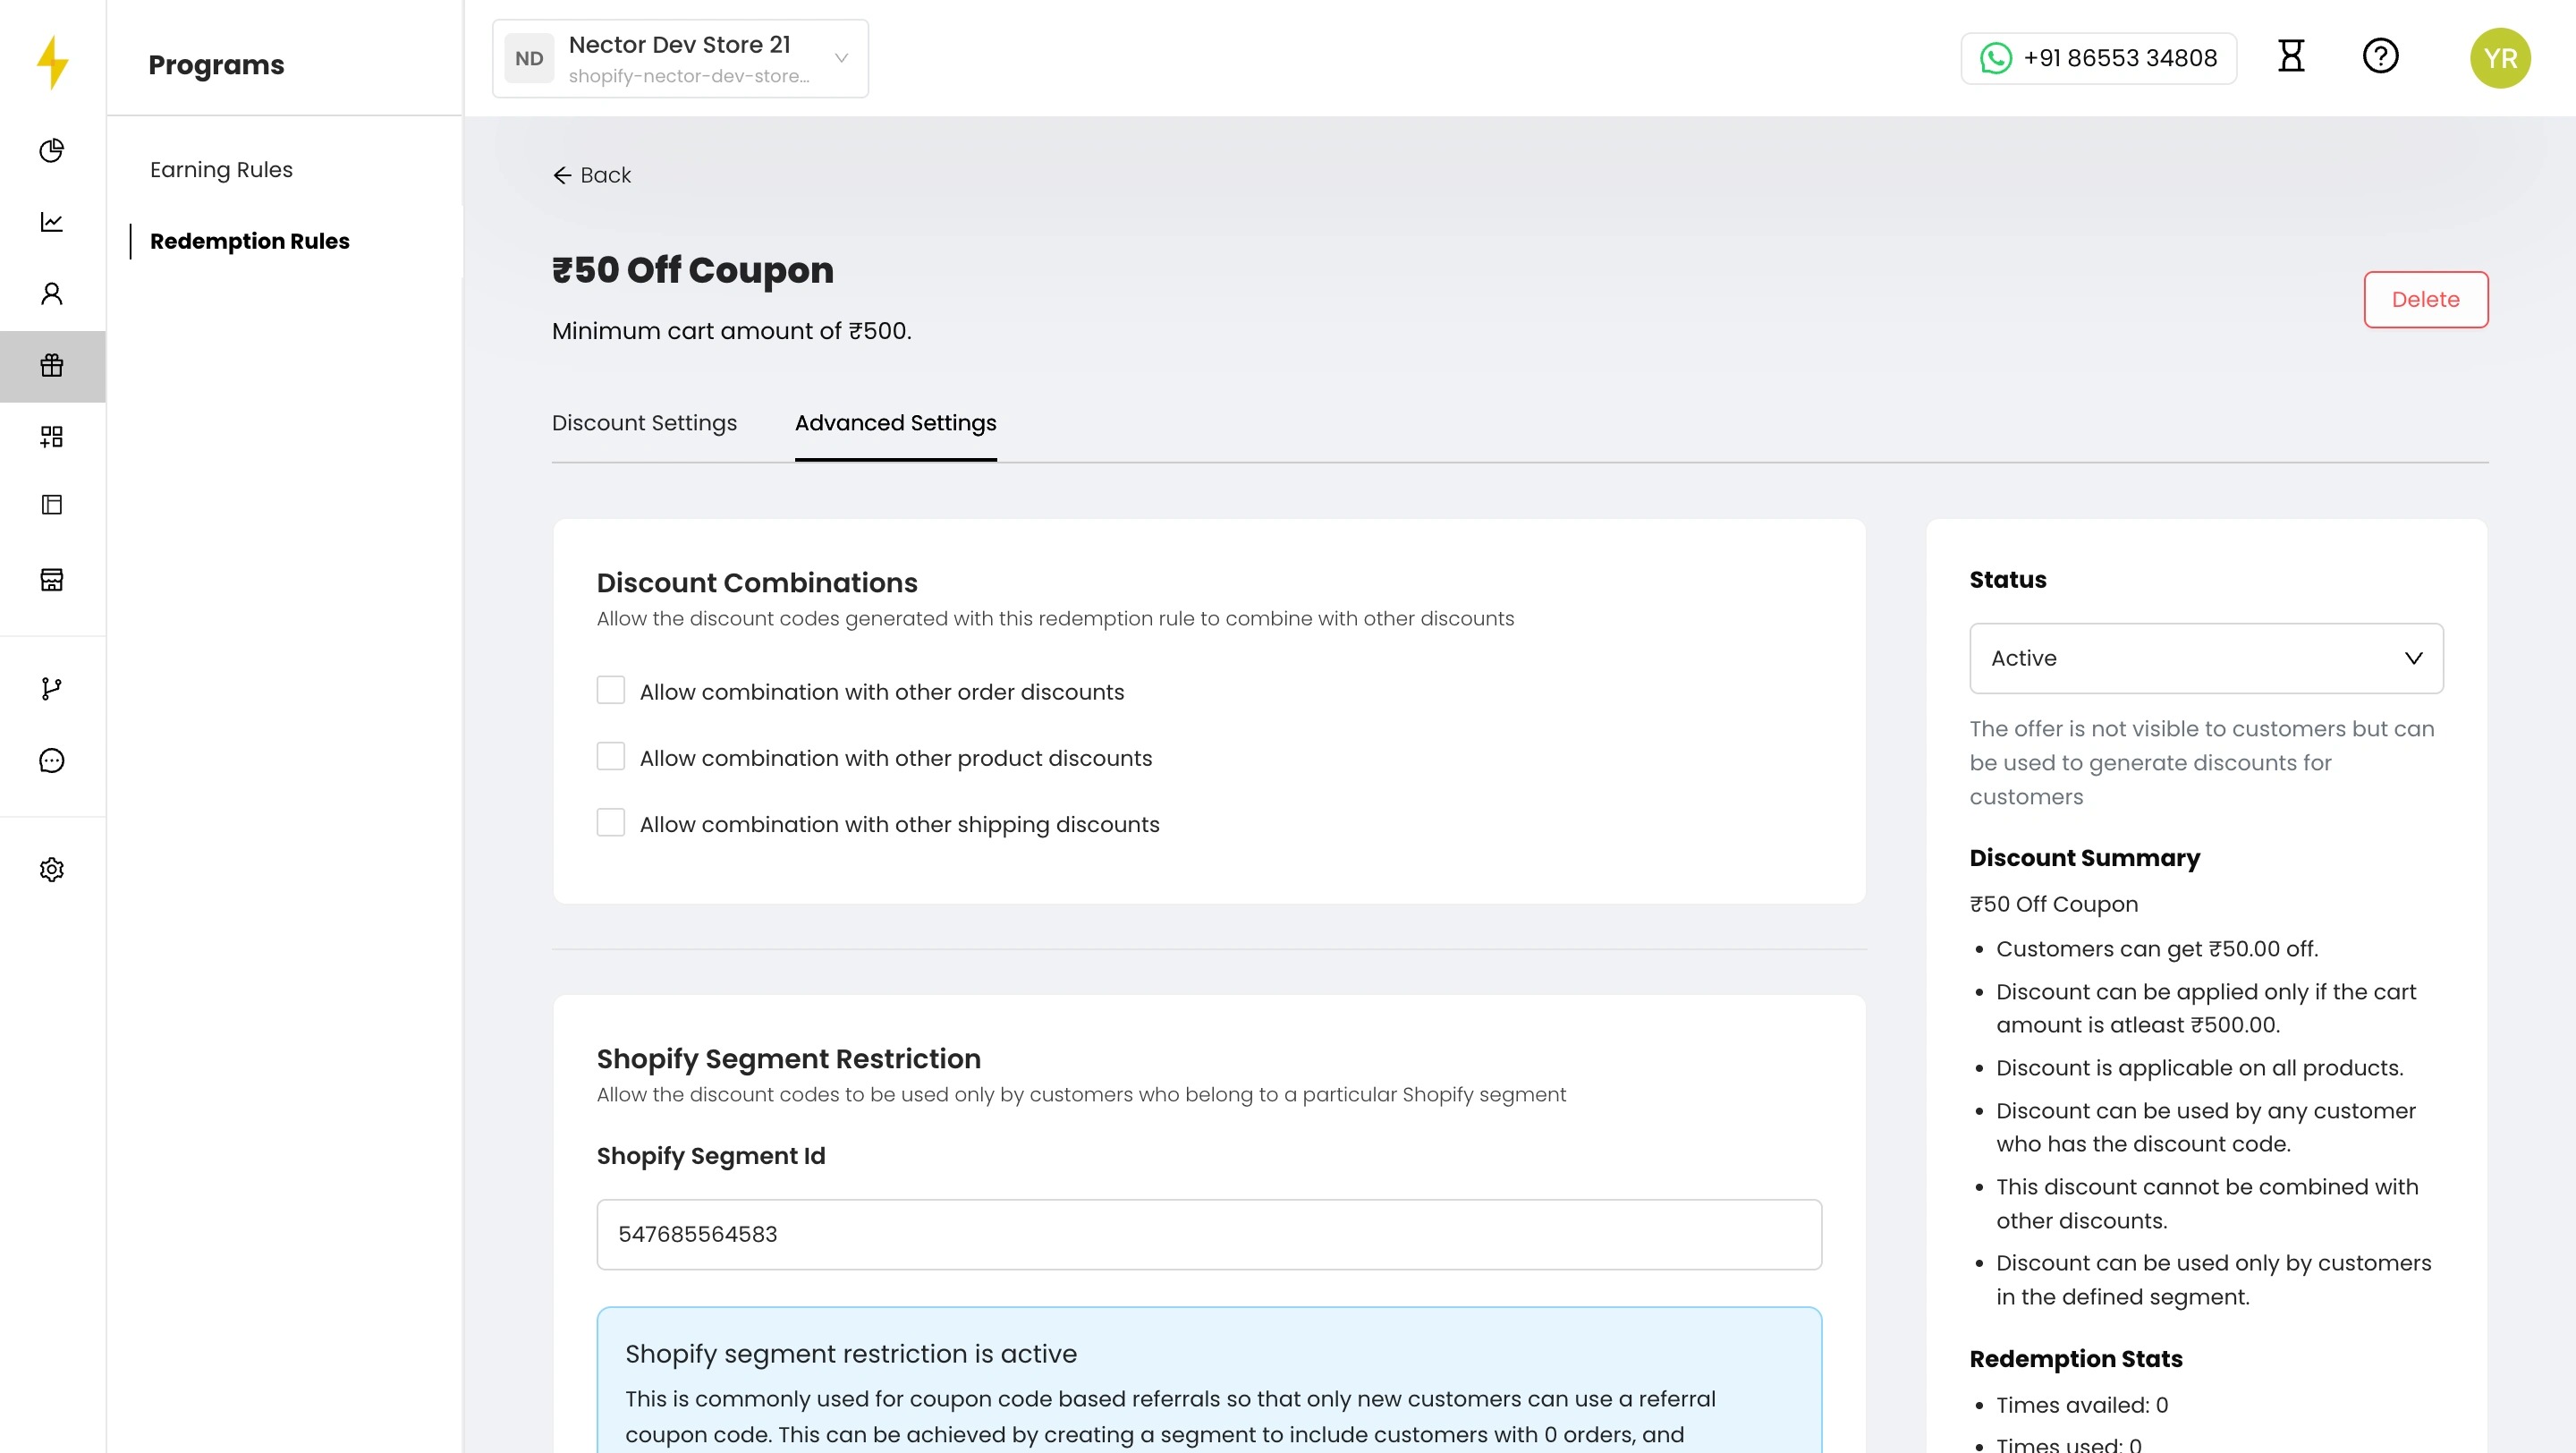
33. Limit the discount to new customers (recommended)
Under Shopify Segment Restriction, enter a Shopify Segment Id. Only customers in that Shopify segment can use the code.
To stop existing customers from using referral codes, first create a segment in Shopify for customers with 0 orders. Then paste its ID here and click Save.
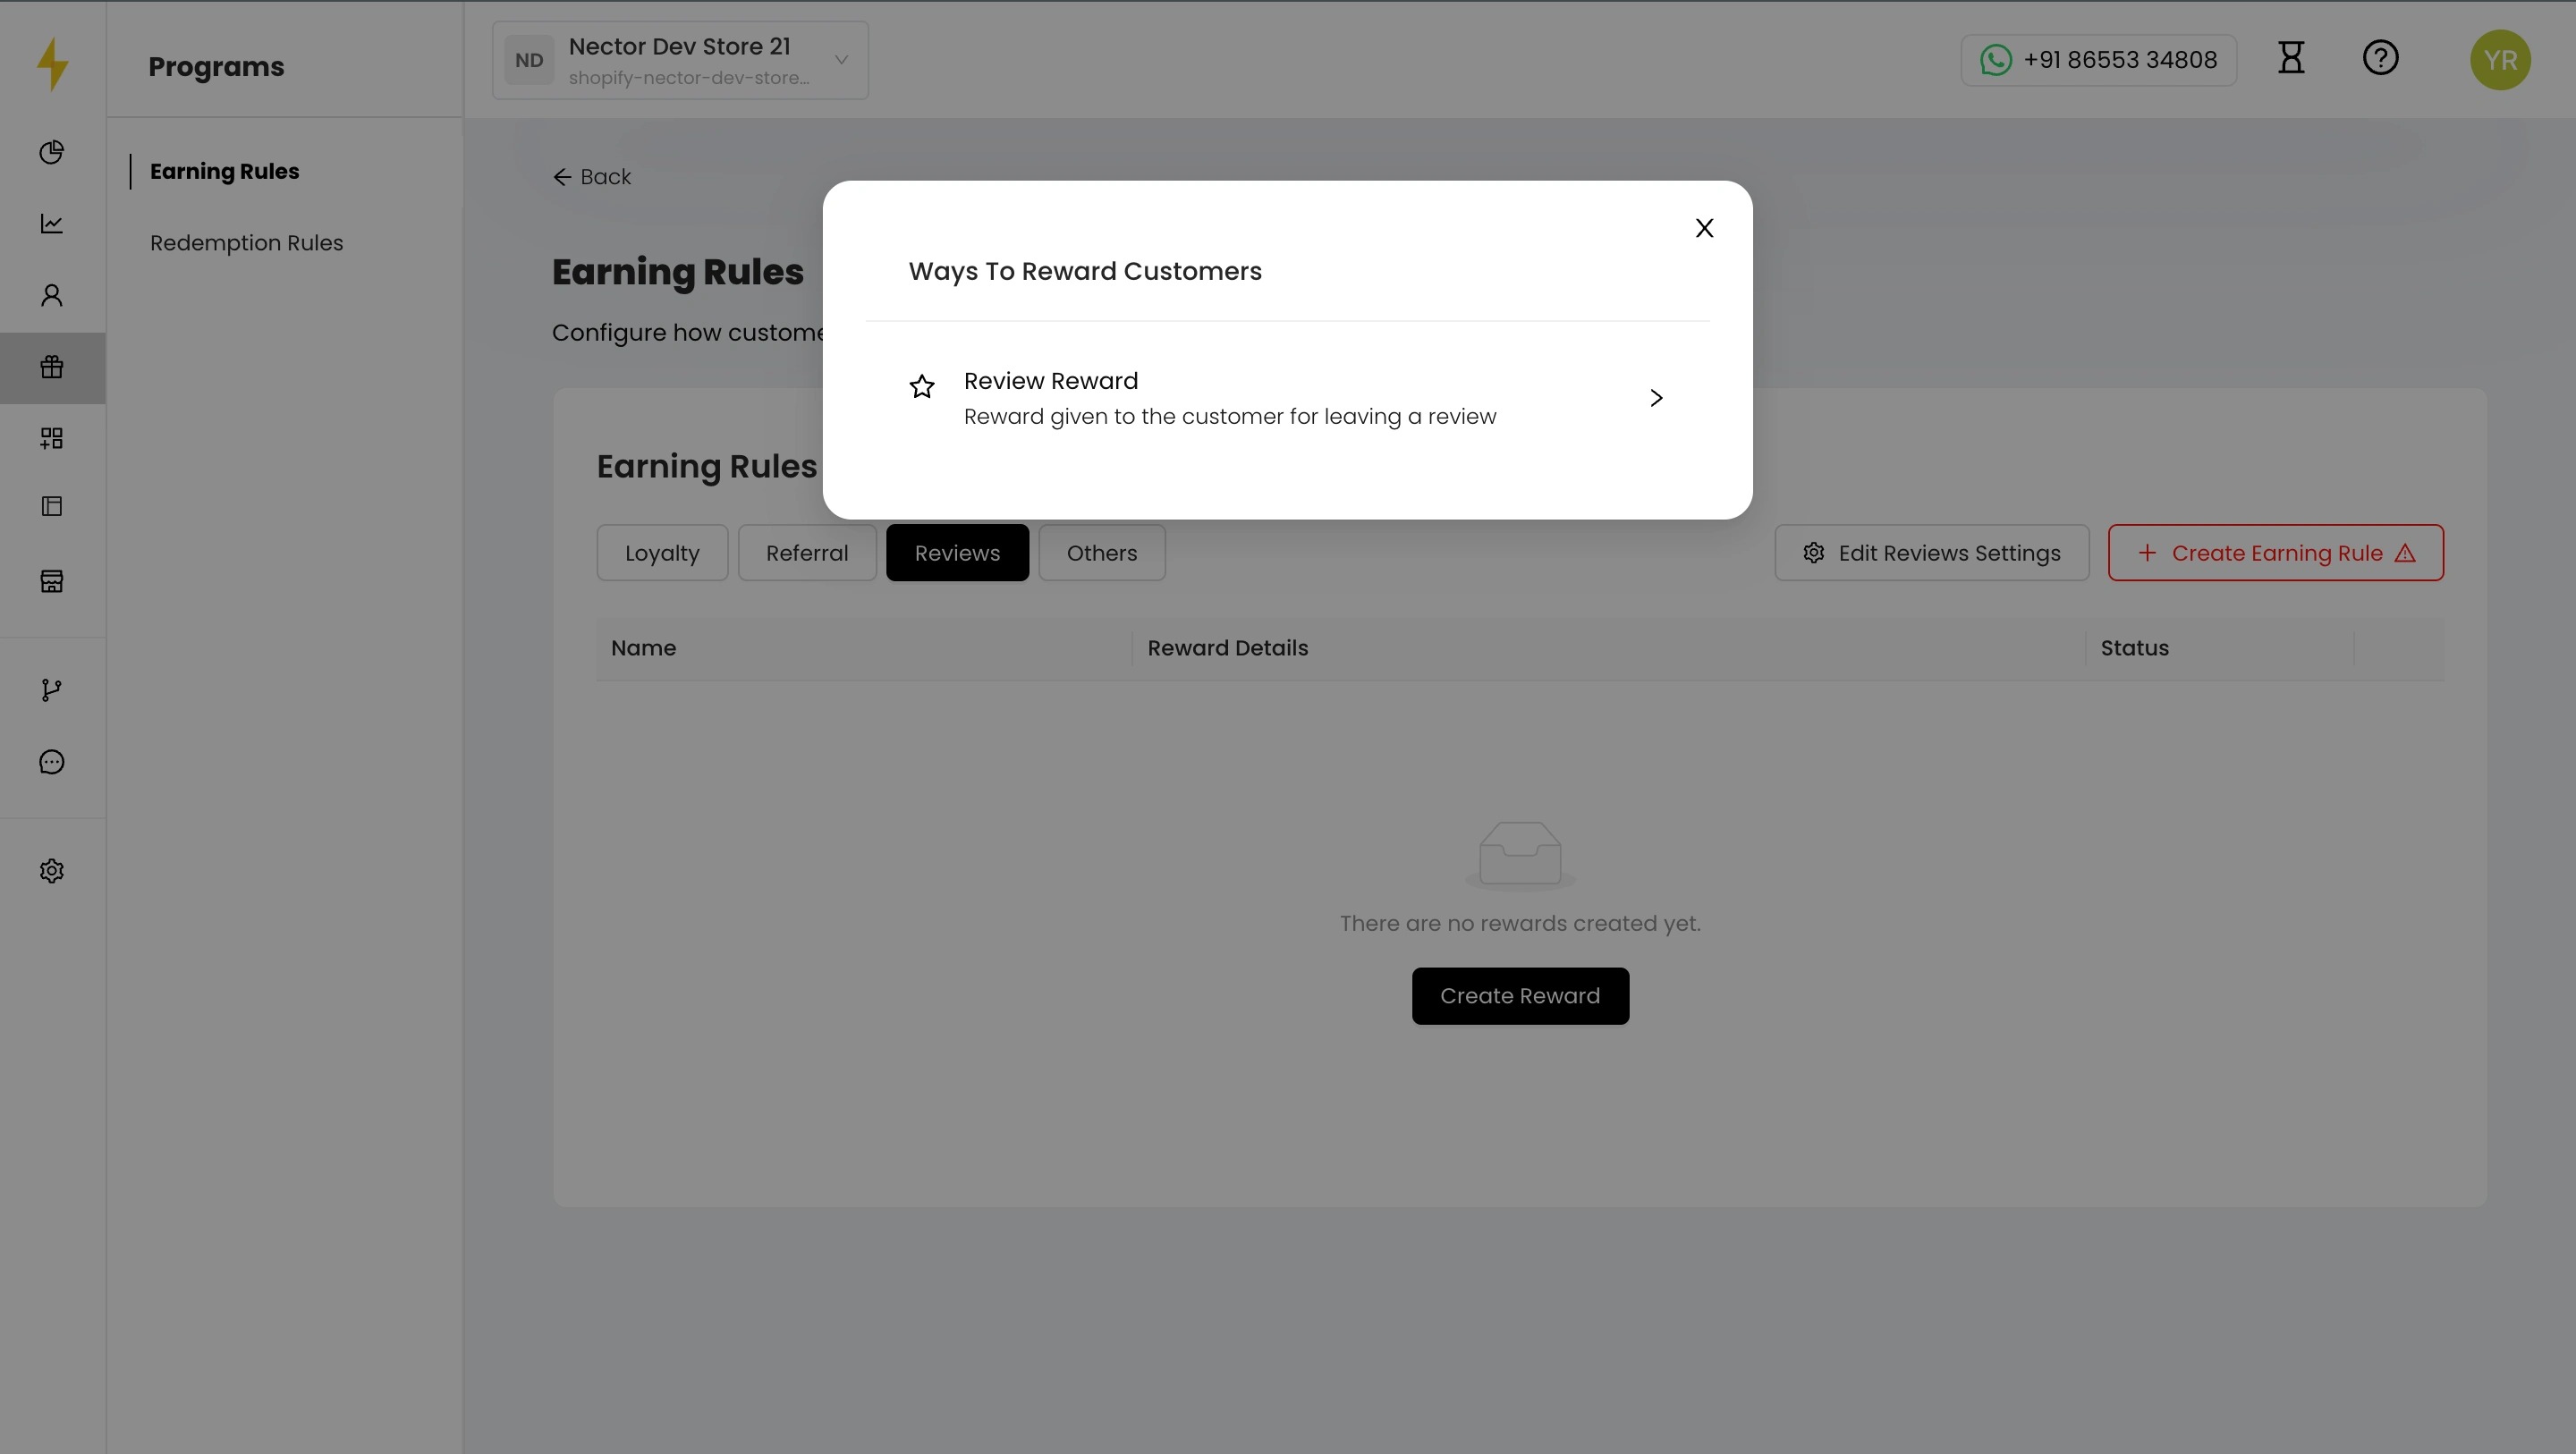
34. Create a review reward
- Choose Review Reward, the reward given when a customer leaves a review.
- Enter the points to reward, for example 100, and click Create.
A ⚠ icon on + Create Earning Rule means no review reward is set up yet.
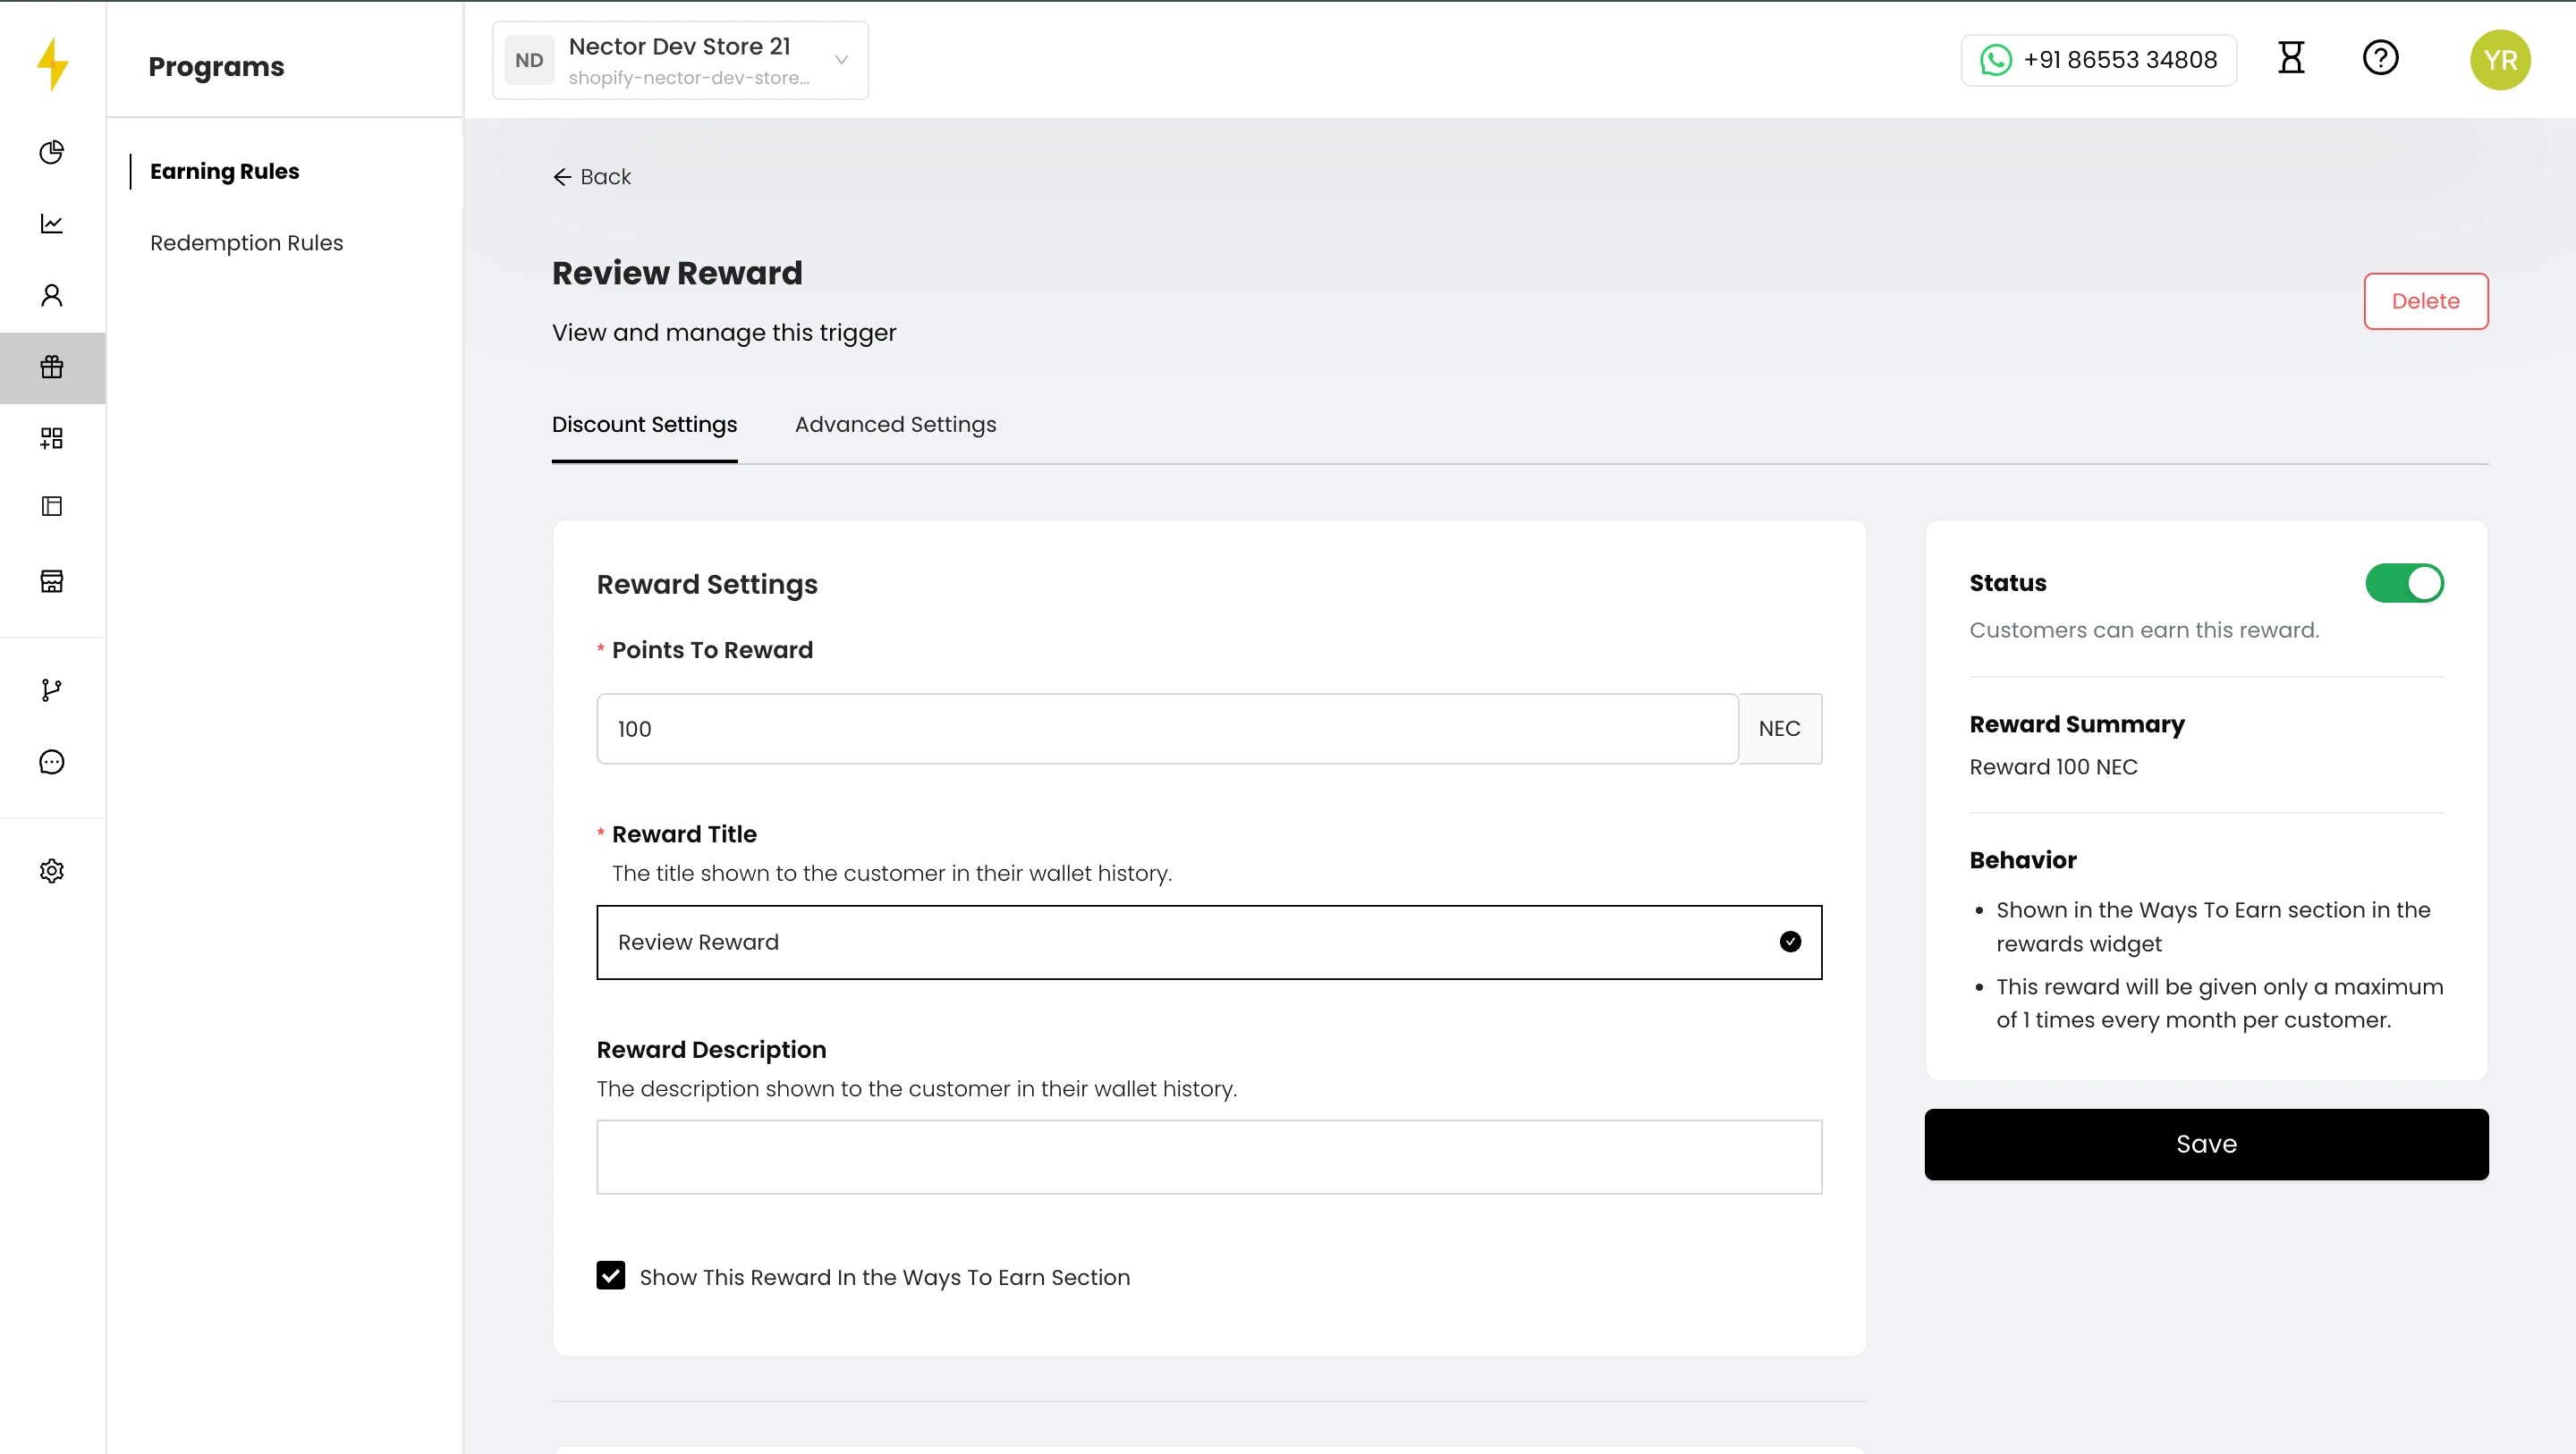
35. Edit the reward details
Click the rule to open the Review Reward page. On the Discount Settings tab:
- Points To Reward (required): points earned per review, for example 100.
- Reward Title (required): the name shown in the customer’s wallet history, for example “Review Reward.”
- Reward Description (optional): a short note shown in their wallet history.
- Tick Show This Reward In the Ways To Earn Section so customers can see it in the rewards widget.
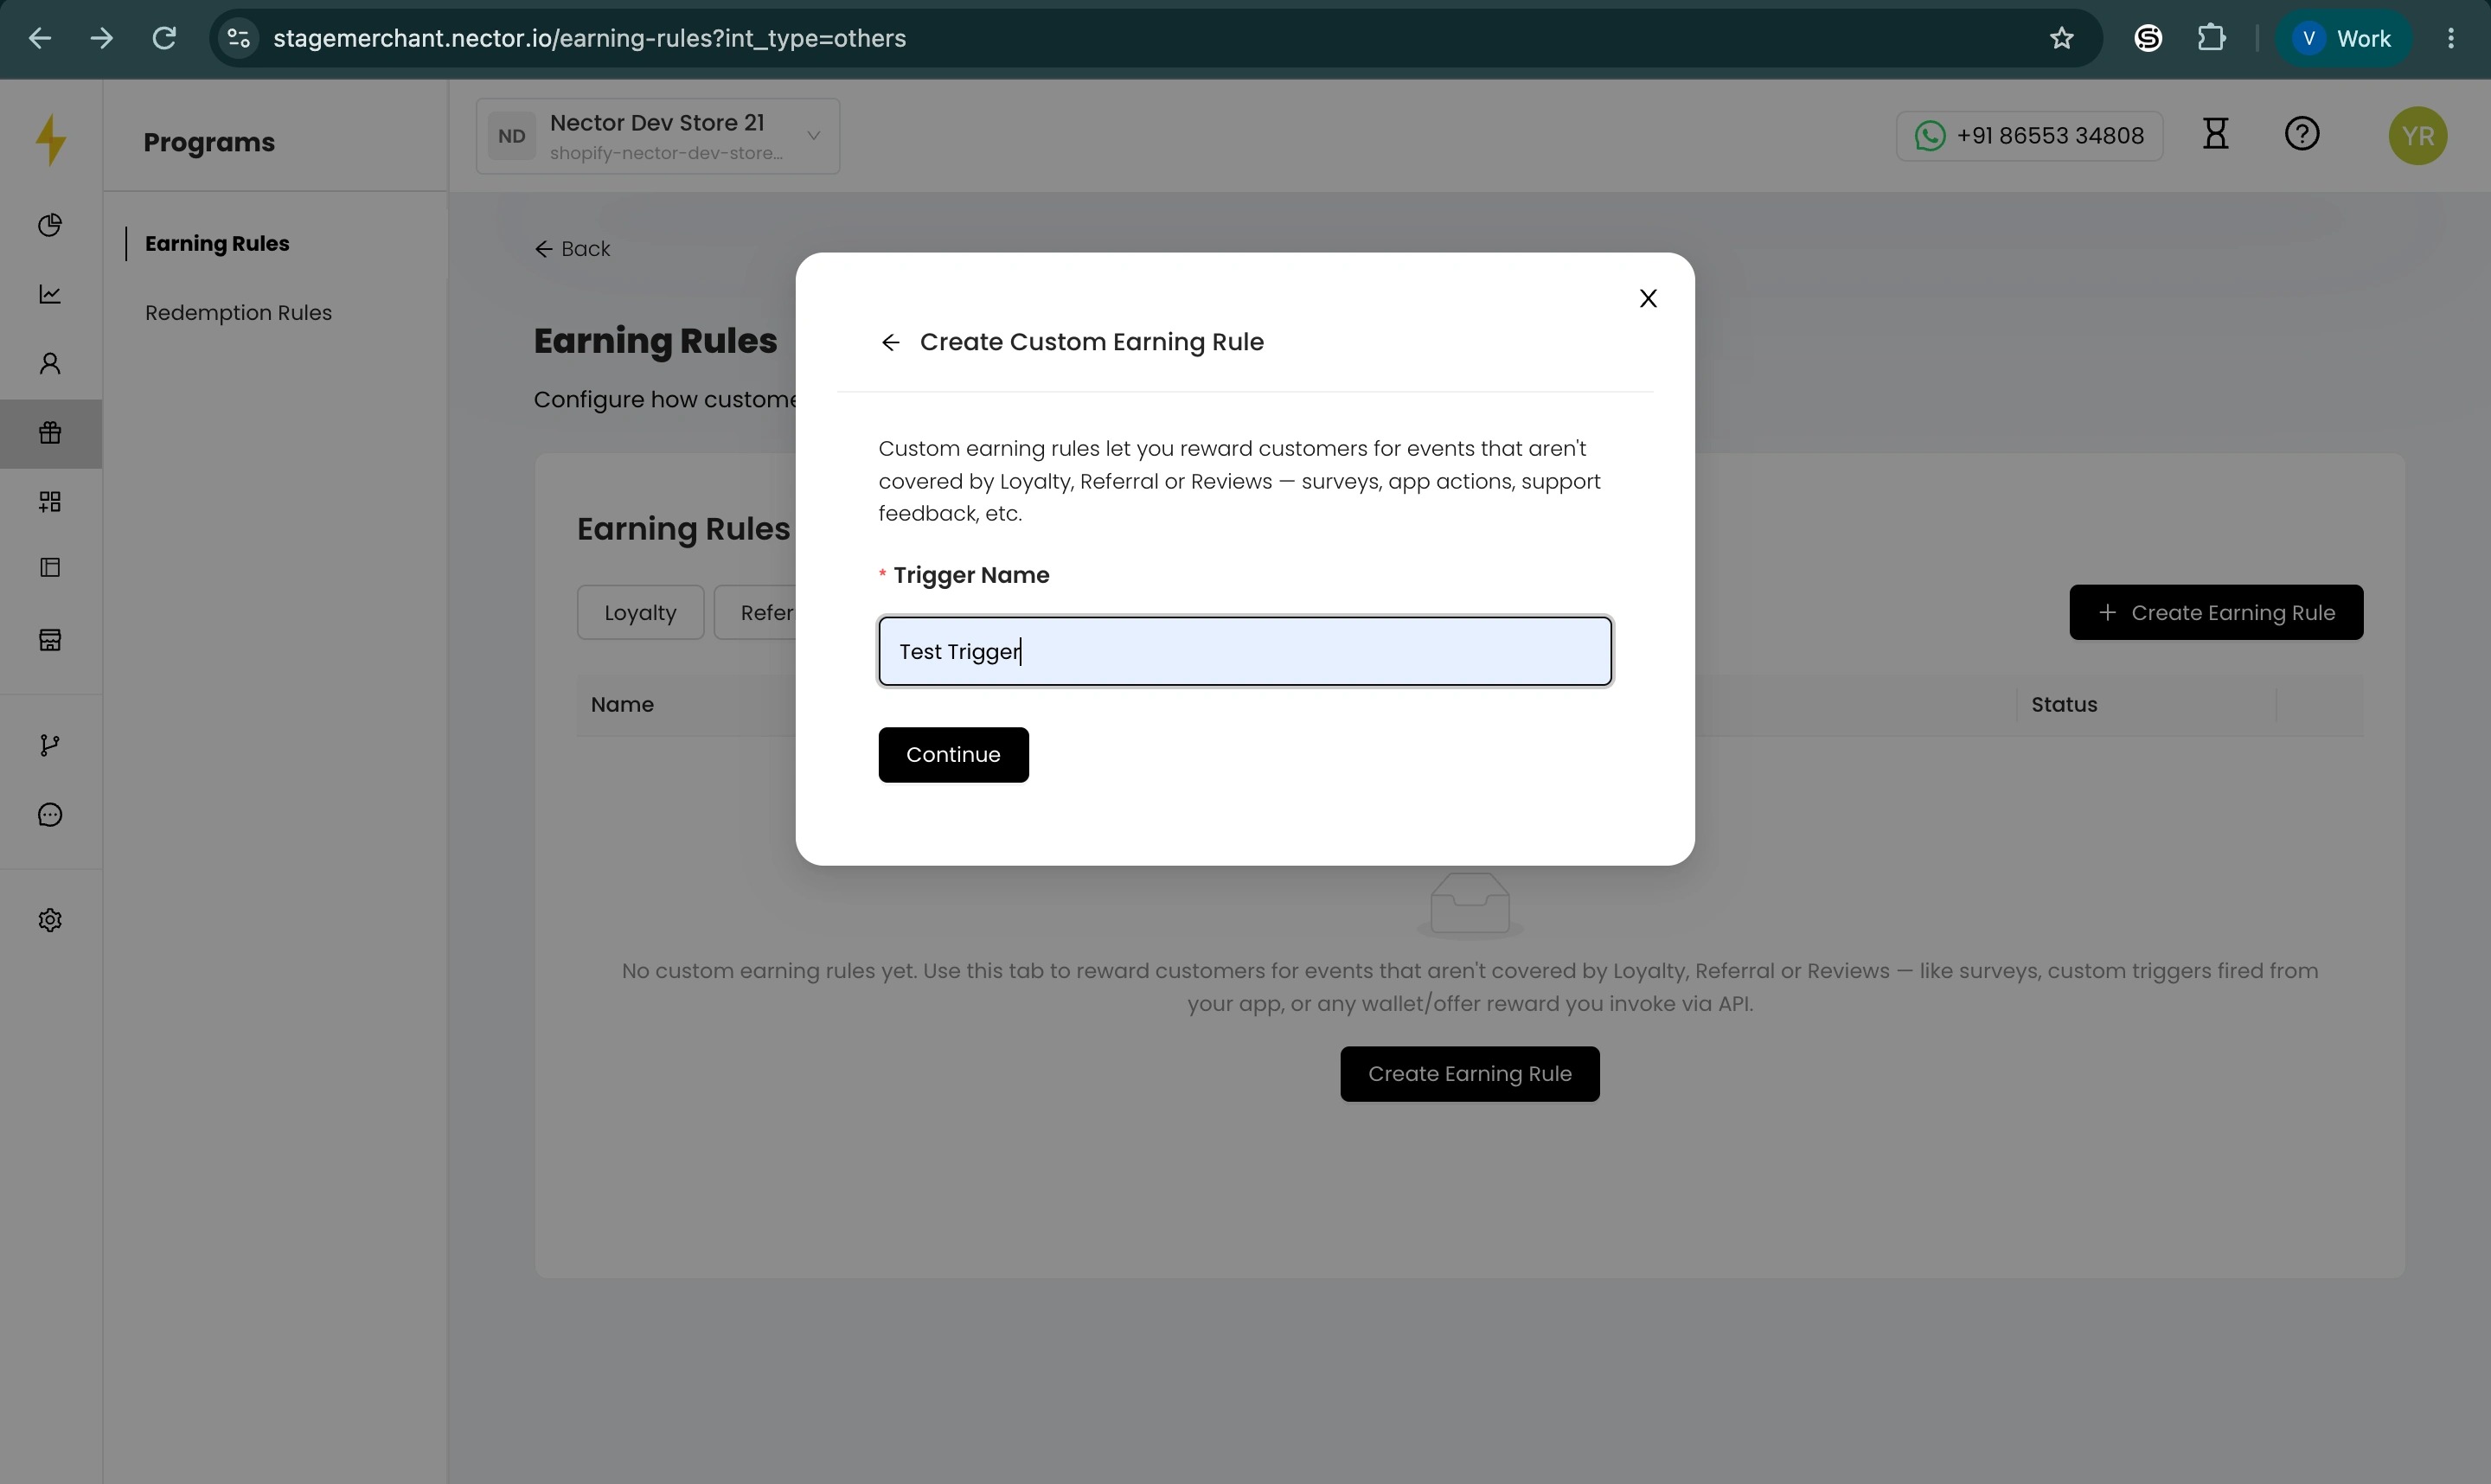
36. Create a custom earning rule
Use custom rules to reward actions that Loyalty, Referral and Reviews don’t cover, such as completing a survey, doing something in your app, or giving support feedback.
- Click the Others tab, then + Create Earning Rule.
- In Trigger Name (required), enter a name for the action, for example “Survey Completion Reward.”
- Click Continue and finish creating the reward.
37. Set the reward details
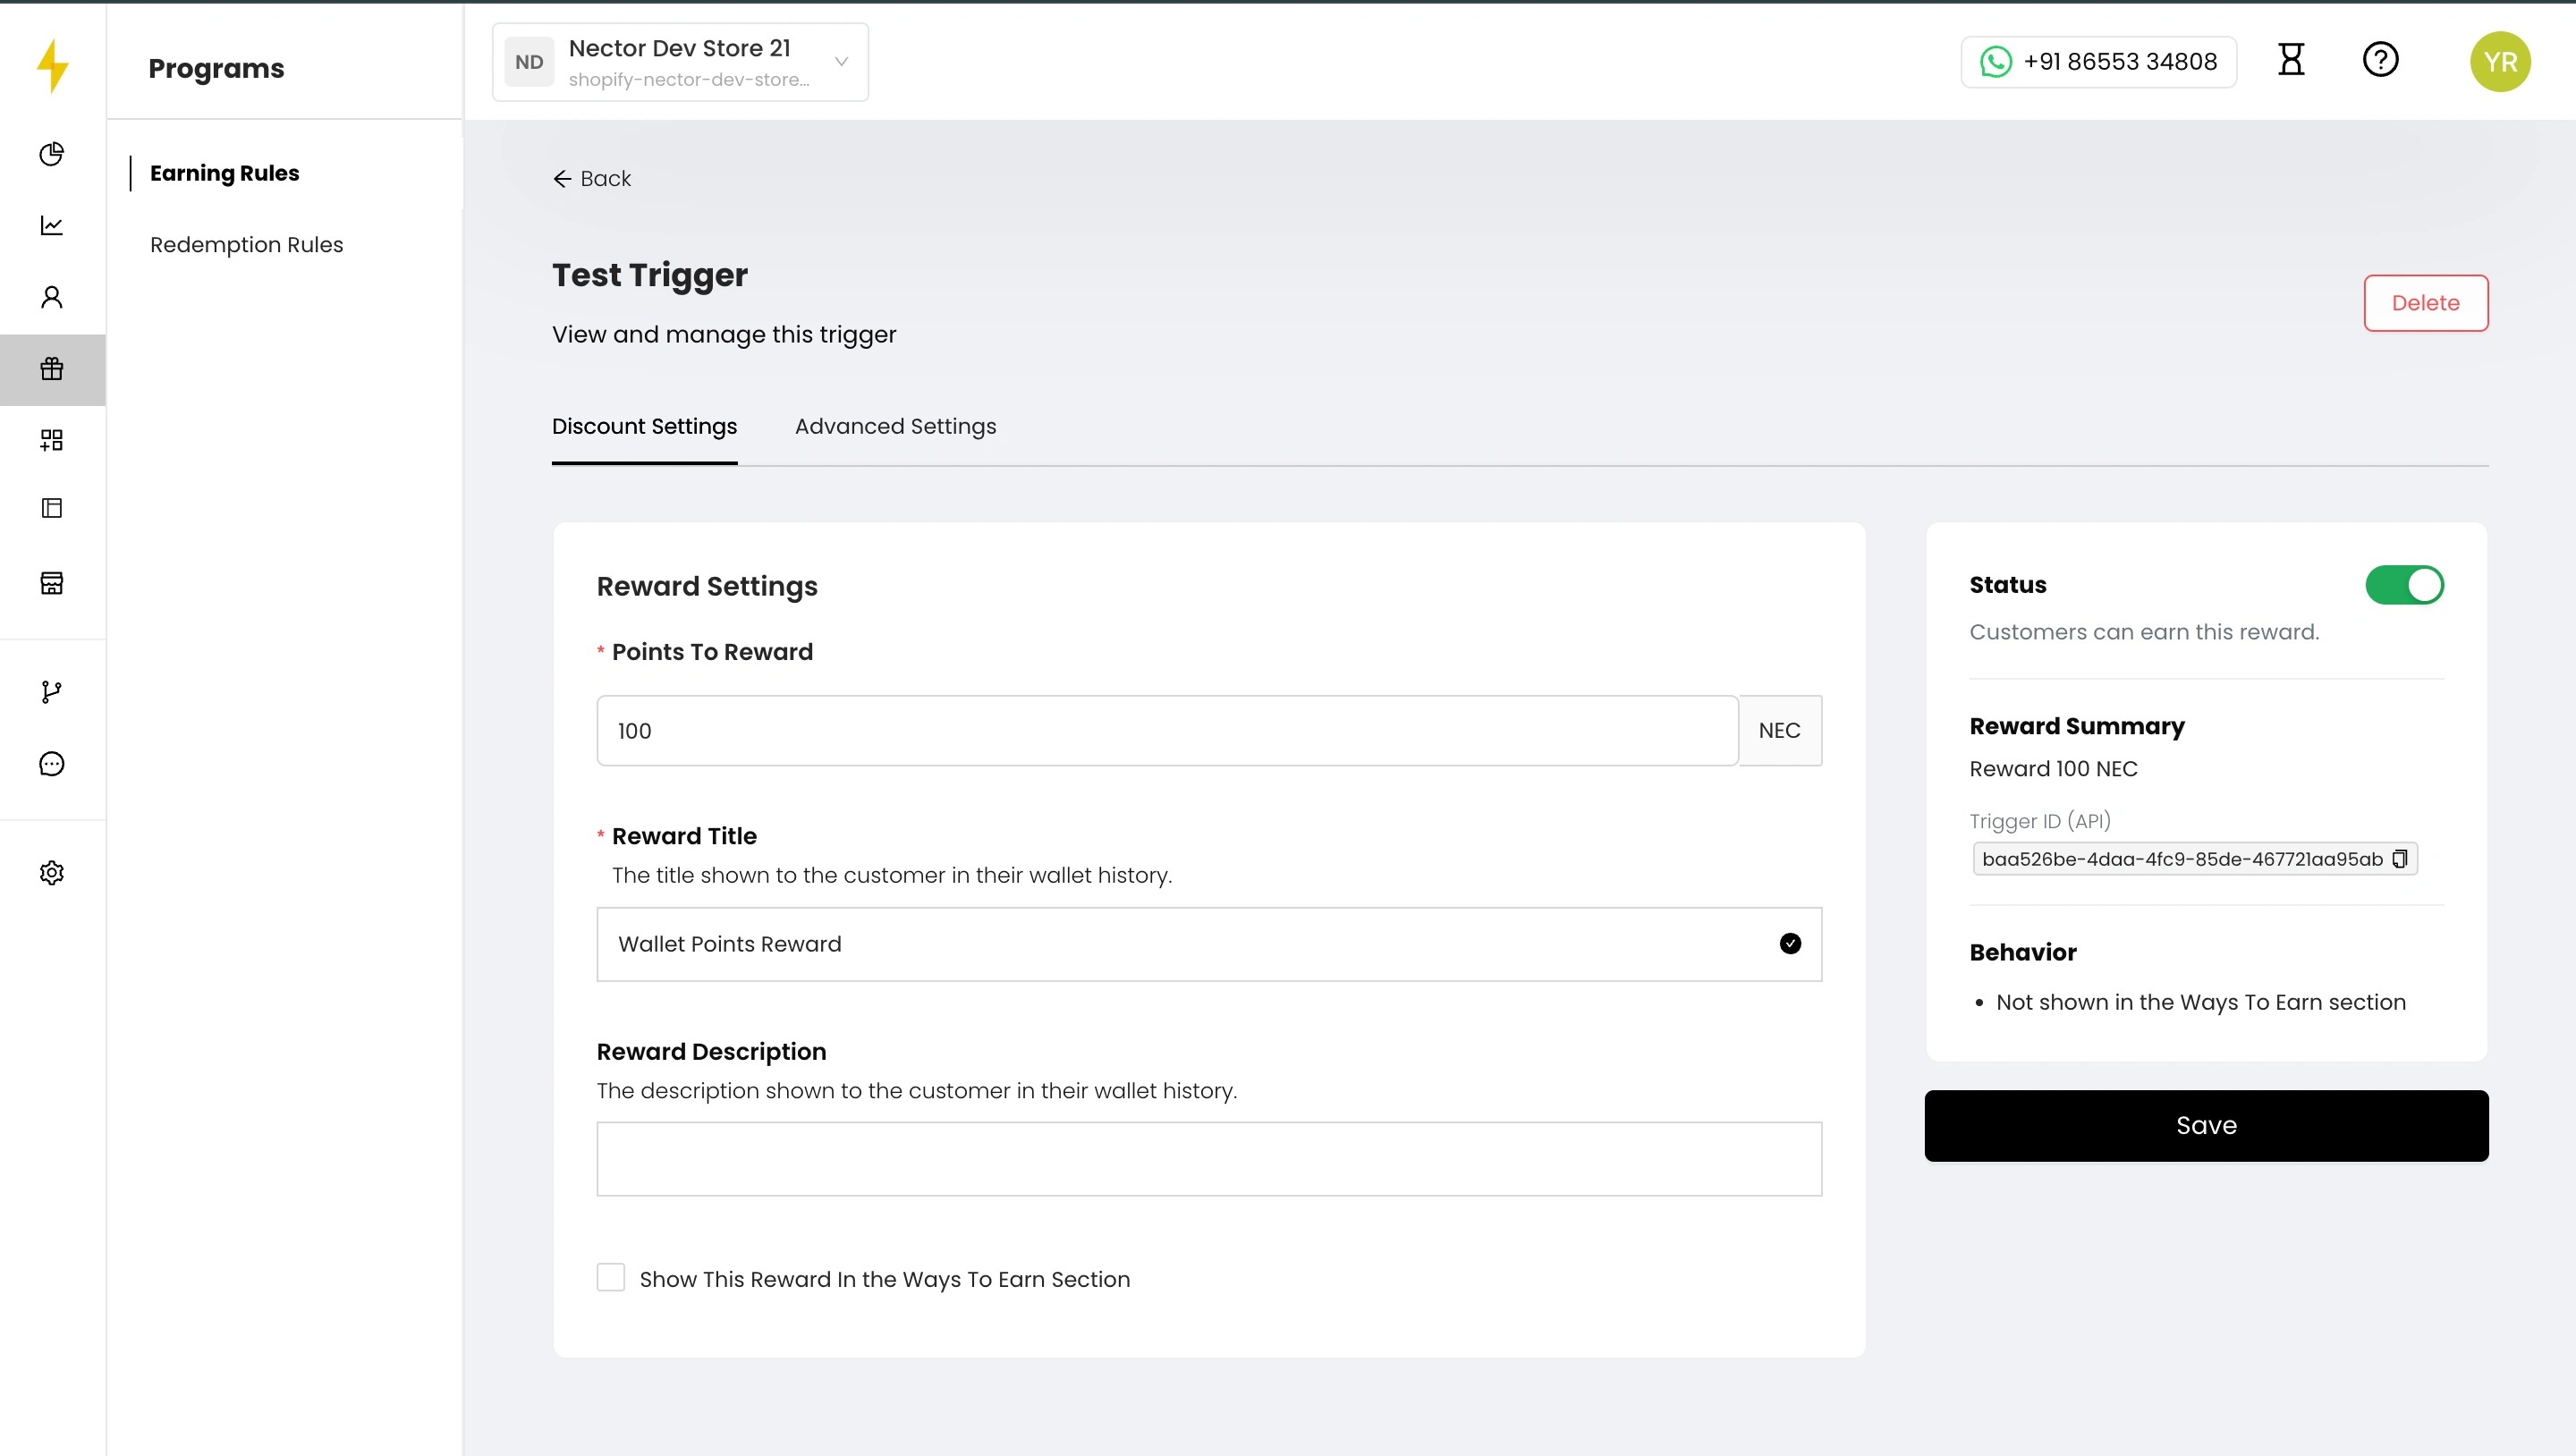
Click the rule to open its page. On the Discount Settings tab:
- Points To Reward (required): points earned for the action, for example 100.
- Reward Title (required): the name shown in the customer’s wallet history.
- Reward Description (optional): a short note shown in their wallet history.
- Show This Reward In the Ways To Earn Section: this is off by default for custom rules. Tick it only if you want customers to see this reward in the widget.
- Click Save.
38. Connect the trigger to your system
Custom rules don’t fire on their own. Your app, survey tool or other system has to tell Nector when the customer completes the action. In the right panel, copy the Trigger ID (API) and give it to your developer. They use this ID in Nector’s API to award the points.
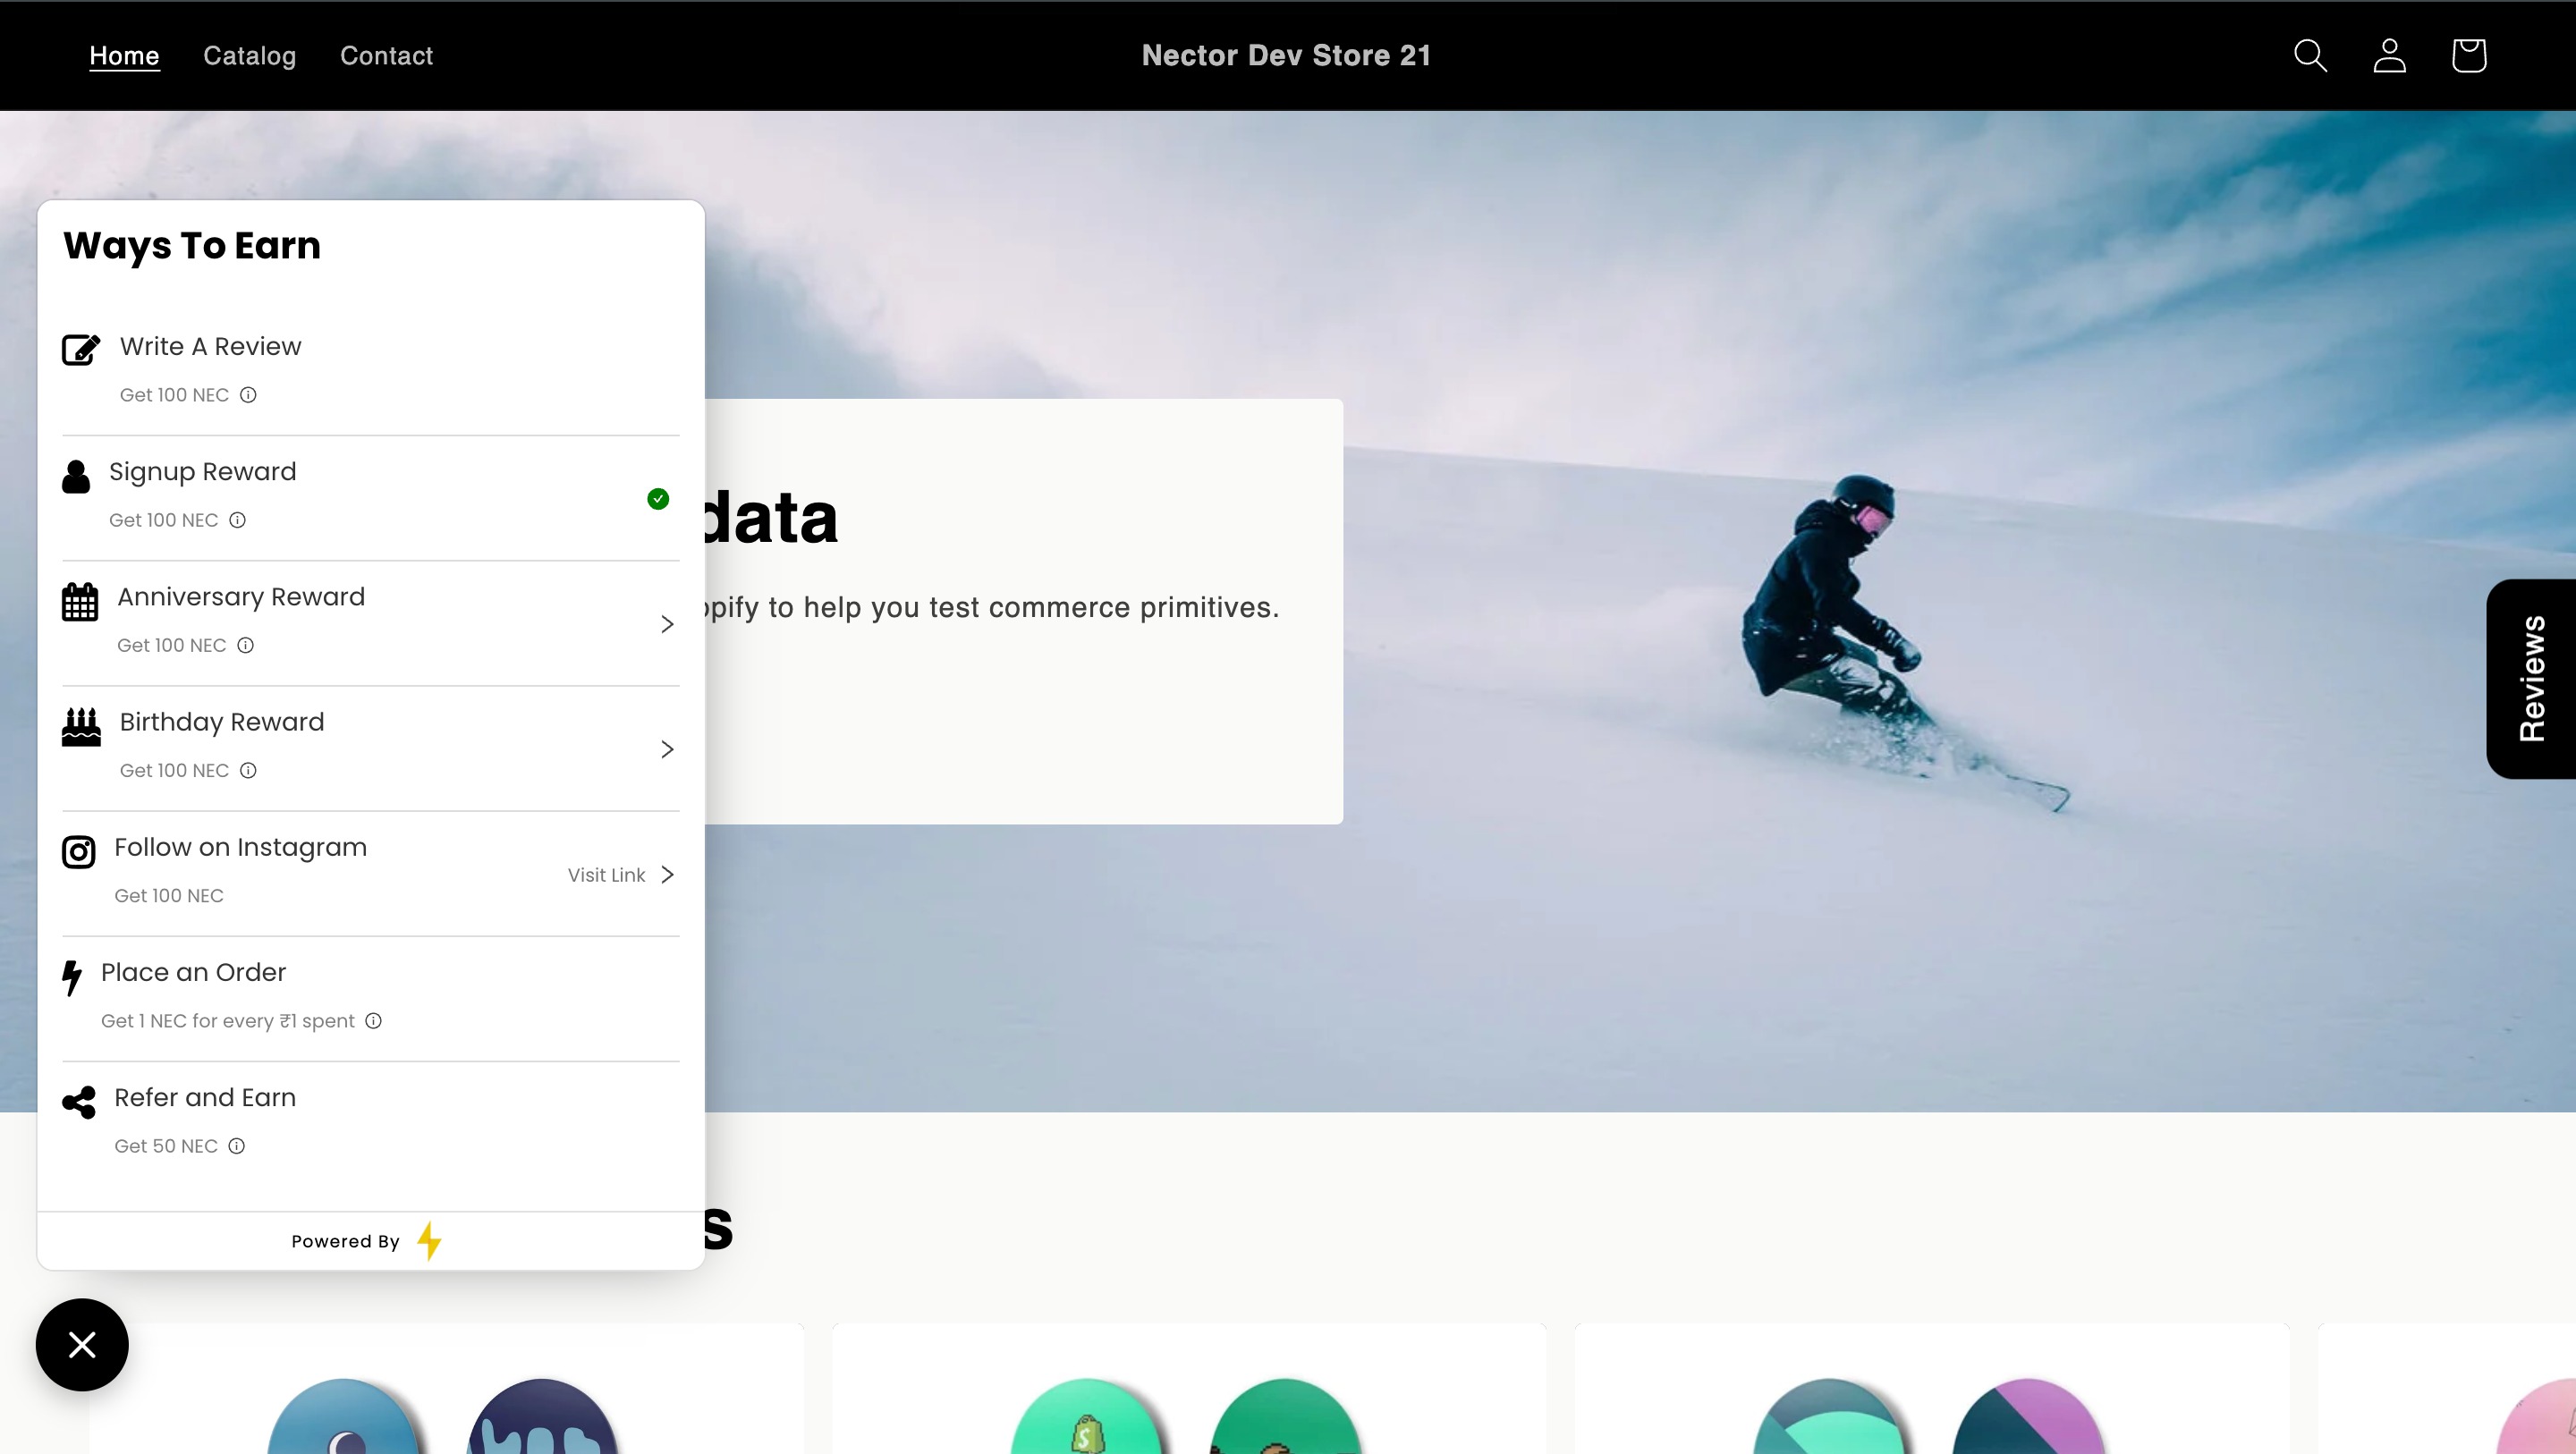
39. Open your store and click the rewards widget (the button in the bottom-left corner). The Ways To Earn section lists every reward that has Show This Reward In the Ways To Earn Section ticked.
Each reward shows:
- Icon and title: set in Content Settings, for example “Write A Review” with a pencil icon.
- Description: set in Content Settings, with variables filled in. For example, “Get {coin_amount} {coin_name}” shows as “Get 100 NEC,” and the Order reward shows “Get 1 NEC for every ₹1 spent.”
- Order: set by the Position field.
What customers can do:
- A green tick means they’ve already earned that reward, like Signup here.
- An arrow (>) on Birthday and Anniversary opens a screen where they can add their date.
- Visit Link on social rewards takes them to your profile, for example Instagram.
Custom (Others) rewards don’t appear here unless you tick “Show in Ways to Earn.”
Updated on: 03/11/2026
Thank you!